HomeGuidesElden Ring
Thiollier questline guide - Elden Ring DLCA full walkthrough of Thiollier’s questline in Shadow of the Erdtree
A full walkthrough of Thiollier’s questline in Shadow of the Erdtree
Image credit:Rock Paper Shotgun/Bandai Namco
Image credit:Rock Paper Shotgun/Bandai Namco
How do you complete Thiollier’s questline in Elden Ring: Shadow Of The Erdtree?The mild-mannered poisioner Thiollier is a major NPC character in theShadow Of The ErdtreeDLC, and his questline, which revolves around his devotion to St. Trina, is one of the most intriguing inElden Ring.
Thiollier’s questline runs parallel to the DLC’s main quest in the Lands of Shadow, and if you can make it to the very end, you’ll receive several excellent rewards after beating Shadow of the Erdtree’s final boss. In this guide, we’ll walk you through everything you need to know about Thiollier’s questline in Elden Ring: Shadow Of The Erdtree.
To see this content please enable targeting cookies.Manage cookie settings
To see this content please enable targeting cookies.Manage cookie settings
Thiollier questline steps
Here is a quick summary of all the steps to complete the Thiollier questline in the Elden Ring DLC. You can click on each step to be taken to the relevant section in our full walkthrough below:
Now let’s explain these steps in greater detail for those who aren’t sure what to do next in Thiollier’s quest.
Important: Complete Thiollier’s quest before Enir-Ilim
How to start Thiollier’s quest
Follow this path from the start of the DLC to reach Thiollier and begin his questline. |Image credit:Rock Paper Shotgun/Bandai Namco
Where to find Thiollier
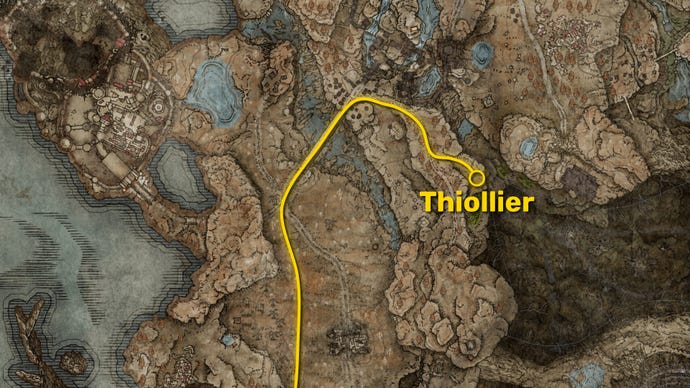
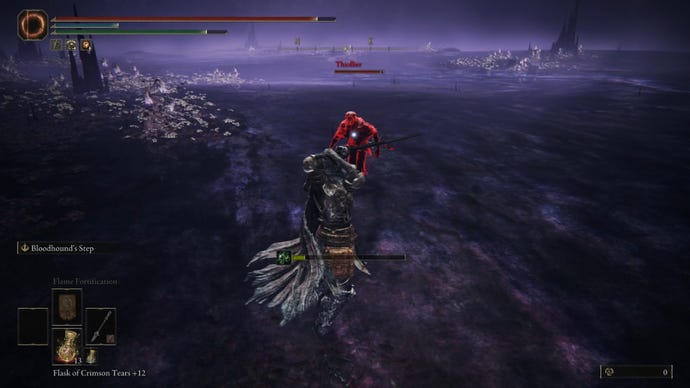
You will first find Thiollier sitting next to thePillar Path Crossin the Gravesite Plain - the first region of the DLC map. To get there, cross the Ensis Greatbridge in the north of the region and then turn right at the Castle FrontSite of Grace. Follow the road southeast and then turn left when the path splits just past the encampment. You should see a Miquella’s Cross at the end of the path; next to it is Thiollier.
Thiollier can be found sitting down next to the Pillar Path Cross. |Image credit:Rock Paper Shotgun/Bandai Namco
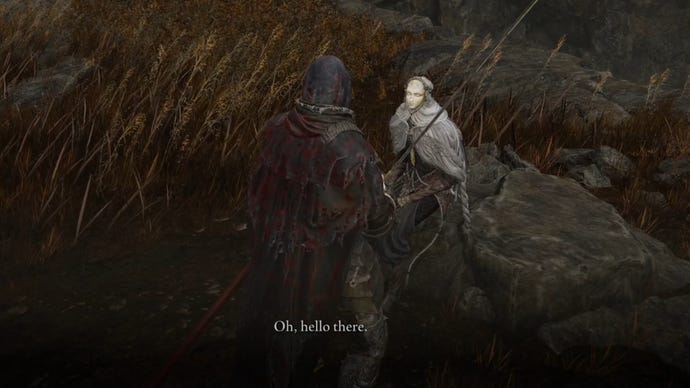
Speak to Thiollier and he’ll tell you a little about himself; namely that he’s weak and his only proficiency is in poison. Feel free to peruse his shop of poisonous goodies, and note that you can purchase theDeadly Poison Perfume Bottlefrom him.
Hoiw to begin Thiollier’s quest
Speak to Moore and have him give you the Black Syrup to deliver to Thiollier. |Image credit:Rock Paper Shotgun/Bandai Namco
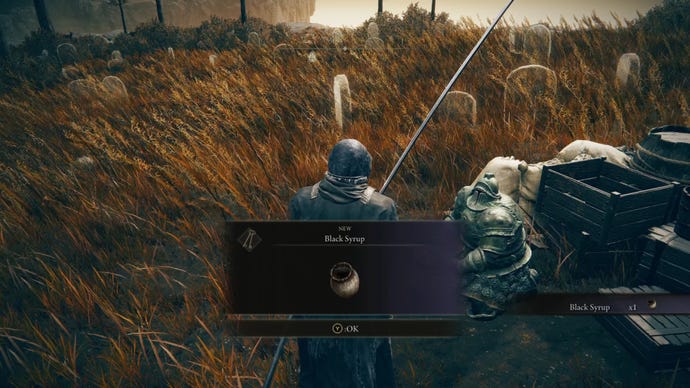
Specifically, select the option to “Talk to Moore”, and he’ll tell you that he’s been holding an item for Thiollier. He’ll give the item -Black Syrup- to you, and ask you to pass it on to Thiollier. Though it may seem like Moore’s questline more than anyone else’s, this also marks the beginning of Thiollier’s quest.
How to get Thiollier’s Concoction
Tell Thiollier you’re weary of life to receive Thiollier’s Concoction. |Image credit:Rock Paper Shotgun/Bandai Namco
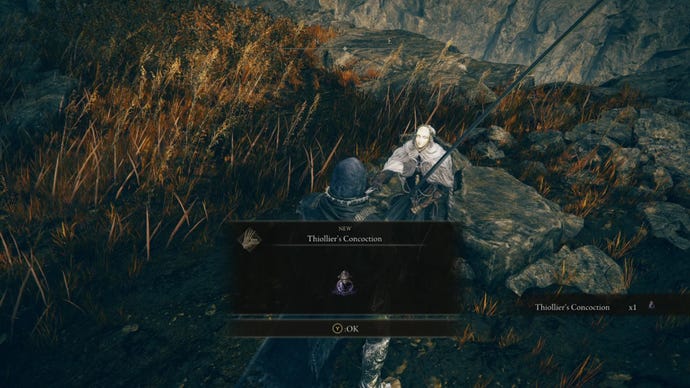
Speak to Thiollier at the Pillar Path Cross again, and select the following dialogue options:
When you first give him the Black Syrup, he’ll wax lyrical about it for a while. Then when you ask him about it, he’ll tell you that if you ever feel weary of life, he can provide something for you. Go straight ahead and tell him “I’m weary of life,” and he’ll give youThiollier’s Concoctionfor free.
Be warned: you’ll die if you consume Thiollier’s Concoction.If you do drink the fatal brew, you can purchase more Thiollier’s Concoction from Thiollier’s shop for 30,000 Runes apiece. See our guide onwhere to use Thiollier’s Concoctionfor more on this item, which leads into theDragon Communion Priestess questline.
Breaking Miquella’s Charm
You’ll need to progress beyond Scadu Altus in order to break Miquella’s charm over Leda’s band of followers. |Image credit:Rock Paper Shotgun/Bandai Namco

The next stage of Thiollier’s questline requires you to first reach either Rauh Base or the eastern section of Scadu Altus beyond Bonny Village. Progress along either of these paths far enough, and you’ll hear a great shattering sound. Moments later you’ll receive a notification:
(Optional) Speak to Leda about Thiollier
Don’t worry, this won’t do anything drastic. Leda will tell you that, given Thiollier’s love of St. Trina, she can’t see him as anything other than an ally to Miquella, and so she won’t make any moves against him. It also won’t stop you from then picking one of the other dialogue options while speaking to Leda, so you’ll be free to continue her quest as normal too.
Speak to Thiollier to hear he’s heading south
After speaking to Thiollier the first time following the breaking of Miquella’s charm, reload the area and speak to Thiollier again, for the final time in this location at the Pillar Path Cross. He’ll tell you that he’s heading south, in search of deep-purple water lilies that he heard Moore once speak about. Apparently they bloom on the southern shore, so he’s heading there to track down St. Trina.
What if you found St. Trina before Thiollier?
If you managed to break Miquella’s charm and reach the end of the Stone Coffin Fissure region before even meeting Thiollier, then when you first meet Thiollier at the Pillar Path Cross, you have the option to tell Thiollier where he can find St. Trina. He will then be at theGarden Of Deep Purplethe next time you reload the area.
Head to the Fissure
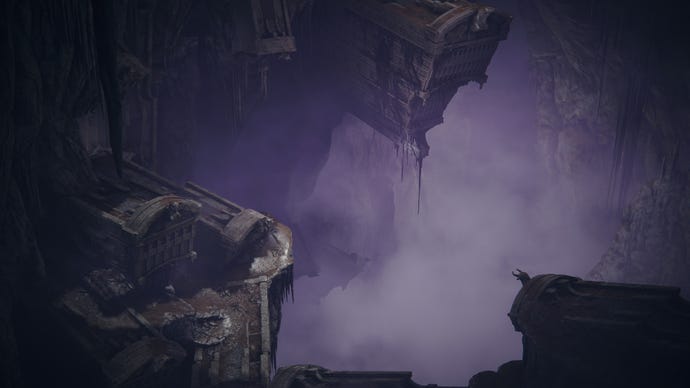
The Fissure entrance is sealed until Miquella’s charm is lifted. |Image credit:Rock Paper Shotgun/Bandai Namco
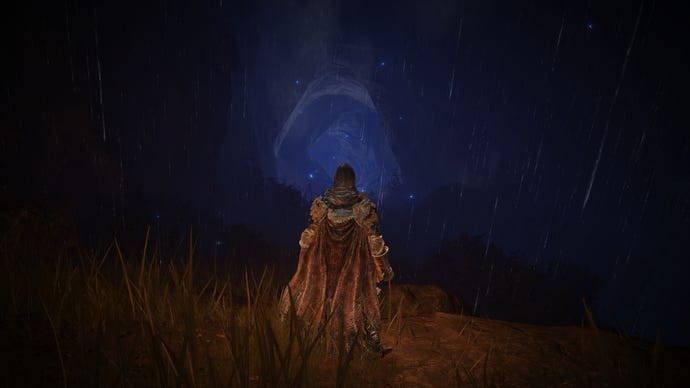
The next stage of Thiollier’s quest involves quite a lot of travel. First you need to reach theCerulean Coast, then the Fissure entrance on the south coast, and then you need to conquer the entire underground Fissure sub-region as well. So let’s dive into… all of that.
Reaching the Cerulean Coast
We have a guide onhow to reach the Cerulean Coast, because the path is quite obscure. But simply put, you need to follow the Ellac River down south below the Gravesite Plain. Start at the Castle Front Site Of Grace outside Castle Ensis, then take the lower path southeast, to the right of the path that led you to Thiollier’s previous location. Turn left just before where the Bloodfiends are fighting Messmer’s soldiers, and follow the path left into a poisonous swamp area.
Follow this exact path to reach the Cerulean Coast from the Gravesite Plain starting region. |Image credit:Rock Paper Shotgun/Bandai Namco
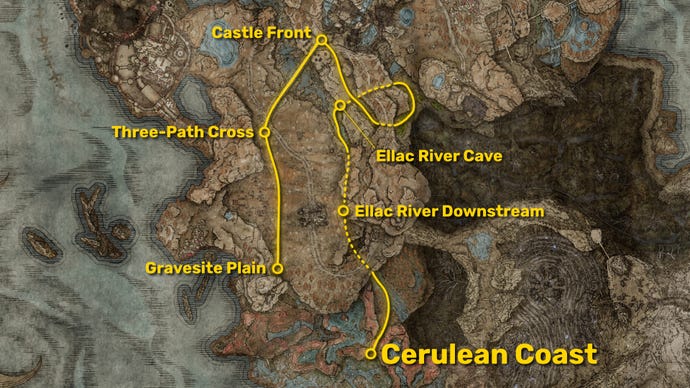
From here, follow the curving path to the left, and once you reach the river past the Vulgar Militia, head into the cave behind the giant MirandaFlower. Take the left path when it splits, and follow it until you reach the Ellac River Site Of Grace.
Reaching the Fissure entrance
From the Cerulean Coast Site Of Grace, this middle phase of the journey is much easier. Just head directly south, killing or avoiding enemy threats as you see them. If you haven’t yet found the Map Fragment for the Cerulean Coast, then head to its marker in the fog of war of the map, because it’ll take you fairly close to where you need to go anyway.
Follow this path to the very southern point of the Cerulean Coast, and you’ll find the entrance to the Fissure. |Image credit:Rock Paper Shotgun/Bandai Namco
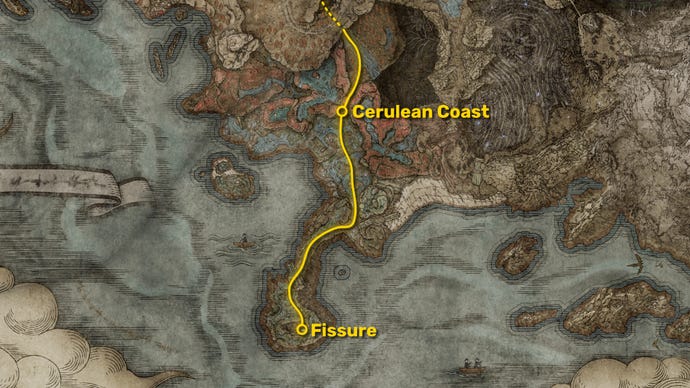
If you’ve revealed this part of the map, your goal is to reach the peninsula sticking out of the southern edge of the Cerulean Coast. Follow the road past the Spirit Worms and the ruin, and you’ll soon come across a gigantic hole in the ground. This is the entrance to the Fissure, a sub-region below the Cerulean Coast. Carefully parkour down all the way to the bottom, where you’ll find theStone Coffin FissureSite Of Grace. For a more detailed explanation on traversing underground, check out our guide onhow to get to the Stone Coffin Fissure.
Heading through the Fissure
The Stone Coffin Fissure will take you perhaps 30 minutes to traverse. |Image credit:Rock Paper Shotgun/Bandai Namco
The Fissure
The Fissure sub-region in Shadow Of The Erdtree is lengthy but fairly linear. Your main enemies in this region are Bloodfiends, Skeletons, and Abnormal Stone Clusters (the wierd stone worm things you see outside Evergaols in base Elden Ring). Stay patient and tackle everything carefully, and this region won’t pose too much of an issue for you.
Once you reach theFissure DepthsSite Of Grace, head up the stairs and jump off the top of the giant stone statue’s head in front of you. You will fall a very great distance, but don’t worry, you won’t take any fall damage. When you finally reach the bottom, you’ll find yourself in a beautiful boss arena: the Garden of Deep Purple.
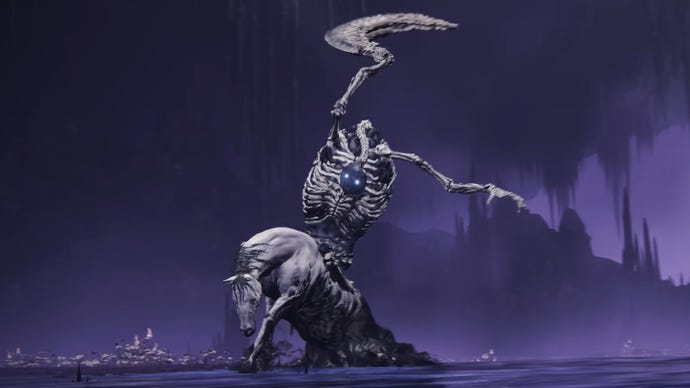
The Garden of Deep Purple
This boss is no joke. Good luck! |Image credit:Rock Paper Shotgun/Bandai Namco
Finding Thiollier again
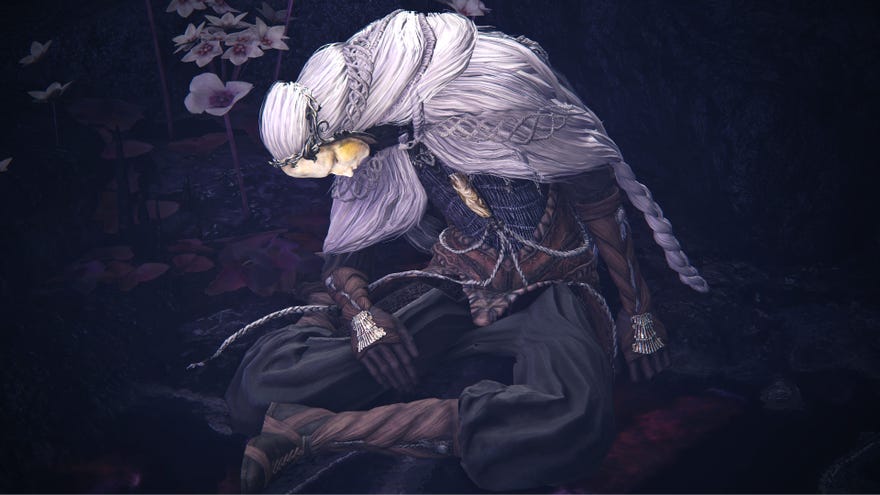
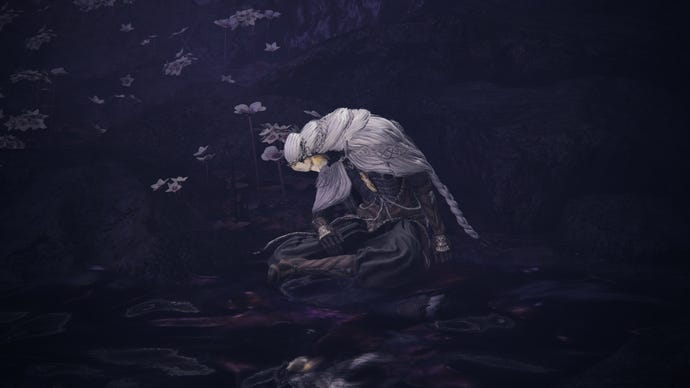
Once you beat the Putrescent Knight and optionally rest at the Garden of Deep Purple Site Of Grace, head down the path in front of the Grace and you’ll finally see Thiollier again, slumped in a pool of purple nectar next to the godly St. Trina herself. Speak to Thiollier, and he’ll explain that he’s drifting off in St. Trina’s poison, and to let him be. He also warns you against taking the nectar yourself, because it will kill you.
You’ll find Thiollier nearly asleep in front of St. Trina just beyond the boss arena room. |Image credit:Rock Paper Shotgun/Bandai Namco
After this point, you can reload the area and speak to Thiollier again, and he’ll beseech St. Trina to grant him more of her poison. He’ll also tell you once again to leave him be.
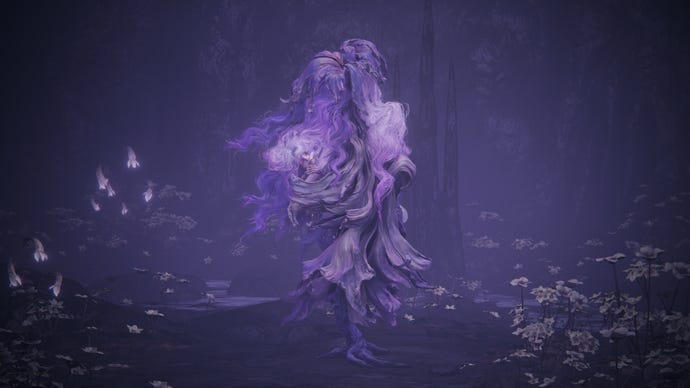
St. Trina herself stands slumbering at the end of the Garden of Deep Purple. |Image credit:Rock Paper Shotgun/Bandai Namco
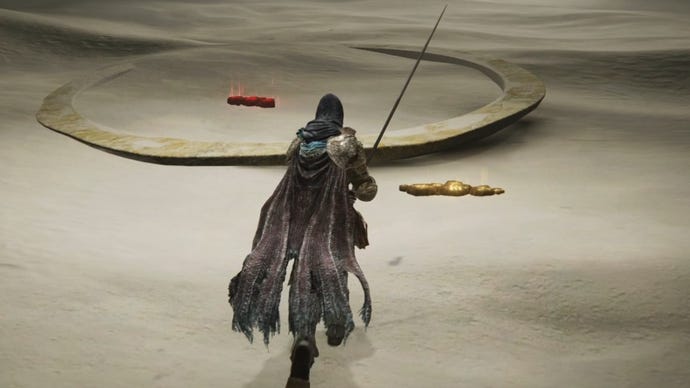
Imbibing St. Trina’s Nectar
Imbibe the Nectar four times in a row
Despite Thiollier’s words of warning, to progress this quest you must nowimbibe St. Trina’s nectar. To do this, go up to St. Trina and interact with her, then select “Imbibe nectar”. Doing so will kill you, which is intended. When you respawn, pick up your runes and then imbibe the nectar once again.
Keep imbibing the nectar and killing yourself, and the fourth time round, after you die you will hear St. Trina speak to you:
When you respawn, speak to Thiollier and pass on St. Trina’s words. He’ll become angry with you, thinking that you’re lying to him, and he’ll warn you not to speak those words again.
Pay him no heed!Immediately try to pass on St. Trina’s words to him again.He’ll tell you that he’ll never forgive you.
Defeat Thiollier
Rest at the Garden of Deep Purple Site of Grace to reload the area. When you attempt to head towards St. Trina’s cave, you’ll find the way blocked. Thiollier invades you at this point, and will fight you using his poison-spewing Perfume Bottles.
He’s pretty easy to defeat, just pay the poison no mind, get up close and personal, and finish him off. As he’s told you, he’s weak as a kitten really.
Ignore Thiollier’s poison and you’ll quickly defeat him when he invades. |Image credit:Rock Paper Shotgun/Bandai Namco
Pass on St. Trina’s words
Once you’ve survived the invasion, go into the cave and speak to Thiollier again. He’ll lament his weakness, and ask you to tell him what St. Trina said.
You won’t be able to respond at this point, so leave him be and go to St. Trina. Imbibe her nectar two more times to hear the following dialogue from her:
After this final dialogue, speak to Thiollier again and pass on St. Trina’s last words to you. He’ll once again consider it a lie, but will question himself in his final moments, and implore St. Trina to visit him in his eternal sleep.
After this point, you can reload the area and interact with Thiollier again, but he’ll only breathe loudly at you (“A-Ah”). You can also continue to imbibe St. Trina’s nectar, but she will simply repeat her final instruction to you.
Summon Thiollier for the Enir-Ilim NPC fight
If you complete Thiollier’s quest fully and don’t side with either the Hornsent or Ansbach in their quests, then you can summon Thiollier for the NPC fight in Enir-Ilim. |Image credit:Rock Paper Shotgun/Bandai Namco
If you have completed all the previous steps in Thiollier’s questbeforeyou reach theCleansing Room AntechamberSite Of Grace in Enir-Ilim, then you will be able to summon Thiollier for the next fight against Leda and her allies.
This fight potentially allows you to summon multiple allies if you have completed their quests; obviously Thiollier is one, but you can also summonAnsbachand the Hornsent if you sided with them both during their quests. We have a list ofall NPC allies and enemies in the Leda fight, as well as the conditions needed to summon them.
If you did not gain any of these characters as allies, you’ll still be able to summon Sanguine Noble Nataan as a backup helper during the fight against Leda, Dane, and the rest. However, if you see Sanguine Noble Nataan, it means you didn’t fully complete all the previous steps before getting to this fight in Enir-Ilim, which means you can’t get Thiollier’s final quest reward (explained in the next step).
Summon Thiollier for the final boss fight
Return to St. Trina after completing the final boss fight to round off this questline. |Image credit:Rock Paper Shotgun/Bandai Namco
If you completed all the previous steps in Thiollier’s questline perfectly and in time before reaching the point of no return at the Cleansing Room Antechamber, then when you reach the final boss fight of the DLC you’ll be able tosummon Thiollierto fight with you. His summon sign will appear on the left just outside the fog wall of the final boss arena.
Optionally, you can also speak to Ansbach just before the final boss fight, if you managed to complete his questline as well and summoned him in addition to Thiollier in the previous fight against Leda and her allies. This isn’t mandatory, but you are able to ask Ansbach specifically about Thiollier in the previous fight, in which case he’ll remark the following:
Now for the final step in Thiollier’s questline. Make sure you summon Thiollier for the final boss, and once you defeat them (this may take some time), you will be able to loot Thiollier’s final quest rewards from his body in the boss arena:Thiollier’s Hidden NeedleandThiollier’s Armor Set.
Thiollier himself will be dead (as will Ansbach if you summoned him as well), so it’s a bittersweet end to his story. But hey, at least he fulfilled his master St. Trina’s wishes at the last.
Return to St. Trina after the final boss
Return to St. Trina after the final boss fight and you’ll get one final reward: St. Trina’s Blossom. |Image credit:Rock Paper Shotgun/Bandai Namco
While this is technically the end of Thiollier’s quest, I’ll just take this moment to finish explaining St. Trina’s quest as well, since the two are inextricably linked.
To finish the quest entirely, you must proceed through Enir-Ilim and defeat the final boss of Shadow Of The Erdtree. After that’s done, return to the Garden Of Deep Purple and proceed into St. Trina’s cave.
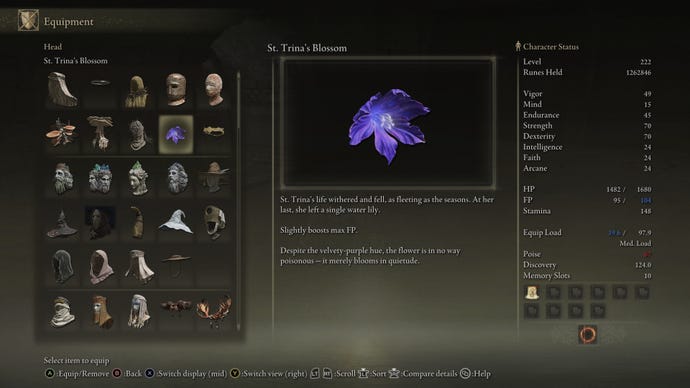
St. Trina will have fallen to the ground, presumably dead along with her other half, Miquella. In front of her, you can lootSt. Trina’s Blossom, a flower you can put in your hair which technically acts as a Helm:
Thiollier questline rewards
Your final reward for Thiollier’s questline is St. Trina’s Blossom, a flower which boosts your max FP when placed in your Helm slot. |Image credit:Rock Paper Shotgun/Bandai Namco
Complete every step of Thiollier’s questline perfectly, and you’ll end up with the following rewards:
This is in addition to the incidental rewards from the required fights against the Putrescent Knight, Leda and her allies, and the final boss of the DLC.
That wraps up this comprehensive guide to completing Thiollier’s questline in Elden Ring: Shadow Of The Erdtree. It’s a tricky and sometimes confusing quest that involves a lot of travel through dangerous areas of the Land of Shadow. For more walkthroughs related to Shadow Of The Erdtree’s NPCs, take a look at our guides forDryleaf Dane’s questline,Leda’s questline,Ymir’s questline, andFreyja’s questline. If you’re more interested in combat strategies, refer to ourShadow Of The Erdtree main boss orderguide for the best way to tackle the enemies of the Shadow Realm.
