HomeGuidesManor Lords
Manor Lords beginner’s guide: Everything you need to build in your first yearLearn what to build first with this beginner’s guide to Manor Lords
Learn what to build first with this beginner’s guide to Manor Lords
Image credit:Rock Paper Shotgun/Hooded Horse
Image credit:Rock Paper Shotgun/Hooded Horse
Not sure how to get started in Manor Lords?It’s a common complaint. I’m of the opinion that solo developer Slavic Magic has made a rather special city-builder withManor Lords, but it has to be said that the game can be pretty obtuse and confusing at times.
If you’re itching to build your own town inManor Lordsbut you’re not sure where to begin or whether you’re doing things right, that’s where we hope to help you. In this beginner’s guide, I will walk you through your first year in Manor Lords, handling everything from the initial few buildings and family assignments to big projects like food production, building your first Church and Manor, and surviving your first Winter. At the end, I’ll also leave you with some key objectives for you to prepare for in Year 2.
So! Here’s how to get off to a roaring start in Manor Lords!
To see this content please enable targeting cookies.Manage cookie settings
To see this content please enable targeting cookies.Manage cookie settings
Note: for this walkthrough, I’ll assume that you’ve chosen the defaultstarting scenario: “Restoring The Peace”. But no matter which scenario you choose, this guide should help you through the basics of setting up your town.
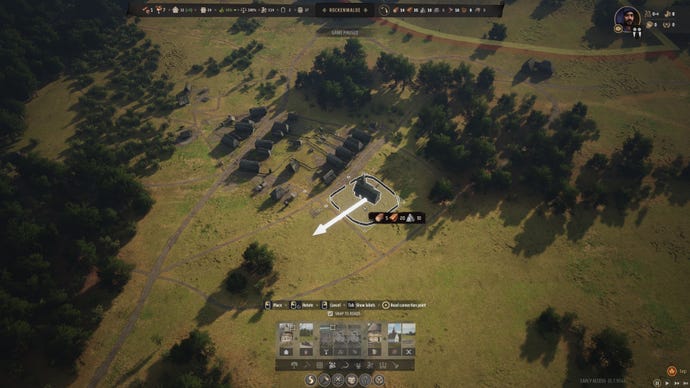
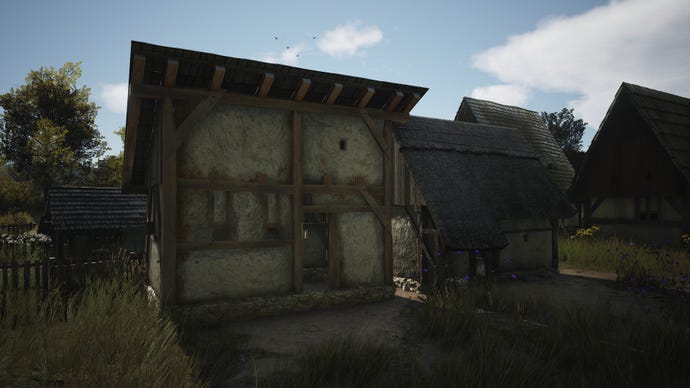
1. Pause the game, and construct these buildings
When you first load into the world, immediately pause the game and take a look around your region of the map. You should see a few key resources:BerriesandWild Animalswill be the most important, as they’re your early-game food sources. There may also beStone,Iron, andClay, which you won’t have to worry about for a while, but it’s good to note their whereabouts ahead of time.

With the game still paused, open up the build menu andconstruct the following buildingswith your starting supplies:
It’s important tobuild the Logging Camp first, to get some early Timber production going as soon as possible.
Here’s where I’m thinking of placing my first few buildings in my new settlement. |Image credit:Rock Paper Shotgun/Hooded Horse
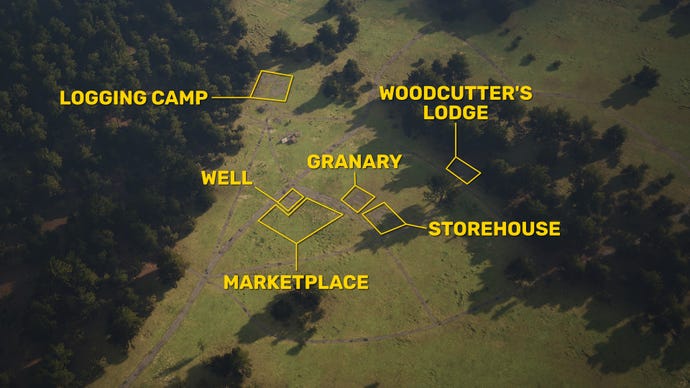
All of thebuildingsexcept the Logging Camp and Woodcutter’s Lodge should benear the centreof where you’d like your village to be. The Logging Camp should be placed near a forest, but make sure it isn’t too close to any Wild Animals. I personally like to place down a Woodcutter’s Lodge early on as well so it’s ready when I need it, but it’s not necessary. If you do place one now, you should ideally place it near a different patch of trees to your Logging Camp.
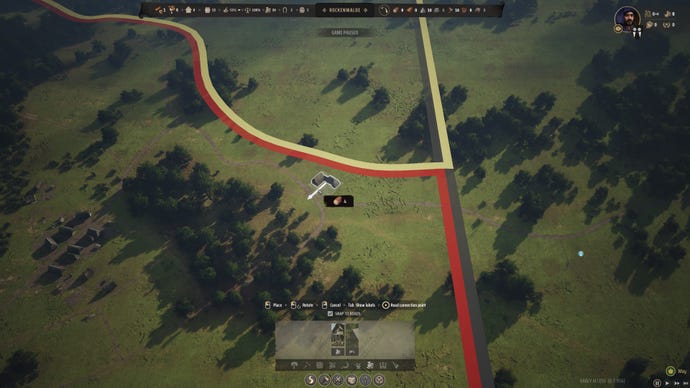
2. Build a basic road network between key areas
With the game still paused, start hashing out abasic road network.Roadsin Manor Lords are completelyfreeand instantly built, so it’s always a good idea to build them at the start of the game while paused.
Building a good road system in advance helps you to easily structure your settlement. |Image credit:Rock Paper Shotgun/Hooded Horse
The general idea with these starting roads is toconnect all your starting buildingsto each other, while also leaving large-ish gaps for Burgage Plots and other buildings later on. It’s particularly important to make sure yourPopulation(andOxen) have road access from the Logging Camp to the rest of your village, because the Logging Camp is where you store all the Timber you need for constructing new buildings.
I’d also recommend placing down some longer roads from the centre of your village towards the nearest Berries and Wild Animals. We’ll revisit them inStep 4.
3. Assigning your families to work
It’s time to unpause the game and let your villagers build those starting buildings you placed down. Feel free tospeed up the game or slow it downwith the buttons in the bottom-right (hotkeys: Z and X).
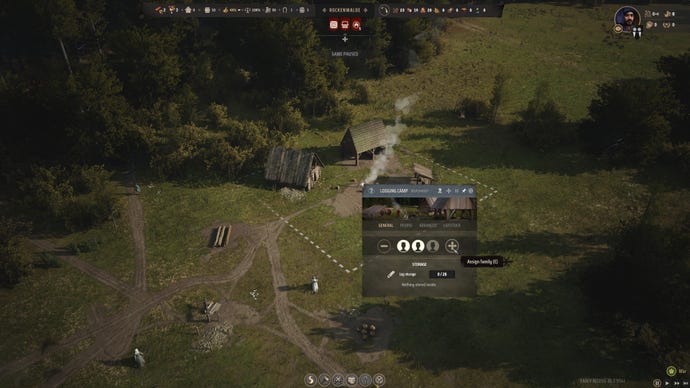
Once yourLogging Campis built, click on it andassign 2 familiesto it immediately. They’ll start chopping wood for more Timber, and meanwhile your other 3 families will continue building.
Two families in the Logging Camp immediately! |Image credit:Rock Paper Shotgun/Hooded Horse
Once yourStorehouseandGranaryare built, assign 1 family each to them, to startstoring resourcesso they don’t get ruined when it starts to rain. Your one remaining family can deal with the rest of the building for now, but if need be you can take one extra family off the Logging Camp to help out.
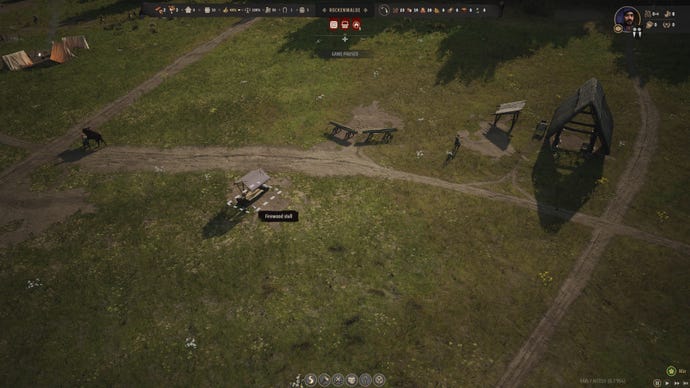
The extra benefit of assigning families to work in the Storehouse and Granary is that you’ll quickly get Food and FirewoodStallsset up in yourMarketplace. You’ll need these Stalls to keep your people happy after setting them up in Burgage Plots inStep 5.
Good job, little Firewood Stall. Good job. |Image credit:Rock Paper Shotgun/Hooded Horse
4. Set up food production
Now it’s time to set upfood production. At the moment, your families are living off the supplies of bread they brought with them, but that will soon run out.
Berries are my nearest source of food, which is why I’ll prioritise it over Wild Animals. Your mileage may vary! |Image credit:Rock Paper Shotgun/Hooded Horse
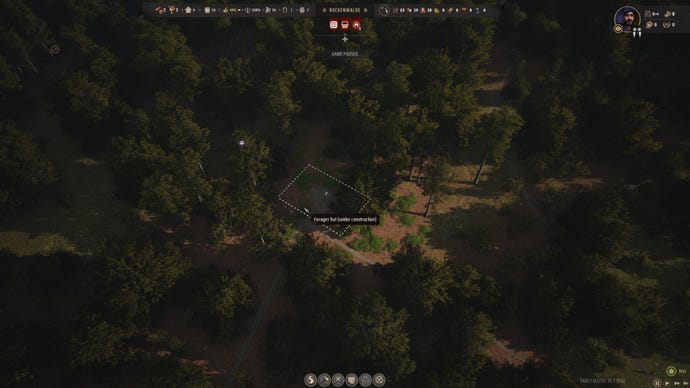
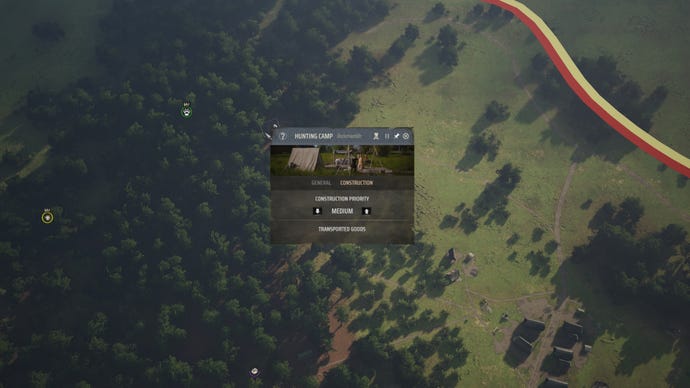
But if Wild Animals are in a better spot for you, then I’d recommend building aHunting Campnear them instead. You don’t need both food sources immediately, so just pick whichever is more convenient.
Once your chosen building (Forager Hut or Hunting Camp) is built,set a family workingthere, but make sure you still have one family free for building. To recap: your families should now have the following work:
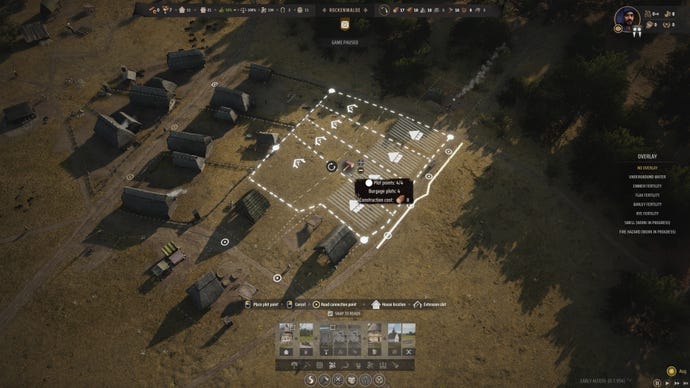
5. Build your first Burgage Plots
All this time, your families have been living in their starting tents, and you may have noticed yourApproval Ratingstarting to decline next to the thumbs up arrow at the top of your screen. The solution is to start buildingBurgage Plots, which are where your families live in Manor Lords.
Make sure your first Burgage Plots provide housing right in the thick of all the places you want your villagers to work. |Image credit:Rock Paper Shotgun/Hooded Horse
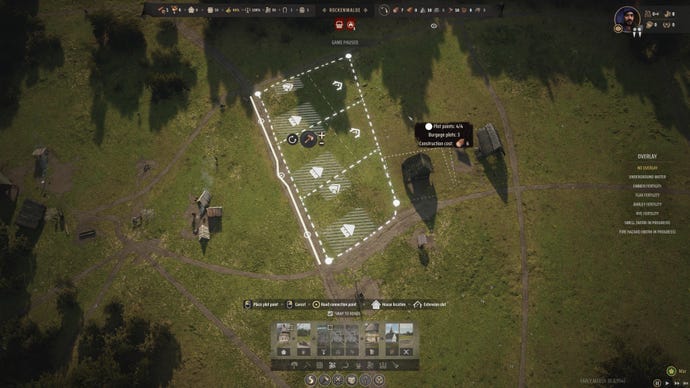
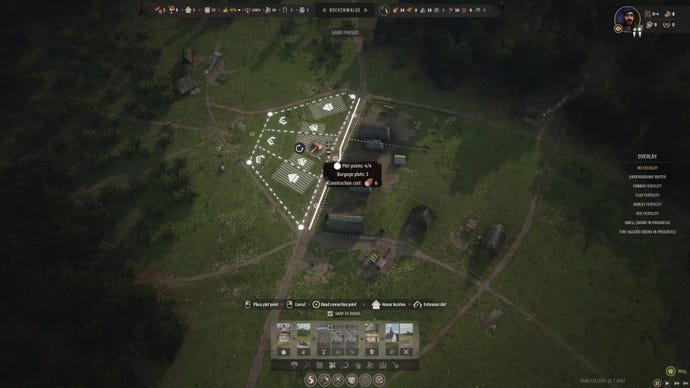
Plop down 3 Burgage Plots for now, and let your builders work on them for a while.
6. Get another Ox and Hitching Post
Purchase another Ox at the Hitching Post for 25x Regional Wealth. |Image credit:Rock Paper Shotgun/Hooded Horse
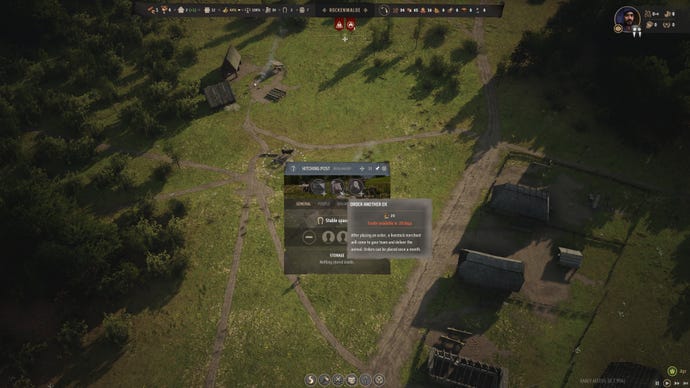
A network of Hitching Posts across your village is essential for healthy growth. |Image credit:Rock Paper Shotgun/Hooded Horse
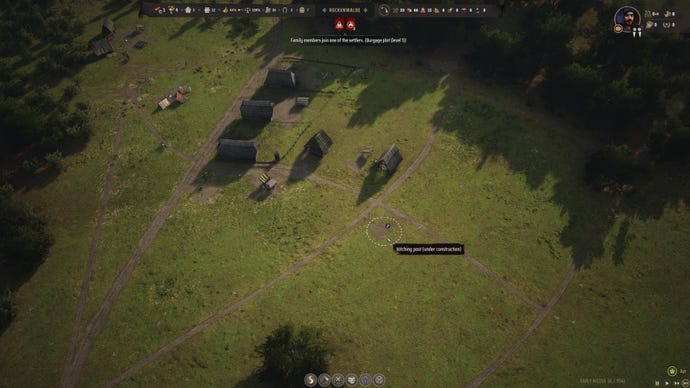
However, you also need tobuild another Hitching Post, because each Hitching Post can only handle one Ox. It’s a good idea to build multiple Hitching Posts anyway, so that your Oxen are spread across your settlement and can do transport jobs more quickly. I placed mine pretty much in the centre of my town, and I suggest you do something similar.
7. Time to eliminate homelessness
You should now have 3 Burgage Plots set up, but that still means 2 out of your 5 families are stuck in your starting tents. You can build more Burgage Plots (and indeed, that’s thenext step), but it’s even quicker to make use of thoseLiving Space Extensionsyou built into your first Plots.
You can expand the living space of certain Burgage Plots with this button. |Image credit:Rock Paper Shotgun/Hooded Horse
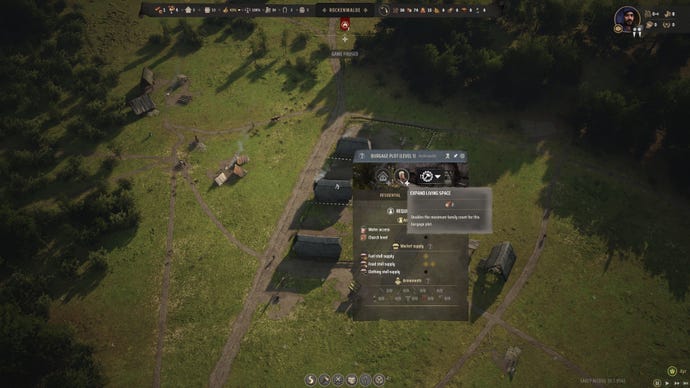
Click on a couple of your Burgage Plots and select the “Expand Living Space” button. Each expansion costs 2 Timber (the same as making a new Burgage Plot), but it’s a quicker job and allows you to place two families in a single Plot, which is useful later on because you only have to upgrade one Plot instead of two in order to make both families happy!
Look, Ma! No tents! |Image credit:Rock Paper Shotgun/Hooded Horse
Once those extensions are built, you should see your starting tents disappear, as no one is living in them anymore.No more homelessness!Huzzah!
8. Expand your village with more Plots and Roads
You can never have too many Burgage Plots. Well, unless you run out of Timber. |Image credit:Rock Paper Shotgun/Hooded Horse
Remember to keep your Burgage Plots fairly close to your Well and Marketplace as they’re important for your Approval Rating; and it’s also a good idea to keep them close-ish to the Storehouse, Granary, and Logging Camp.
I also took this opportunity to flesh out my settlement’s road system a bit more. Now that the starting supply areas and tents were gone, I could afford to be a little neater and more efficient with road placement.
I’ve tried to neaten up my roads a little bit on the left-hand side now that the tents and starting supplies are gone. |Image credit:Rock Paper Shotgun/Hooded Horse

9. Your first Development Point
Trade Logistics is almost always my first pick in the tech tree. |Image credit:Rock Paper Shotgun/Hooded Horse
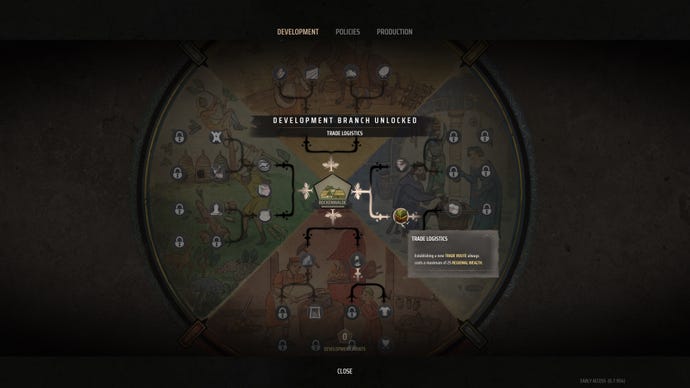
We’d recommend you put your first Development Point into Trade Logistics. It’s a fantastic early-game tech which will make setting up trade routes much,muchless expensive. We’ll be starting up our Trade network very soon inStep 11, so it’s a good time to get Trade Logistics.
10. Assign your first new families to work
Now that you’ve eliminated homelessness, your Approval Rating should start creeping up above 50%. As long as it’s above 50% and you have empty Burgage Plots, you will periodically get new families joining your village. Which is great, because at the moment we’re basically using all our families already.
Time to get a second source of food going! |Image credit:Rock Paper Shotgun/Hooded Horse
Whenever your next few families arrive, you should assign them to build a second food production building for whichever food source you haven’t already got (Berries or Wild Animals), and start a family working there the moment it’s built.
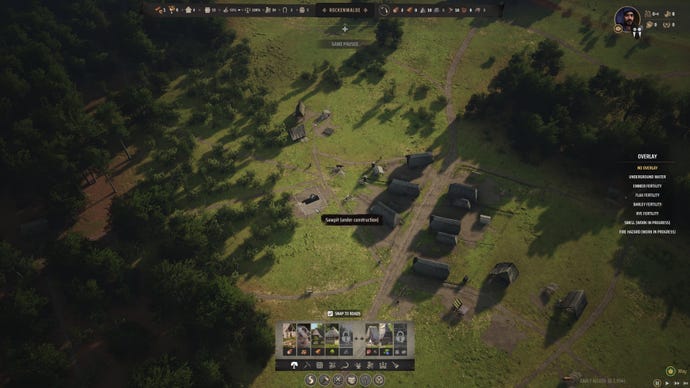
Your next family to arrive at the settlement should go towards building a Sawpit near your Logging Camp and working there to start making Planks. And your next family after that can start working in the Woodcutter’s Lodge for Firewood production.
A Sawpit converts Timber into Planks, which are essential for more advanced buildings. |Image credit:Rock Paper Shotgun/Hooded Horse
If you need more Burgage Plots before these families arrive, then go ahead and build them (and it wouldn’t hurt to have a couple of them with Backyard Extension space as well).
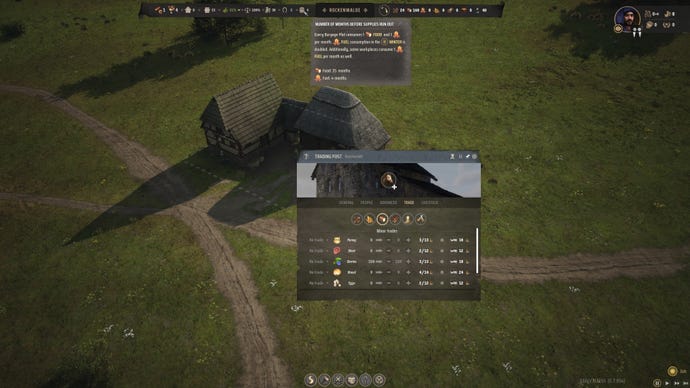
11. Build your first Trading Post
It’s time to build your first Trading Post. Traders come from off the edge of the map; there are little icons off the map edge to tell you where they spawn. Try to build your Trading Post fairly close to the edge of the map, connected to the main road.
It doesn’t matter terribly if you build your Trading Post far from your village. Build it close to the map edge for efficient trading! |Image credit:Rock Paper Shotgun/Hooded Horse
Tradeis very important in Manor Lords. It’s the easiest and earliest way to get lots of Regional Wealth, which you’ll need for expanding and upgrading your town. Once it’s built, have a look at all your resources in the Trade tab to see if you have any large surpluses of resources.
In my case, I had an awful lot of Berries - enough to feed my village for 35 months, which is rather more than I need. So I started selling my Berries until I was down to just 100 of them, which is still more than enough for the time being.
I’ve got a huge surplus of Berries, so I’ll sell some of them for some early Regional Wealth income. |Image credit:Rock Paper Shotgun/Hooded Horse
A brief word on Bandits
This isn’t really a step, but at around this point of your playthrough, you may see your firstBandit Campsarise elsewhere on the map. These bandits may periodically steal some resources from your village. There’s nothing you can do about this until you start building up an army and taking them out, which we’d recommend you wait until Year 2 to do. So it’s not a big issue for now, it’s just something to keep in mind going forward!
12. Goats, Hides, and Leather
It may be a strange time to think ofClothingin the summer months, but winter will be on us soon. I recommend taking this time to start producingLeather, so that when winter arrives you’ll be able to start makingShoes.
Sorry about the rain; makes it hard to spot the Tannery I’ve set up at the bottom of the village. But hey! At least none of my supplies are getting soaked! |Image credit:Rock Paper Shotgun/Hooded Horse

You’ll have started getting a few Hides from your Hunting Lodge, but it’s good to get more, and closer to home. Take a couple of Burgage Plots with Backyard Extension Slots, and build someGoat Shedsthere (or just one if you don’t yet have the Regional Wealth for it). These will provide a steady supply of Hides for your village.
13. Keep an eye on your Firewood!
It was around this time that I realised my Firewood reserves were dangerously low, so consider this your warning to get a family working in the Woodcutter’s Lodge so that you have a nice healthy stockpile before Winter! Firewood is consumed twice as fast in Winter, so you’ll need a good amount.
14. Even more Burgage Plots
Make sure you have a balance between Plots with Living Space Extensions, and Plots with Backyard Extensions. |Image credit:Rock Paper Shotgun/Hooded Horse
It’s time to build even more Burgage Plots! You need 10 Burgage Plots in total to reach the next settlement level, so I’d recommend building the remaining ones now.Living Space Extensionsare always welcome as usual, but even more important at this point is to have someBackyard Extension slotsready for when you need to start creating weapons,Ale, and other more exciting resources.
Once again, keep your Burgage Plots fairlytight around the centreof your village, where your Well and Marketplace Stalls reside.
15. Planning ahead for major builds
It’s time to do a little bit of earmarking of space inside your village for some key buildings. Those buildings are: theChurch, for religion; and theTavern, for a different kind of religion altogether. The Church in particular is quite large, about the equivalent of a couple of decently-sized Burgage Plots. And it has to be fairly close to your Burgage Plots, so try and find a good spot for it.
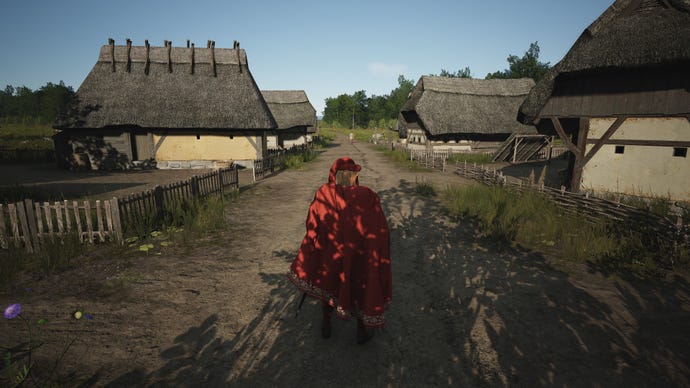
It’s important to take a step back every once in a while and have a stroll round your village. Take in the atmosphere. Feed the chickens. |Image credit:Rock Paper Shotgun/Hooded Horse
It’s also a good idea to earmark one of your Burgage Plots that has a Backyard Extension slot, preferably as near as possible to where your Tavern will go. This Burgage Plot can become yourBrewerylater on!
16. Lay a couple of Chicken Coops
I like to do what I can to diversify food types in the first year. So to that end, if you’ve got a couple of spare Burgage Plot Backyard Extensions handy, I’d recommend building a couple ofChicken Coopsfor 25x Regional Wealth each.
These Chicken Coops provide a slow but endless passive supply ofEggs, which will increase the total food offerings available to your Population. Not only does this increase their happiness, but the varied diet also makes your villagersless susceptible to illness.
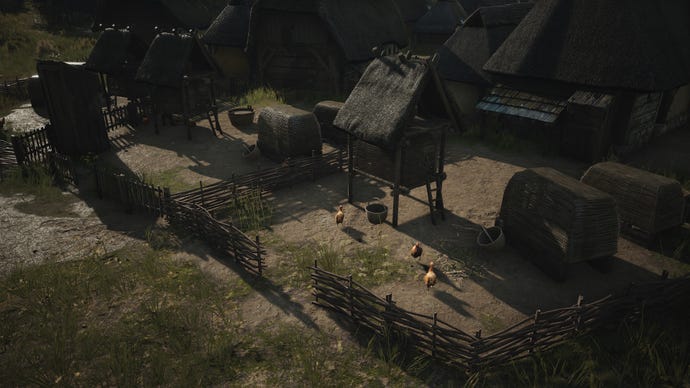
Don’t be alarmed if your chickens phase in and out of their coops. They’re magical realm-hopping chickens. |Image credit:Rock Paper Shotgun/Hooded Horse
Remember: if you need more Regional Wealth, go to yourTrading Postand sell off any big surpluses of major resources!
17. And along came religion
With all that work your Sawpit has been doing, you should now have at least 20x Planks (and probably a lot more to be honest). So now is a good time to build your first Church.
The Church is a hefty building, costing those 20x Planks I mentioned, plus 5x Timber and 10x Stone. You won’t have Stone production set up yet, but you should have enough Stone in your starting supplies to get the Church built.
Once it’s built, you can set a Family working inside it if you like, but it’s not a requirement. It’ll just give you a little extra Approval Rating boost.
18. Expand your storage
My other recommendation at this Autumnal stage of your first year is to look at expanding your storage, to avoid any annoying “Generic Storage Full” prompts from the game. A Large Storehouse will hold2,500 itemsinstead of the regular Storehouse’s 250, and it doesn’t cost much at all.
A Large Storehouse can carry 10 times as much as an ordinary Storehouse. |Image credit:Rock Paper Shotgun/Hooded Horse
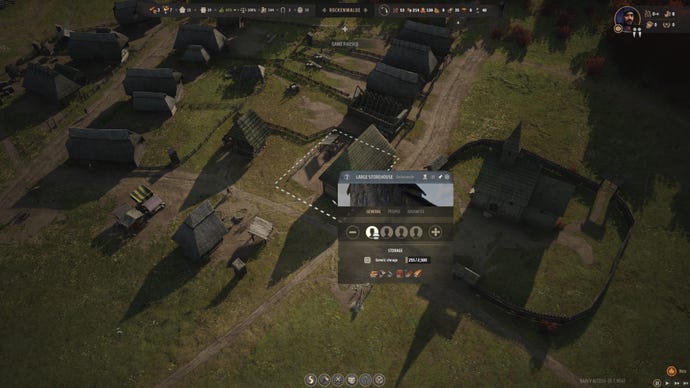
Just be sure tobuild it while it isn’t raining, because the moment you begin the upgrade, the entire contents of the Storehouse will be dumped on the ground.
19. Upgrade your first Burgage Plots
We’re getting towards the end of the first year’s major objective: reaching theMedium Villagemilestone. You should already have at least 10 Burgage Plots in your settlement, so all that remains to hit the settlement level goal is toupgrade at least two Burgage Plots to Level 2.
You can upgrade a Burgage Plot as long as all its requirements are met. |Image credit:Rock Paper Shotgun/Hooded Horse
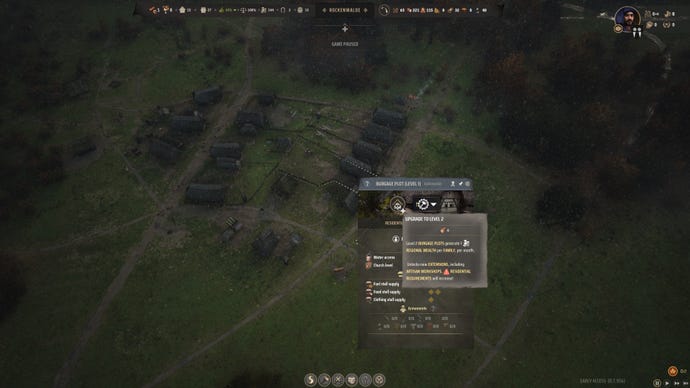
Upgrading only costs4x Timber. You can only do it once all of the approval requirements in that Burgage Plot are satisfied, but that shouldn’t be an issue if you’ve been following along with this walkthrough! Get those upgrades done, and I’ll see you in the Medium Village era.
20. Your second Development Point
Congratulations! You are now the proud owner of one Medium Village. Your reward? A newDevelopment Point. And I know just where it should go.
Behold, the best Development Ugprade in Manor Lords: Better Deals! |Image credit:Rock Paper Shotgun/Hooded Horse
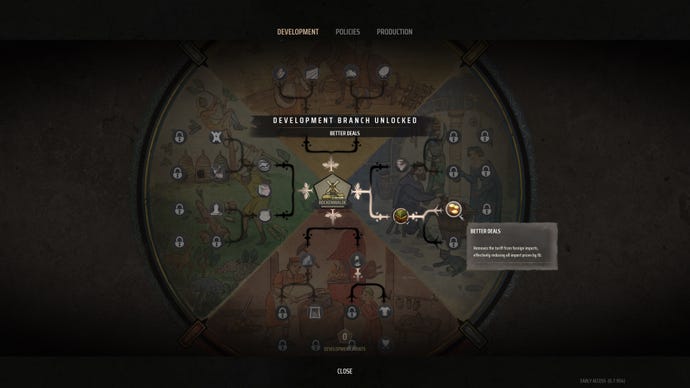
Better Deals is probably the single most powerful Development Upgrade in Manor Lords right now. It removes the 10x Regional Wealth tariff on all your imports at the Trading Post, which in simple terms meanseverything can be bought for 10x Regional Wealth cheaper. That’s a huge deal when you’re looking at more expensive items like Polearms and other weapons that you’ll need forraising your first armylater on.
21. Start collecting Stone for your Manor
As Winter dawns, there’s just a couple more jobs that I’d recommend squeezing into Year 1 if you can. The first is toconstruct your Manor, which in some ways (mainly thematic ways) is the most important building in your whole settlement.
Once you construct your Manor, you’ll be able to starttaxingyour Population forTreasuryandInfluence, and you can also start hiringRetinueto help you in battle.
I’ve placed my Manor a fair distance from the main village, up on a hill. There’s no need for it to be central. |Image credit:Rock Paper Shotgun/Hooded Horse

The only issue is that yourManorrequires Stone to build, and you probably won’t have enough. You could always purchase the Stone at the Trading Post, but there’s no reason why you can’t start collecting Stone for yourself. Find the nearest Stone patch, build a road out to it, and construct a Stonecutter Camp there. Then set one of your families working in the Stonecutter Camp, and they’ll periodically ferry the Stone back to your base. Soon you’ll have more than enough to build your first Manor.
When the time comes to actually place down your Manor, you’ll enter the Castle Planning screen where you can expand walls, add towers and outposts, and more. But all of that stuff is very costly in materials and time-consuming to build, so we’d recommend just building the basic Manor for now. Once it’s built, you can re-enter the Castle Planning screen at any time to add more walls and gubbins.
22. Start making Shoes from your Leather
Remember all thatLeatheryou’ve been making? Well, your Level 1 citizens may have been happy draping Leather over themselves, but Level 2 citizens want actual Clothes. There are three types of Clothing items in Manor Lords:Clothes, Cloaks, and Shoes. Clothes and Cloaks require Linen and Yarn, neither of which you have yet. So that leaves Shoes, which you can thankfully make out of Leather.
It may not look like much, but this tiny, empty shack is actually where your entire town gets their Shoes. |Image credit:Rock Paper Shotgun/Hooded Horse
To start building Shoes, all you need to do is select one of your Level 2 Burgage Plots with a Backyard Extension Slot (if you don’t have one, build it!), and create aCobbler’s Workshop. The Workshop costs5x Regional Wealthand5x Planksto make, which shouldn’t exactly break the bank. The downside is that you’re effectively locking that family away from any other jobs throughout the village, but that’s okay. You can always get more families.
Once the Cobbler’s Workshop is done, you should begin to see Leather being slowly turned into Shoes and stored in your Large Storehouse (or sold at a Clothing stall). That’s one of the major hurdles for upgrading toLevel 3Burgage Plots already complete!
23. Surviving Winter
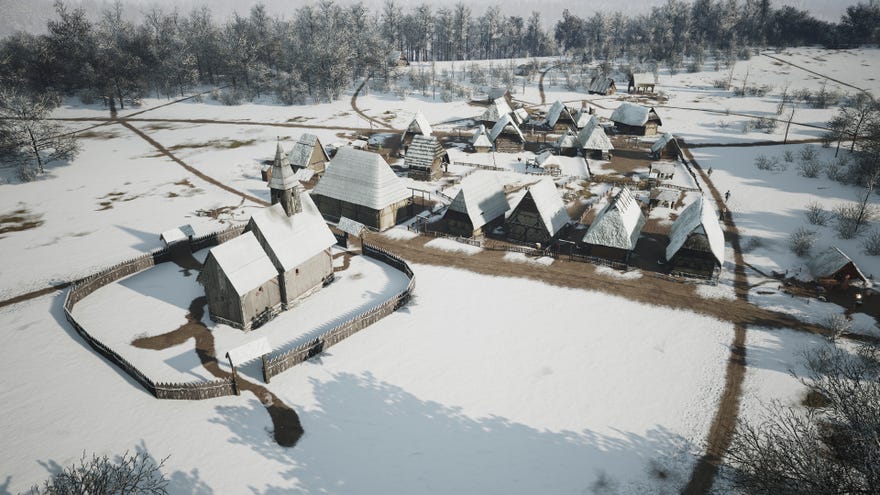
Winter makes things extra pretty. |Image credit:Rock Paper Shotgun/Hooded Horse
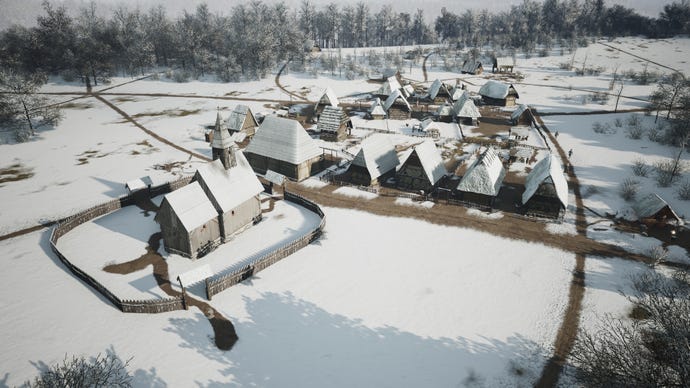
You don’t need to take any special precautions during Winter. This isn’tFrostpunk; your people can take care of themselves as long as they have food, fuel, clothes, and a little bit of religion to help them get through the long nights. And that’s just about the entire first year of Manor Lords sorted! Congratulations on surviving and thriving!
24. Year 2 objectives…
I’ll leave you with a few key objectives to think about for Year 2 of your Manor Lords playthrough:
I’ll let you figure out the details of these Year 2 objectives for yourself, but you should be on very firm footing after such a successful first year. Hopefully you found this beginner’s guide useful, and good luck Manor Lording!
