HomeHardwareGuides
How to install a new SSD on the Steam DeckVenture inside your Deck to make a permanent storage upgrade
Venture inside your Deck to make a permanent storage upgrade
Image credit:Rock Paper Shotgun
Image credit:Rock Paper Shotgun
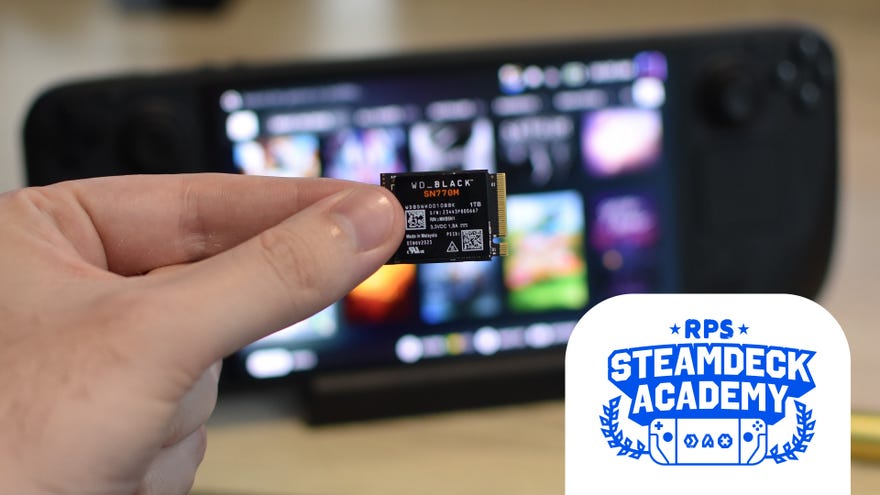
Image credit:Rock Paper Shotgun

Steam Deck Academybrings together all our guides and explainers on getting the most out of your Steam Deck, no student loans or sweaty dormitories required.
This guide will cover both the SSD upgrade itself, and the process for installing a fresh copy of SteamOS once it’s in place. Note that LCD-screened Steam Decks won’t all have exactly the same internal design, as Valve rejigged it very slightly in 2023, and theSteam Deck OLEDhas yet another unique layout of its own. Nonetheless, I’ve written this guide as such that all three should be covered.
Image credit:Rock Paper Shotgun
How to install a new SSD on the Steam Deck: What you’ll need and prep steps
As forewarned, changing the SSD on a Steam Deck is trickier thaninstalling an SSD in a desktop. Full-sized PC parts can be surprisingly sturdy, but the Steam Deck was never really intended to be poked around in, so we’re going to be dealing with some preposterously tiny screws, plastic casing that really doesn’t want to budge, and highly fragile components. To name a few things.
Besides the new SSD itself, then, there are few more pieces of kit you’ll need before starting the installation in earnest. I’d recommend you also take a couple of preparatory steps as well:
All sorted? Then enough preamble – let’s get that new SSD in place.
Image credit:Rock Paper Shotgun
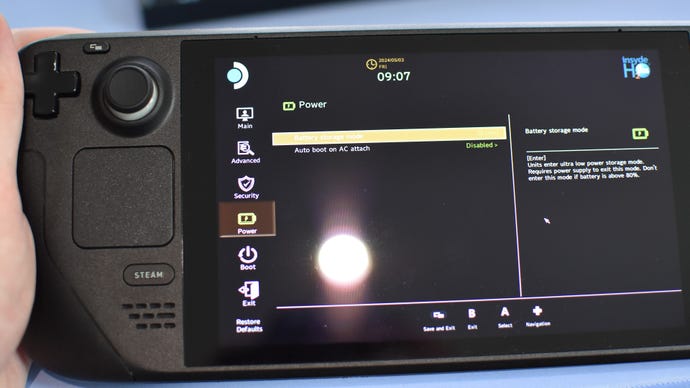
Step 1:First up, put your Steam Deck into Battery Storage mode, to prevent accidentally powering it on while you’re working on the insides. Start with your Deck switched off, then hold down the Power button and the Volume Up button at the same time to boot into the BIOS. Once you’re in, use either the D-pad or the right trackpad to navigate to Setup Utility, then the Power menu. Select Battery Storage mode and confirm. Now, your Deck will shut down and won’t respond to any pressing of the power button (though don’t worry, we’ll reverse this later).
Image credit:Rock Paper Shotgun
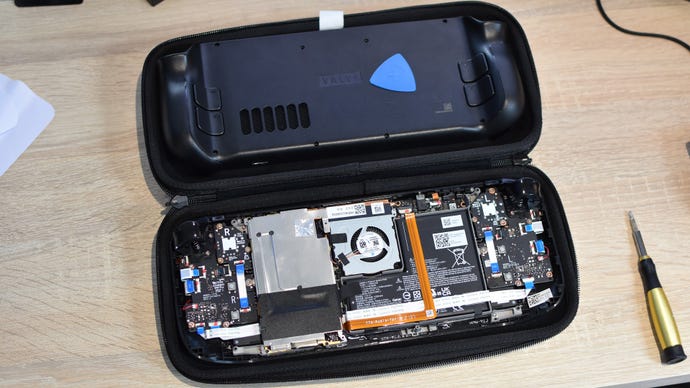
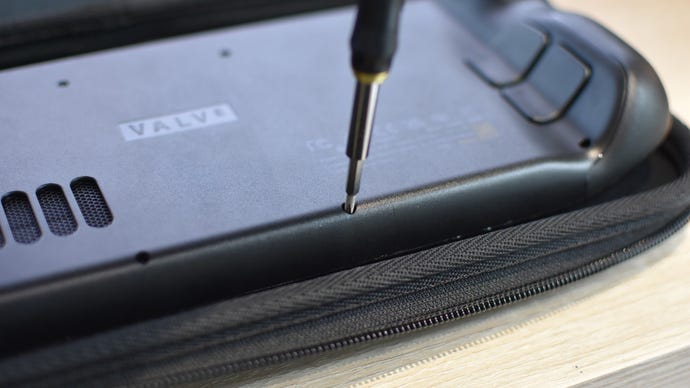
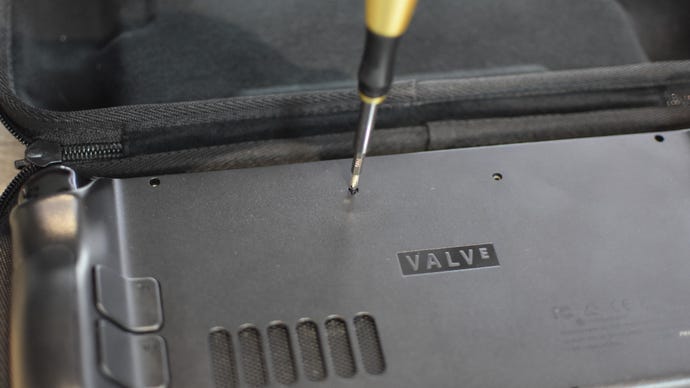
Step 2:Lay out your Steam Deck’s bundled carry case and place the handheld face-down inside, holding it in place without putting any stress on the thumbsticks. Then get to work removing all the screws – on the original Steam Deck, some of these are different sizes, so do keep track of which screws need to go back in which holes. Laying the loose screws out on a table, in the pattern that matches their positions on the Steam Deck, can help. On the Steam Deck OLED, all the screws are identical, so you don’t need to be so careful (beyond not losing any).
Image credit:Rock Paper Shotgun
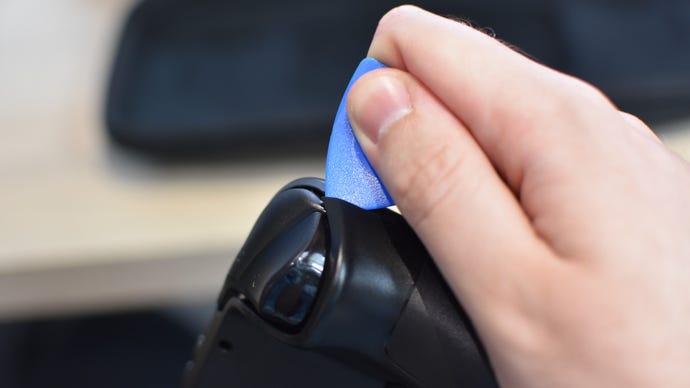
Step 3:With all the screws removed, VERY CAREFULLY remove the Deck’s back cover. This is where a proper pry tool is useful, as you can just work it inside the seam and run it along the edge to slowly push the rear cover away from the body.
Image credit:Rock Paper Shotgun
The next step varies depending on which Steam Deck version you have, so OLED owners, skip a paragraph.
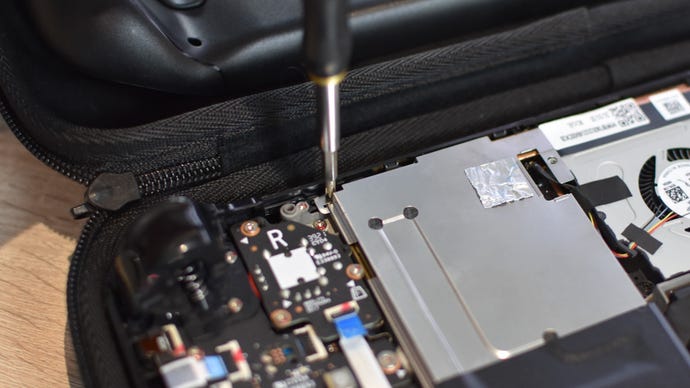
Step 4 (LCD Steam Decks):On the left side of the Deck’s internal layout is a large metal plate. On newer models, this should be plain black, with just a couple of small screws holding it in place. On older Decks, it’s silver-coloured, and has a small piece of foil hiding a third screw, so you’ll need to carefully peel this back to access it. In both cases, remove all the screws holding the plate in place, keep them safe to the side, and (also carefully) lift away the plate. Avoid touching any of the thermal pads on the underside as you do so.
Image credit:Rock Paper Shotgun
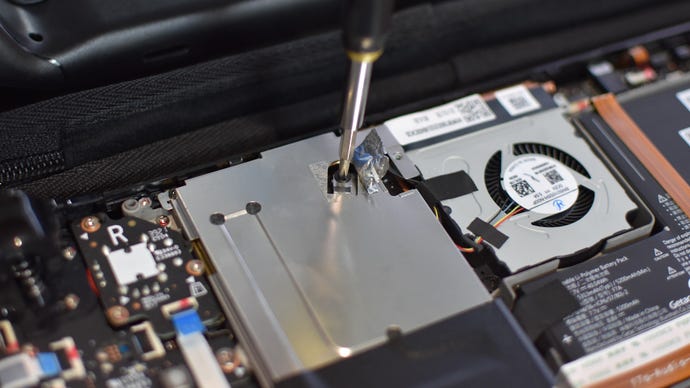
Image credit:Rock Paper Shotgun
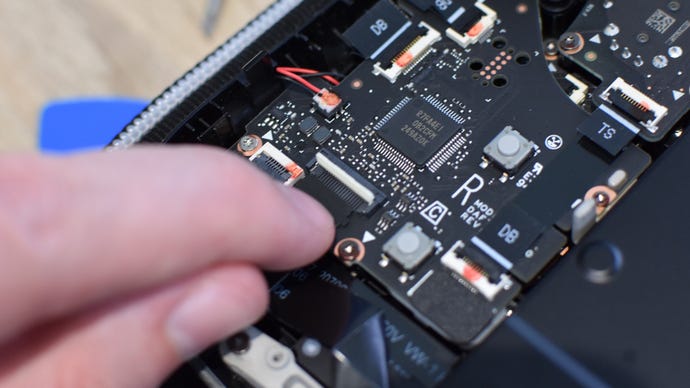
Image credit:Rock Paper Shotgun
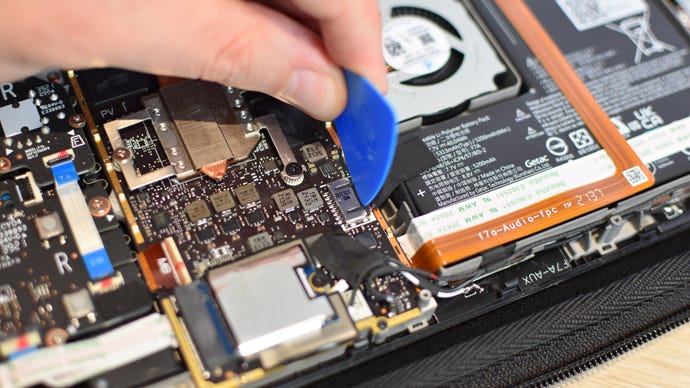
Image credit:Rock Paper Shotgun

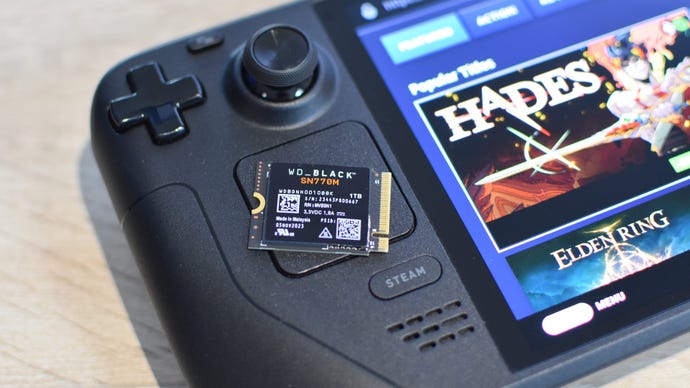
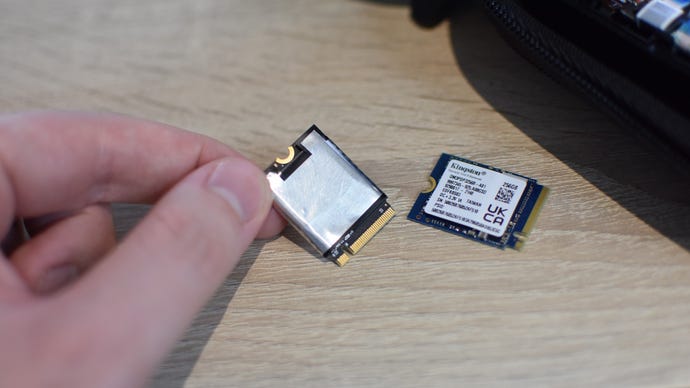
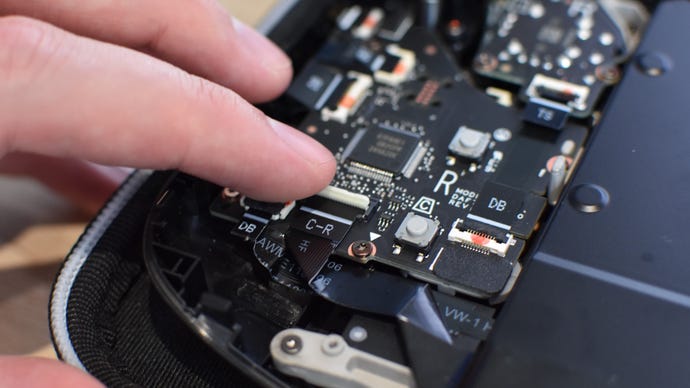
Step 7:Remove that shiny sheath from the old SSD and slide it onto your new drive, in the exact same position. The new drive’s screw cutout and the connecting contacts should both be exposed.
Image credit:Rock Paper Shotgun
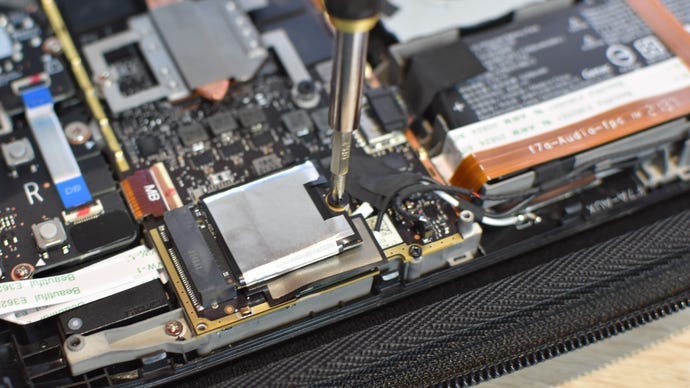
Step 8:Push the new SSD into the M.2 slot, and use the same screw you just removed to fasten it in place.
Image credit:Rock Paper Shotgun
Step 9:Reconnect the battery cable, then replace the metal cover and fasten that down with its screws as well. On older LCD models, re-cover that third screw with the foil.
Image credit:Rock Paper Shotgun
On the Steam Deck OLED, don’t forget to reconnect that ribbon cable too. Slide it in fully, then flip the plastic tab back down to secure it.
Image credit:Rock Paper Shotgun
Step 10:Snap the Steam Deck’s backplate back into place, making sure it’s fully clipped together all around, and replace the screws you removed in step 2.
Image credit:Rock Paper Shotgun
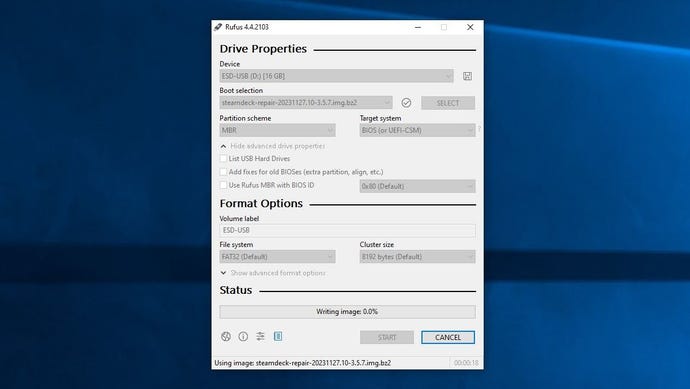
Step 11:Good news! That’s the tricky part done. But you still need to install SteamOS, so on your PC or laptop, head to Valve’sSteam Deck recovery instructionspage and download the SteamOS recovery image. You’ll also need an appropriate writing tool to turn your USB stick into a bootable device that the Deck can use – if you’re on a Windows PC, Valve recommendRufus, as do I.
Once both the recovery image and Rufus are downloaded, plug in your USB drive and run Rufus. It should detect and list your drive in the “Device” field. Just below that, click the “Select” button, navigate to your downloads folder, and select the recovery image (it’s a .bz2 file) to set it as the boot selection. Finally, click “Start” then “OK” to write the SteamOS image to the USB.
Image credit:Rock Paper Shotgun
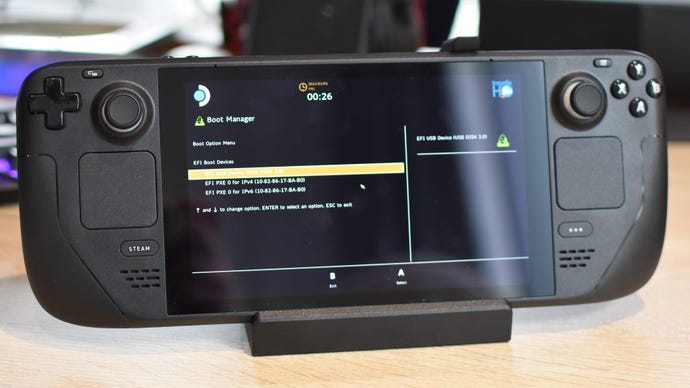
Step 12:Start prepping your Steam Deck for the OS install. First, plug in its charging cable and press the power button – this will have it leave Battery Storage mode. Then, unplug the power and connect a USB-C adapter, hub or docking station, into which you’ve also connected the USB drive with the SteamOS recovery image.
Once everything’s connected, hold down the Volume Down button and press the power button once. After a few moments, your Steam Deck will load up its boot menu. Select the “EFI USB Device” option here.
Image credit:Rock Paper Shotgun
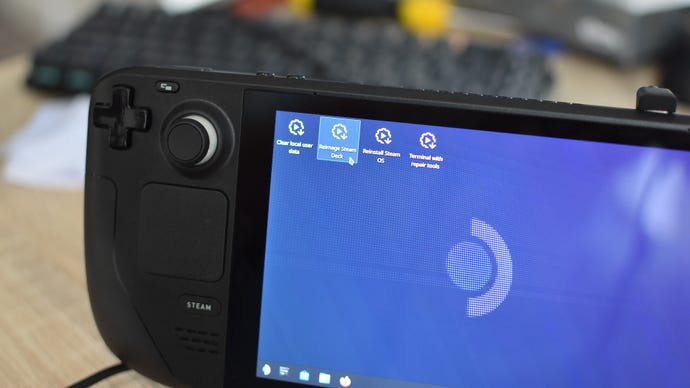
Step 13:Now, wait a bit while SteamOS settles in on your new SSD. At one point you might face a sustained black screen, but resist the urge to reset and just let the installation process play out. Eventually, you’ll arrive on a desktop-like screen. Use the right trackpad to double-click the “Reimage Steam Deck” shortcut here, then click “Proceed” once the dialogue box appears. Finally, after waiting a minute or two for the reimaging to complete, click “Proceed” again.
Image credit:Rock Paper Shotgun
You’ll see a bunch more code on the screen after this, but give the Steam Deck a moment and it will soon reboot into the same standard setup procedure that you encountered when it was fresh out of the box. At this point, you can consider your new SSD installed. Disconnect that USB adapter/hub/dock, get set up, and log into your Steam account. There are games that need installin’.
