HomeGuidesBlack Myth: Wukong
Black Myth Wukong Man-In-Stone questline walkthroughAnd how to find the NPC near the Squall Hideout Shrine
And how to find the NPC near the Squall Hideout Shrine
Image credit:Rock Paper Shotgun/Game Science
Image credit:Rock Paper Shotgun/Game Science
Looking to free the man trapped in the rock in Chapter 2 of Black Myth: Wukong?You’ll first meet the Man-In-Stone (as the character is called) in the Fright Cliff region ofBlack Myth: Wukong, inChapter 2of the game. He’s stuck in a rock, and needs help escaping, simple as that.
The Man-In-Stone questline is a fairly short one, but it’s well worth completing properly. Black Myth: Wukong follows thesoulsliketradition of adding some rather convoluted questlines which you must puzzle throughout without the help of a journal to track your progress.
In this guide, we’ll walk you through how to complete every step of the Man-In-Stone quest in Chapter 2 of Black Myth: Wukong, including exactly where you can find the NPC near Squall Hideout.
To see this content please enable targeting cookies.Manage cookie settings
To see this content please enable targeting cookies.Manage cookie settings
Man-In-Stone quest steps
We’ll go over the entire quest in more detail below, but first: here is a quick summary of all the steps you must take to complete the Man-In-Stone questline in Black Myth: Wukong.
Where to find the Man-In-Stone
1. Complete Chapter 1 and begin Chapter 2
The Man-In-Stone is a character who you’ll meet about halfway into Chapter 2 of Black Myth: Wukong. So the first step in order to start this questline is tocomplete Chapter 1. Chapter 1 is fairly small and linear compared to the others, so it shouldn’t take you too long to get through the3 required Yaoguai King boss fightsin order to start Chapter 2!
2. Defeat the Rat King and Second Rat Prince
The Rat King and Second Rat Prince face you together at the end of the Sandgate Village. |Image credit:Rock Paper Shotgun/Game Science
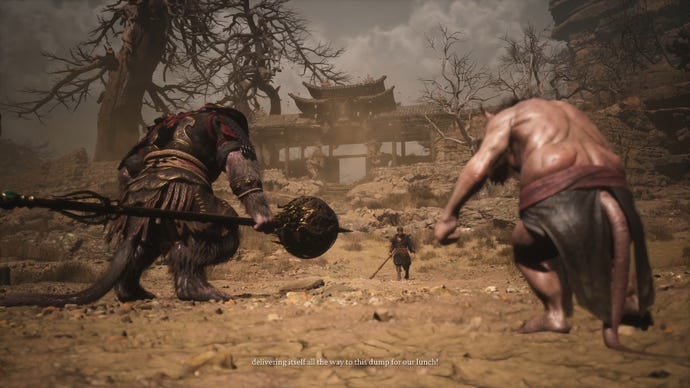
Your first major milestone in Chapter 2 is found at the end ofSandgate Village, where you begin the chapter. Once you’ve fought your way past the various Rat enemies patrolling the area, take the right-hand path through the large clearing where thetwo-headed Rat Captainscan be found. There are also several Rat Archers looking down on the area, so be careful.
Proceed to the double doors at the end of the area, and open them to begin your first boss fight against theRat Kingand his son, theSecond Rat Prince. There are two ways to go about this fight:
The second option is considerably easier, but whichever option you choose, you’ll need to defeat this boss encounter before you can reach the Man-In-Stone.
3. Take the right-hand path into Fright Cliff
Take the right-hand path from the Valley Of Despair to reach the Fright Cliff region. |Image credit:Rock Paper Shotgun/Game Science
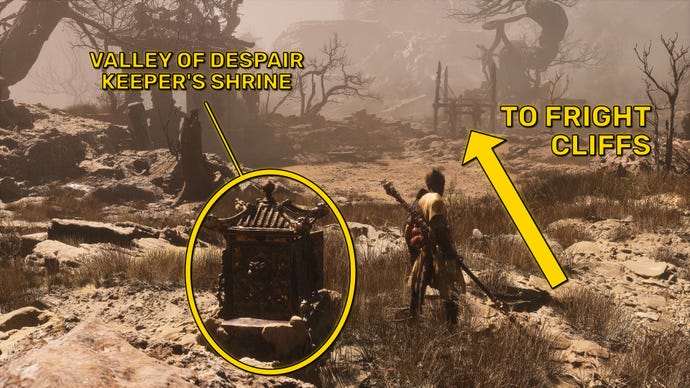
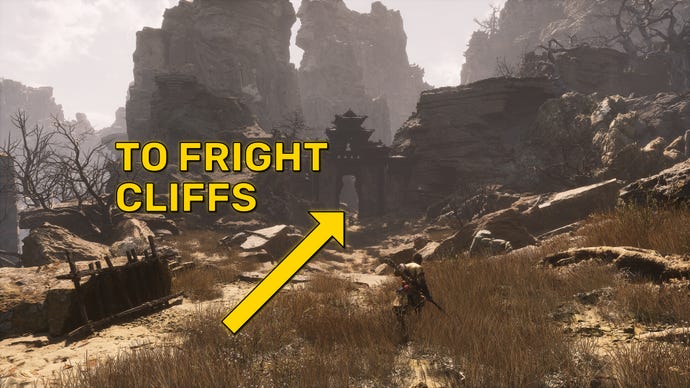
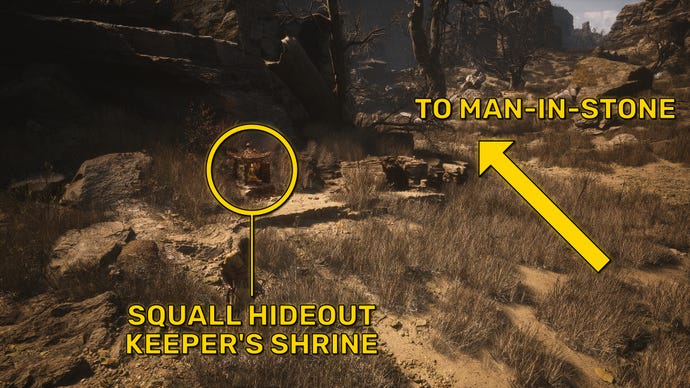
After defeating the Rat King and Second Rat Prince, feel free to rest at the"Valley Of Despair"Keeper’s Shrineon the edge of the arena. After that, the path splits before you. Take the right-hand path over the bridge, and follow it all the way until you enter theFright Cliffregion. A short distance in front of you will be the"Squall Hideout"Shrine where you can rest if needed.
4. From “Squall Hideout”, turn right and take the lower path
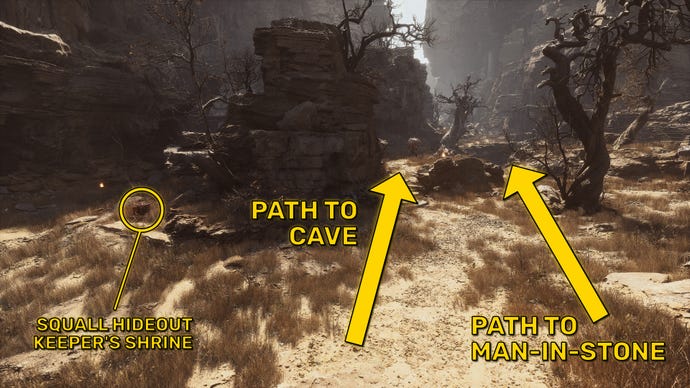
Image credit:Rock Paper Shotgun/Game Science
Follow the arrows to find the Man-In-Stone. |Image credit:Rock Paper Shotgun/Game Science
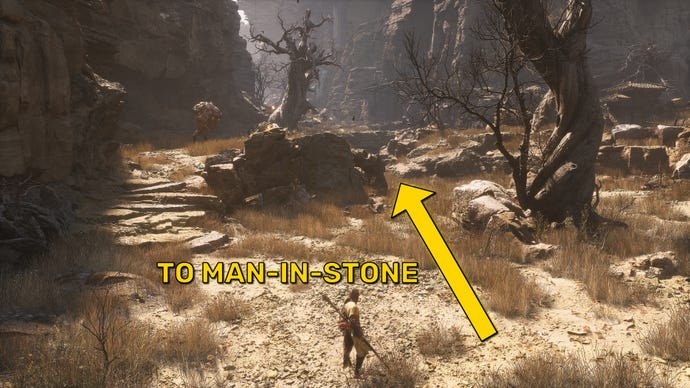
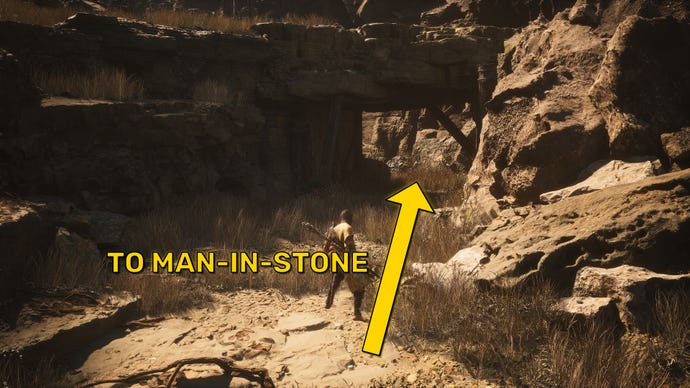
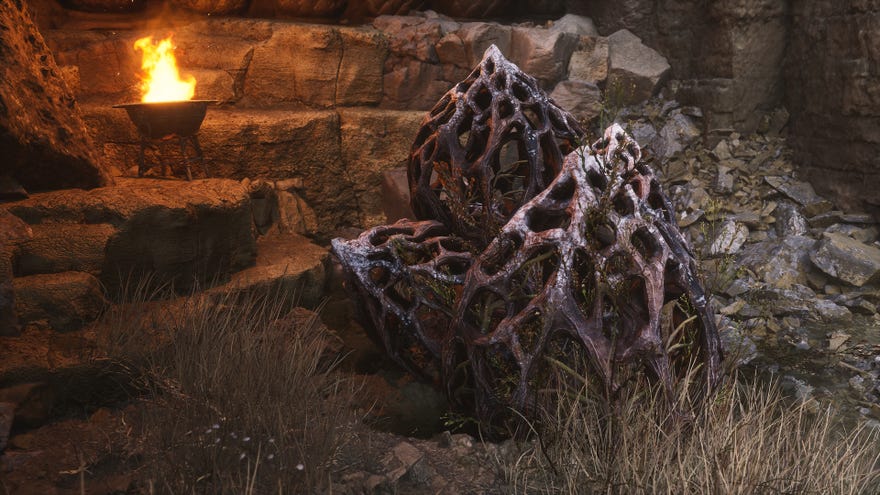
Again, the path before you splits at Squall Hideout. To find the Man-In-Stone, you must turn right, and around the corner you should see several paths, one of which is a lower path that cuts through the rock, like a miniature ravine. Take this lower path, and at the very end of the path you’ll see a strange rock formation.This is the Man-In-Stone, and the starting point of the questline.
Man-In-Stone quest walkthrough
5. Speak to the Man-In-Stone at the end of the path
He doesn’t look much like a living thing, but this is the Man-In-Stone alright. |Image credit:Rock Paper Shotgun/Game Science
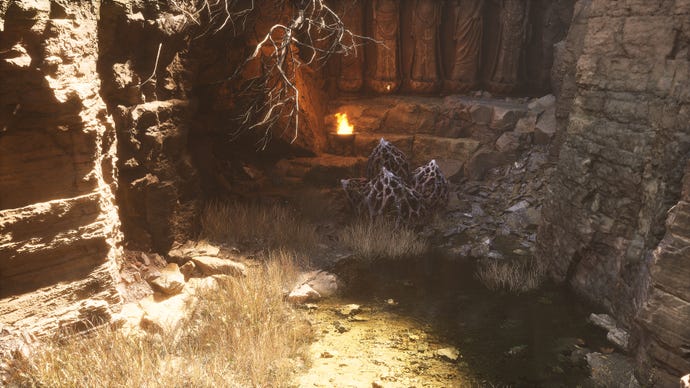
Your next step, then, is tohead into the cavefurther into Fright Cliff, and discover the source of the spell holding the Man-In-Stone prisoner.
6. Enter the cave further into Fright Cliff
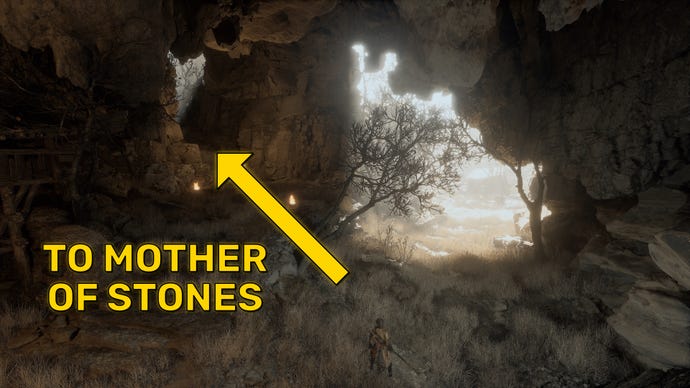
Image credit:Rock Paper Shotgun/Game Science
There are multiple paths into the cave just before the Rockrest Flat Shrine in Fright Cliff. |Image credit:Rock Paper Shotgun/Game Science


The cave in question can be accessed fromeither path left or rightof the “Squall Hideout” Shrine, but from the Man-In-Stone’s location the easiest way is to just go back to the start of the lower path, and instead take the raised path just to the left of it. You’ll pass aBuddha headwhich you can interact with to obtain aBuddha’s Eyeball. After that, you can either take the first left (for a chest and a longer path into the cave) or the second left (which leads directly into the cave).
7. Take the left path before the cave exit
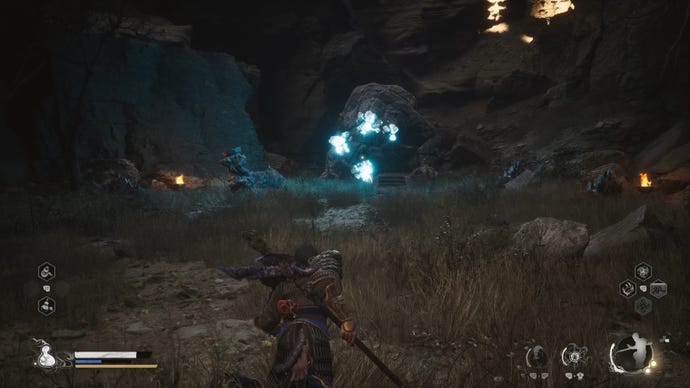
Take the left path in the cave to reach the Mother Of Stones, the boss you need to defeat for this questline. |Image credit:Rock Paper Shotgun/Game Science
Once inside the cave, deal with the two rangedBlazeboneenemies on the wooden platform, and then head past them as if to exit out into the open once more. But instead of heading out of the cave fully, turn left at the cave mouth and you’ll see a path curving upwards and to the left. Take this path up towards an elevated area of the cave.
8. (Optional) Defeat the Poisestone for its Spirit
9. Defeat the Mother Of Stones
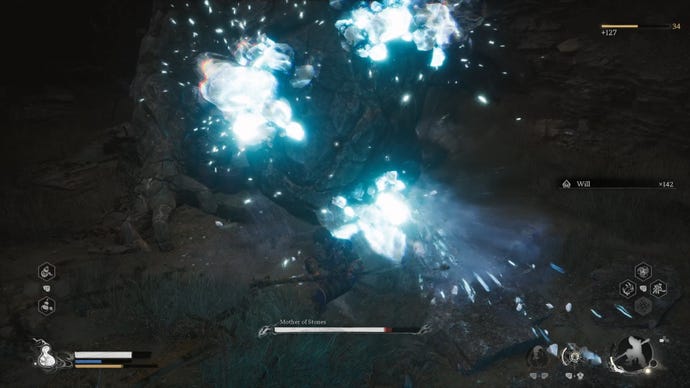
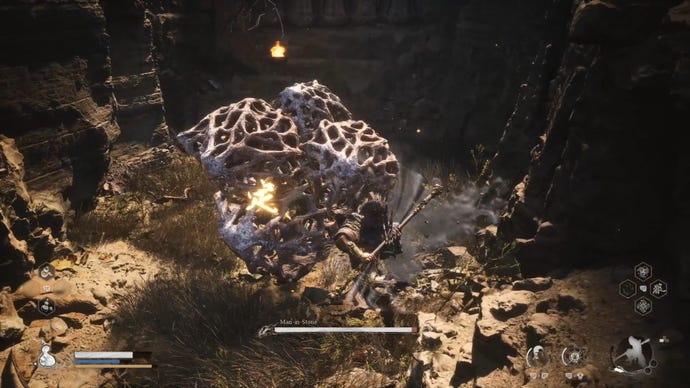
Attack the Mother Of Stones to begin the fight. |Image credit:Rock Paper Shotgun/Game Science
Proceed further into the cave’s upper level and you’ll come to a cavern. At the end of the cavern is a large rock creature with crystals embedded in its front. Attack the creature to begin the boss fight against theMother Of Stones.
As an aside: you can turn right and exit out of the cavern onto a walkway whereanother Buddha headawaits you!
Ignore her minions and just focus on dealing damage to the Mother herself. |Image credit:Rock Paper Shotgun/Game Science
10. Deliver the Stone Essence to the Man-In-Stone
Once you’ve dealt with the Mother Of Stones,return to the Man-In-Stone, who is waiting patiently where you left him at the end of the lower path in Squall Hideout. Interact with him to deliver him the Stone Essence.
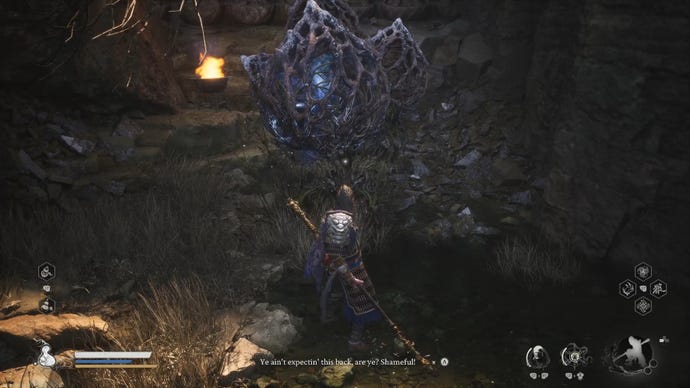
Upon delivery of the Stone Essence, the Man-In-Stone will triumphantly burst out of the ground, taunting you for your gullibility. Turns out all he wanted was a pawn to fetch the Stone Essence for him. Bastard.
Well, that’s gratitude. |Image credit:Rock Paper Shotgun/Game Science
You can keep talking to him, but he’ll give you short shrift. So the only logical thing to do is…
11. Attack the Man-In-Stone until he surrenders
You may have noticed that after the Man-In-Stone emerges from the ground, he becomes targetable with your lock-on, just like an enemy.Attack him, and you’ll prompt a miniboss fight against the Man-In-Stone - if you can call it that. He doesn’t have much health at all, so it’s very easy to force him to submit.
Don’t worry, the Man-In-Stone is a pushover. |Image credit:Rock Paper Shotgun/Game Science
After he loses all his health, he’ll retreat back into the ground and plead for mercy. He’ll also return the Stone Essence to you to help make amends, and you’ll receive a new Spell:Azure Dust, a transformation spell that turns you temporarily into a rock guai which is immune to status effects.
Defeating the Man-In-Stone gives you the handy Azure Dust transformation spell. |Image credit:Rock Paper Shotgun/Game Science

The Man-In-Stone also states that if you return to him later, he’ll offer you his treasures in exchange for a payment of Will (the main currency of Black Myth: Wukong).
12. Reload and interact with the Man-In-Stone to open his shop
Return to the Man-In-Stone after defeating him and he’ll have opened his shop for you to return to when you like. |Image credit:Rock Paper Shotgun/Game Science
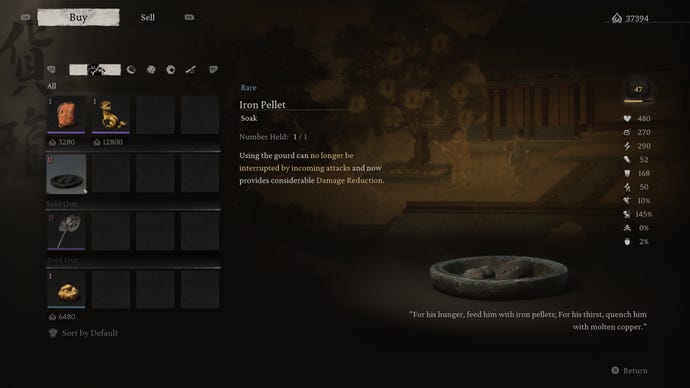
You can purchase the following items from the Man-In-Stone’s shop:
And with that, we’ve reached the end of the Man-In-Stone questline in Black Myth: Wukong. While you’re here, you can make sure you’ve found everything so far with our guides on theChapter 1 bossesandall Black Myth Wukong bosses, as well as thebest Skills to unlock first. We’ve also got guides on thePC requirementsandhow to absorb Spiritsas well.
