HomeGuidesBlack Myth: Wukong
Black Myth Wukong: Chapter 5 walkthroughHere’s a complete guide to Chapter 5, including how to open Bishui Cave
Here’s a complete guide to Chapter 5, including how to open Bishui Cave
Image credit:Rock Paper Shotgun/Game Science
Image credit:Rock Paper Shotgun/Game Science
Looking for a Black Myth: Wukong Chapter 5 walkthrough?Chapter 5 of Black Myth: Wukong is much more linear and straightforward compared to Chapters 2 to 4, which is a welcome break. But linear doesn’t mean easy, and you’d best be prepared to deal with some nasty flame status effects as you climb the lava-oozing peaks of the Flaming Mountains.
Hidden in this hot region is the tragic story of the Bull King and his family, along with some very devious bosses, three of which are hidden in the secret Bishui Cave. In this guide, we’ll present a full rundown of everything you need to do to completeChapter 5 of Black Myth: Wukong, including how toenter the Bishui Cave.
Ourwalkthrough hubhas links to all of our Black Myth: Wukong guides. You can also navigate between our Chapter walkthroughs below:
To see this content please enable targeting cookies.Manage cookie settings
To see this content please enable targeting cookies.Manage cookie settings
Black Myth: Wukong Chapter 5 walkthrough
Chapter 5 of Black Myth: Wukong is entitledGolden Child, Crimson Blood. It is divided into the following areas - click on each name to be taken to the section of the walkthrough where that area begins. You should also check out our guide toall bosses in Chapter 5for greater details on fighting the foes in your path.
If you need some extra visual guidance on where to go and what to do in the Flaming Mountains, we’ve embedded our handmadeChapter 5 mapfor you below, so you can refer back to it while following along with this walkthrough.
Our handmadeChapter 5 mapgives you a clear idea of the locations of all major items and bosses, and the connections between various Shrines and regions.Image credit:Rock Paper Shotgun

1. Woods of Ember walkthrough
Woods of Ember: Ashen Pass I
First things first - you’re going to be dealing with the Scorch Bane a lot this Chapter, so make sure you have lots of Body-Cooling Powder in your inventory or equip the Fireproof Mantle Vessel, which you got back inChapter 1.
The Chapter starts out with you and Zhu Bajie fighting a wave of Revenants. Beat ‘em up, go forward, and unlock the “AshenPass I” Keeper’s Shrine. Then proceed onwards until you see thePale-Axe Stalwartengaged in combat with some enemies. Fight alongside him or take the chance to hit him while he’s preoccupied - either way,Pale-Axe Stalwartwill assume you’re a foe until his health is almost depleted, after which he’ll give up. Exhaust his dialogue to learn of the five Element Carts that inhabit this mountain - you’ll need to defeat these carts to unlock Bishui Cave.
Best get used to the fire-spitting tactics of these carts now. |Image credit:Rock Paper Shotgun/Game Science
The first cart is right up the stairs beyond Pale-Axe Stalwart and along the bridge.Brown-Iron Cartexhibits many of the behaviours that you’ll quickly grow accustomed to as you battle these sentient wagons. Beware the flames and fireballs spitting from its mouth, and if you can, roll towards its side and pummel its wheels to deal damage. AfterBrown-Iron Cartis demolished, cross the bridge to find the next Shrine.
Woods of Ember: Camp of Seasons
Rest up at the “Camp of Seasons” Shrine and go over the bridge, through the caves, then past another bridge. The road branches off here; to the left is a treasure chest, and if you go up the stairs on the right you’ll findThe ReliefMeditation Spot.
Proceed onwards and be sure to check out a chest in a building along the way to get theMount Lingtai SeedlingsSoak. Then cross one more bridge and you’ll reach the “Height of Ember” Shrine.
Woods of Ember: Height of Ember
Just a few feet away from the “Height of Ember” Shrine, a big Yaoguai Chief namedFather of Stonesjumps out of nowhere and tries to stomp you.Father of Stonesis a pretty slow fella, so Immobilize him, pummel away, and absorb his Spirit. If you take the time to explore the area you were in before you were rudely interrupted, you can find aLuojia Fragrant Vine.
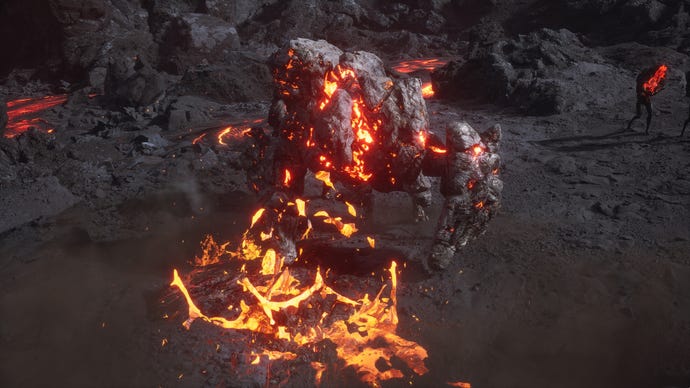
When you’re ready, head through the door and keep proceeding. A health bar for theGray-Bronze Cartwill pop up, and you can drop downwards (and suffer some damage) to immediately engage it. I recommend you veer right to explore a cave, which is full of treasure, including a Charface Spirit. The cave exit eventually leads to a narrow path that takes you to the boss fight proper.
The tight confines of this battle makes avoiding Gray-Bronze Cart’s fire quite difficult. |Image credit:Rock Paper Shotgun/Game Science

Here we have Fast as Wind and Quick as Fire. Insert joke about making heads roll here… |Image credit:Rock Paper Shotgun/Game Science
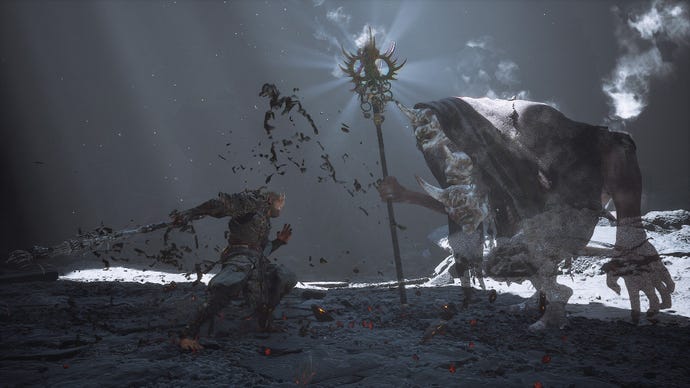
Fast as Wind and Quick as Fireare a pair of bosses that immediately engage you if you keep on walking. Chapter 5 has a lot of these tag-team duos, and they’re fairly annoying but not too hard at the end of the day. Be prepared to dodge and switch your enemy tracking to focus fire on one target, sinceFast as Wind and Quick as Firewill roll all over the place, alternating between burning you or knocking you over with wind attacks.
Woods of Ember: Ashen Pass II
When the two-headed duo are defeated, you can activate the “Ashen Pass II” Shrine at the far end of the boss arena. Keep going and you’ll meet Pingping Fox, Bull King’s daughter. Watch the cutscene and then follow her to head down into Furnace Valley, the next area.
2. Furnace Valley walkthrough
Furnace Valley: Valley Entrance
Go down the slope and take note of the lava all over the ground here. (Once again, be sure you have your Fireproof Mantle at the ready!) If you want to battleFlint Chief, an easily missable boss, head left into the lava just before you reach the large archway, and then veer right. You’ll spot a bunch of rocks that come together to formFlint Chief, who’s similar to the other rock Yaoguai Chiefs that you battled inChapter 2. Dodge like hell to avoid its magma spurts, and bonk it on the head with fully charged heavy attacks.
If you explore one of the few pathways in this area without any lava, you’ll come across a seemingly deceased Element Cart. The cart has a whip sticking from it; pull the whip a few times to hear the moans of your old friendMa Tianba, the horse Guai who you’ve hopefully bumped into in every Chapter prior to this one. (Go back and look at all of our walkthroughs if you haven’t!)
There’s not much you can do the first time you run into this cart, but come back later to finally finish Ma Tianba’s sidequest. |Image credit:Rock Paper Shotgun/Game Science
Mark the location of this cart in your mind - once you defeat theKeeper of Flaming Mountains and Yin-Yang Fishlater in this chapter, return and pull the whip a final time to get the very decentDark ThunderTransformation, which lets you turn into Ma Tianba and unleash lightning attacks.
When you’re done exploring the lava-covered floors, follow the path upwards and you’ll encounter the boss arena ofCloudy Mist and Misty Cloud, another Guai duo. You’ll face the same targeting difficulties in this fight as the one against Fast as Wind and Quick as Fire. After a while, Cloudy Mist and Misty Cloud will also start alternating their attacks back and forth. Do enough damage to one and he’ll vanish, forcing you to contend with his buddy. Once again, they’re annoying - but not too hard. Once they’re dead, go up the stairs to reach the “Rakshasa Palace” Shrine.
It’s hard to get a screenshot of both Cloudy Mist and Misty Cloud, as they keep swapping in and out of the fight. |Image credit:Rock Paper Shotgun/Game Science
Furnace Valley: Rakshasa Palace
Rakshasa Palace is full of quite a few treasures, so explore the various paths around the Shrine to find a Celestial Taiyi Pill and plenty of Will. Beware the Flame Rhino Master enemies and the massive shield-wielding Sea Rakshashas, who are considerably tough. If you manage to fell both of those Sea Rakshashas, you’ll find that one of them carries theGold ButtonCurio, which significantly increases your attack power while at full health.
The bigger they are, the harder they fall. Knock these two giants down to size to get a handy curio. |Image credit:Rock Paper Shotgun/Game Science
When you’re done clearing the area, enter the lava area to find the old sage Yuan Shoucheng, who once again surprises with his ability to turn up in the most random locales. There’s a glowing barrel here with an Awaken Wine Worm; grab it and then talk to the sage. If you have a fully upgraded Medicine Buddha Gourd, he’ll let you obtain theSupreme Gourd, which tops our list of thebest Gourds in Black Myth: Wukong.
After your Gourd upgrade, go into the pagoda to the right and keep moving onwards to find the “Emerald Hall” Shrine.
Furnace Valley: Emerald Hall Shrine
Before we go any further, be forewarned that you’re about to step into a boss battle that ends theMa Tianbaquestline. If you want the Dark Thunder Transformation, be sure that you’ve found Ma Tianba in Chapters 1 to 4!
Keeper of Flaming Mountains awaits us as the next dapper fellow who just happens to hate monkeys. |Image credit:Rock Paper Shotgun/Game Science

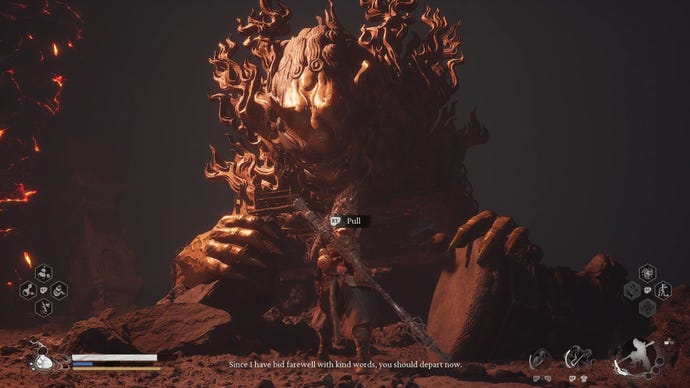
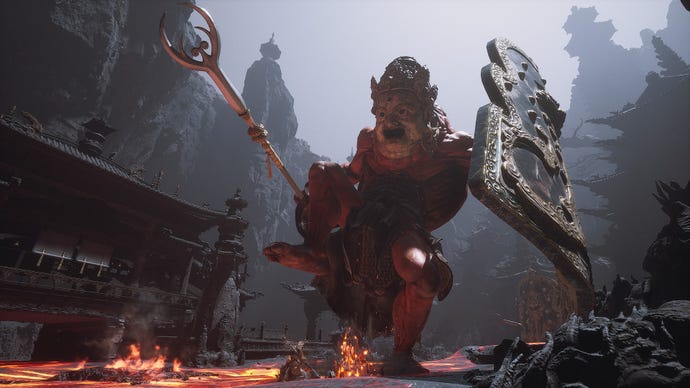
When ready, go up the stairs and you’ll be thrown into a fight againstKeeper of Flaming Mountains and Yin-Yang Fish.The fights happen back-to-back, and if you die you’ll have to do both again. Of the two, fightingKeeper of Flaming Mountainsis easier, as Zhu Bajie will help you. Dodge his projectiles, take out the Revenants that he summons, and try to attack from afar with Thrust stance. Once the Keeper’s health is low, he’ll summon Ma Tianba as long as you met the horse in the last 4 Chapters. Ma Tianba is tough, with a whip that has a long range and deals heavy damage. Immobilize him and stay out of that whip’s range.
The Keeper of Flaming Mountains and Yin-Yang Fish fights take place in a neat, otherworldly arena where the floor is water. |Image credit:Rock Paper Shotgun/Game Science
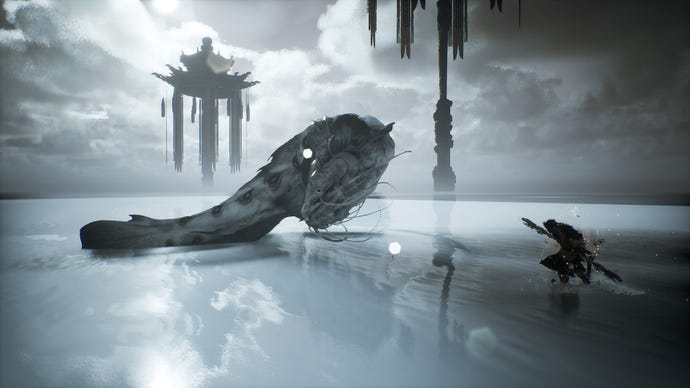
The Yin-Yang Fish is a harder opponent, mostly due to its erratic movements and painful tail swipes. Use Cloud Step to get close to the fish and dodge its worst attack - when it floats in the air and summons a barrage of projectiles to hit you in a row. This attack will deplete your health bar rapidly, so avoid it at all costs.
After the fight, examine the Emerald Hall to pick up theLoong BalmDrink and theSlumbering Beetle HuskSoak.The BuddhaMeditation Spot is in this area as well.
This is also a great time to return to the “Valley Entrance” Shrine and pull the whip on the fallen cart to finally unlock Ma Tianba’s Dark Thunder Transformation. While you’re at it, you should also take a quick trip back to the"Ashen Pass I" Shrine at the start of this Chapter to speak with Pale-Axe Stalwart, who has new dialogue about the Element Carts that must be uttered in order to unlock the secret area of this Chapter.
When ready, follow the path leaving the hall until you go up a set of stairs and run intoCrimson-Silver Cart. This one’s notably more aggressive than the other carts you’ve faced thus far, and I died a few times before I started takingCrimson-Silver Cartseriously. Watch out for the flames that it shoots from its sides, and try to angle around the cart to hit it from behind as much as you can.
I’m tired of all these darn Element Carts on this darn Flaming Mountain! This one especially, since it breathes too much fire. |Image credit:Rock Paper Shotgun/Game Science
If you spoke to Pale-Axe Stalwart recently, he’ll be present in this area and you can talk to him after beating Crimson-Silver Cart. Be sure to exhaust all his dialogue before heading on.
3. Field of Fire walkthrough
Field of Fire: Ashen Pass III
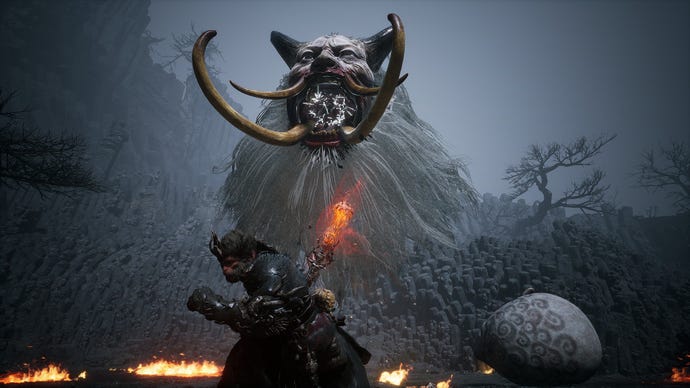
The “Ashen Pass III” Shrine is just beyond the cart fight. If you want a quick optional boss fight, go right of the Shrine to the area with lots of mushrooms and pick the one in the middle to fightNine-Capped Lingzhi Guai. Watch out for this guy’s hat/head, whichNine-Capped Lingzhi Guaiwill throw with great gusto. Once you’ve beaten him, explore the rocks just beyond the boss arena to findThe CragMeditation Spot.
Now you’ll have to move along the main path, contending with a huge ball that rolls back and forth. This is an irksome section, and if you get too greedy and move too far the ball is sure to kill you. Take it slow and duck into the side alcoves of the path for safety. You might notice a wall of fire along the way blocking an area - we’ll return here soon enough.
This damn ball squashed me more times than I care to admit. Not even Cloud Step helps to avoid its onslaught. |Image credit:Rock Paper Shotgun/Game Science

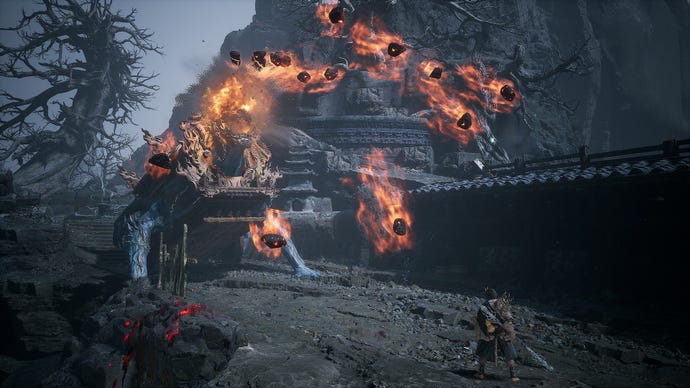
Exploring the newly opened slope behind the fire wall will lead you to theFlint Vanguardboss, who’s yet another rock Guai. Be cautious ofFlint Vanguard’s minions, who can overwhelm you easily if you don’t use A Flock of Many to distact them.
Continue onwards to reach an area with lots of Flamlings and an interactable red swirl coming from the ground. If you’ve got 4 Flame Ores in your inventory (kill the Flamlings to get these), interacting with the swirl spawnsMother of Flamlings, who shoots lots of fire and summons smaller Flamlings to burn you to a crisp.Mother of Flamlingsis only tough if you’ve used up your spells on Flint Vanguard, so don’t be afraid to rest up in between these two fights.
Field of Fire: Cooling Slope Shrine
The “Cooling Slope” Shrine is just beyond the Flamlings arena. You’ll see a gate in the background that seems to be frosted over - this is the entrance to the Bishui Cave and the start of theRusty-Gold Cartboss battle, the hardiest cart of all. This fight only begins if you’ve beaten all the other Element Carts and talked with Pale-Axe Stalwart multiple times, as painstakingly detailed in this guide. (If you skipped a step or two, clickherefor a handy list of tips on unlocking the fight with Rusty-Gold Cart.)
After beating Rusty-Gold Cart, talk to Pale-Axe Stalwart one last time to open Bishui Cave.
4. Bishui Cave walkthrough
Bishui Cave: Purge Pit
As far as secret areas in Black Myth: Wukong go, Bishui Cave is straightforward once you’ve actually entered it. The “Purge Pit” Shrine awaits you not far from the entrance, as doesThe ScreenMeditation Spot, which is visible from the Shrine. (Congrats, this is the last Meditation Spot in the game! Double check ourMeditation Spot locations guideto see if you’ve missed any.)
Now you’ve got three bosses to tackle. The first isBaw-Lang-Lang, another big frog.Baw-Lang-Langis just beyond the cave’s entrance to the left-hand side, and if you’ve fought any of the other frog bosses in this game, you know what to expect.
Top Takes Bottom and Bottom Takes Topare next on the boss list, and appear if you follow the path directly through the cave. They’re the final tag-team duo in this chapter, and actually the folks hidden in that giant ball that gave you so much grief earlier. Once their health gets low,Top Takes Bottom and Bottom Takes Topwill take turns hiding in their halves of the ball. They’re invulnerable when they do so, forcing you to attack the other boss.
Once Top Takes Bottom and Bottom Takes Top are dead, note that you can pick up their Spirit not far from the “Emerald Hall” Keeper’s Shrine. Exit the hall and walk the road that leads to where you fought the Crimson-Silver Cart - along the way you’ll see their fallen ball. Interact with it to get the Spirit, which is a great one for breaking an enemy’s poise when fully upgraded.
So these were the two controlling the giant ball that squashed me so many times. I hate them. |Image credit:Rock Paper Shotgun/Game Science

Bishui Cave: Cave Depths
The “Cave Depths” Keeper’s Shrine comes into view when you forge onwards after beating Top Takes Bottom and Bottom Takes Top. There’s not much of note here besides a bunch of rhino enemies and a chest that containsThe Bull King’s Iron Horn, which you should most definitely take. This is a crafting material needed to make the Bull King’s armor set,one of the finest (and tankiest) armorsin Black Myth: Wukong.
Bishui Cave: Corridor of Fire and Ice
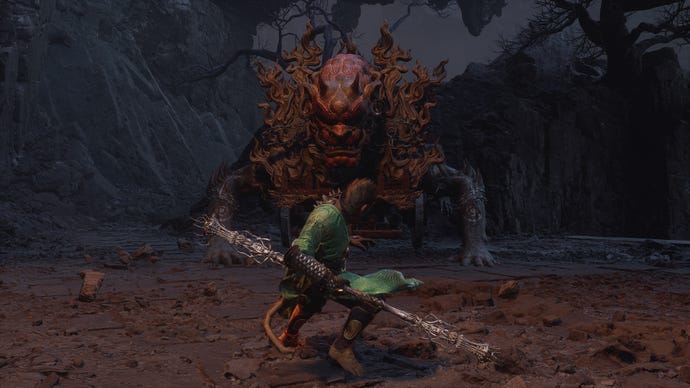
The “Corridor of Fire and Ice” is the last Shrine in the Bishui Cave and lies just before the hardest boss in here - theBishui Golden-Eyed Beast. This guy is a proper bastard thanks to how infuriatingly aggressive he is. Dodge theBishui Golden-Eyed Beast’s initial pounce, Immobilize him, and try your best to stagger him as best you can with light and heavy attack combos. The battlefield will become awfully fiery over the course of this combat, so use the Fireproof Mantle or any consumables you have on hand religiously. Once you fell this big guy, enjoy the cutscene that reveals a little context into the origins of the end boss of this Chapter.
5. Fallen Furnace Crater walkthrough
Field of Fire: Fallen Furnace Crater
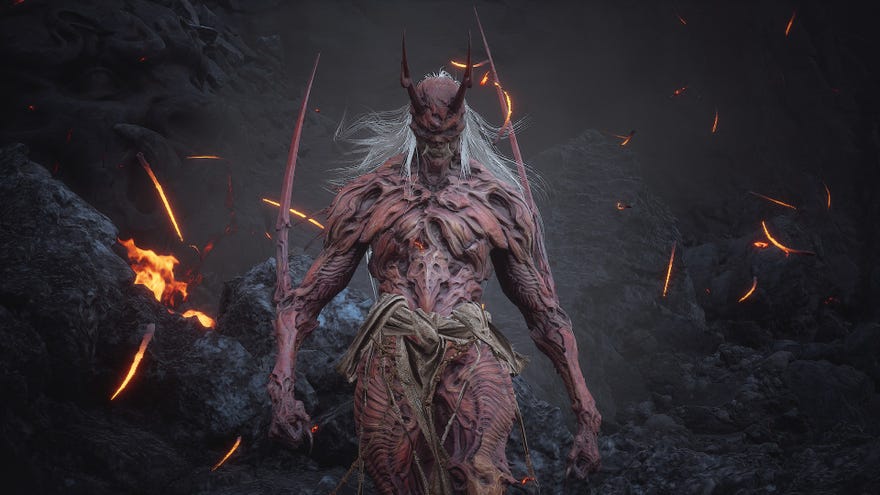
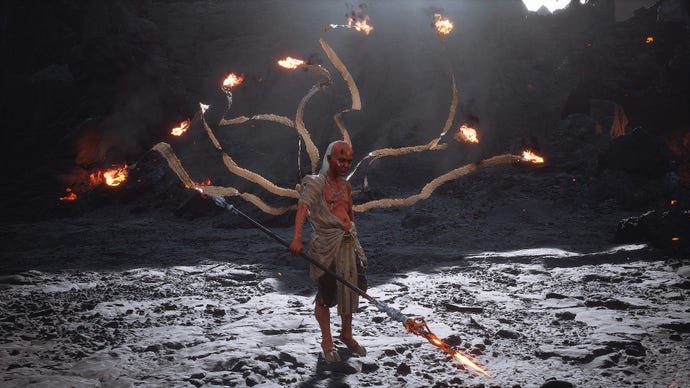
Teleport back to the “Fallen Furnace Crater” Shrine in the Field of Fire zone and get ready for a difficult combat. Then walk into the large opening just beyond the Shrine to initiate a cutscene with Bull King. At the end of it,Red Boy- the wily teen who’s been manipulating everything from behind the scenes - emerges to challenge you.
Red Boy boils with teenage angst against his parents, against Sun Wukong, against everyone. |Image credit:Rock Paper Shotgun/Game Science
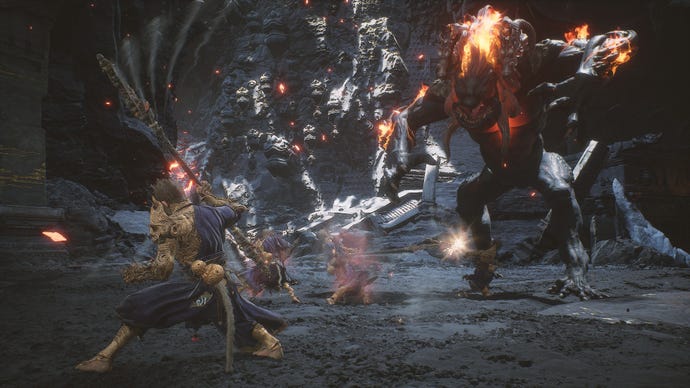
Once Red Boy falls, it seems like the Chapter’s over - until it’s revealed that Red Boy was hiding a second form all along! Meet theYaksha King. Cool electric guitar music will start playing during this boss fight and you’re likely to get super pumped - which is great, because theYaksha Kingdeals a busload of damage. Zhu Baijie will help you in the first half of this battle before peacing out, but don’t expect your pig friend to do much heavy lifting. Thankfully, if you die during this fight, you don’t need to defeat Red Boy all over again.
The Yaksha King is Red Boy’s final form, when all of that teenage angst transforms into radical devilry. Beware his big flaming blades! |Image credit:Rock Paper Shotgun/Game Science
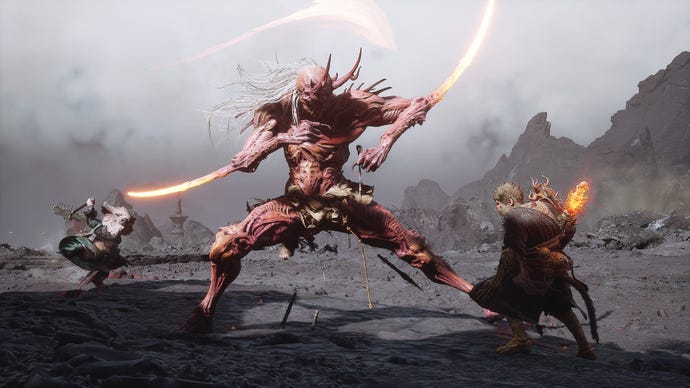
The Yaksha King’s worst attack occurs after his HP has been whittled down a bit. He’ll create two giant flame blades and whirl them around the battlefield. The range on these things is ridiculous, and they’re easily capable of carving off a third of your health bar at a time. He’ll also occasionally slam the blades into the ground, creating a field of flame spikes. Roll out of the way as fast as you can, lest you suffer mightily from area-of-effect damage. Good luck - this is one of my favourite fights in the game.
Congratulations on completing Chapter 5 of Black Myth: Wukong - now you can finally take a rest from constantly worrying about the Scorch Bane. For a more detailed look at all of the Yaoguai in every chapter of this expansive game, take a deep dive into our guide toall bossesin Black Myth: Wukong. If you’d prefer a quick rundown of places to level up and rest, check out our guides toall Keeper’s Shrine locationsandall Meditation Spots. And last but certainly not least is our guide toall Journal entries, which will help you make sense of Black Myth: Wukong’s awesome take on Chinese legend.
