HomeGuidesBlack Myth: Wukong
Black Myth Wukong: Chapter 4 walkthroughHere’s a complete guide to Chapter 4, including how to find Yellow Loong
Here’s a complete guide to Chapter 4, including how to find Yellow Loong
Image credit:Rock Paper Shotgun/Game Science
Image credit:Rock Paper Shotgun/Game Science
Looking for a Black Myth: Wukong Chapter 4 walkthrough?Chapter 4 of Black Myth: Wukong takes the Destined One out of snowfields and into the Webbed Ridge, an eerie realm replete with some very cool (or disgusting, if you prefer) insect Yaoguai. Unlike the two sprawling chapters that preceded it, Chapter 4 is more straightforward, though it does feature a massive, somewhat confusing underground area called the Webbed Hollow.
Secret regions and enemies also abound in Chapter 4, including the Purple Cloud Mountain and Yellow Loong, the toughest of Black Myth: Wukong’s hidden loong bosses. In this guide, we’ll present a full rundown of everything you need to do to completeChapter 4 of Black Myth: Wukong, including how tofight Yellow Loong and unlock the Purple Cloud Mountain.
Ourwalkthrough hubhas links to all of our Black Myth: Wukong guides. You can also navigate between our Chapter walkthroughs below:
To see this content please enable targeting cookies.Manage cookie settings
To see this content please enable targeting cookies.Manage cookie settings
Black Myth: Wukong Chapter 4 walkthrough
Chapter 4 of Black Myth: Wukong is entitledRosy Cheeks, Gray Hair. It is divided into the following areas - click on each name to be taken to the section of the walkthrough where that area begins. For the sake of easy reading, we’ve divided the Temple of Yellow Flowers region up into two parts. You should also check out our guide toall bosses in Chapter 4for greater details on fighting the foes in your path.
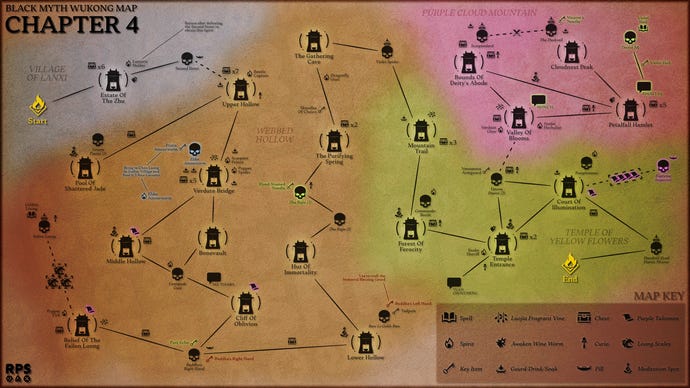
Chapter 4 is overall fairly linear, but there are certain sections with criss-crossing pathways that can make the journey feel a little confusing and overwhelming. Feel free to consult ourChapter 4 mapbelow to keep you on the right track!
Ensure you don’t miss a thing in the Webbed Hollow with our comprehensive and handmadeChapter 4 map!Image credit:Rock Paper Shotgun
1. Village of Lanxi walkthrough
Village of Lanxi: Estate of the Zhu
The creepy village of Lanxi is your first stop in Chapter 4. After you and your buddy Zhu Bajie bust out of a boxy mode of transport, go towards the village to unlock the “Estate of Zhu” Keeper’s Shrine. As you enter the village proper, you’ll meet some of the bug enemies that dominate the place, including Grasshopper Guais, Puppet Spiders and Beetle Captains. All of them have cool designs (in my opinion), but if you’re not a fan of creepy crawlies, things won’t get much better once you enter the door of the Zhu Estate, as you’ll have to fight theSecond Sister, who morphs into a giant spider.
Spider-haters beware! This is only the first of a whole buncha multi-legged fights. |Image credit:Rock Paper Shotgun/Game Science
Despite being the first of several upcoming enemies who will probably terrify arachnophobes, theSecond Sisterisn’t a hard foe. Stagger her with repeated spells and heavy attacks, and Zhu Bajie will help out as well, offering up plenty of wicked words. (He’s got history with the spider sisters and their matriarch, as this Chapter will soon reveal.)
Once the Second Sister is defeated, explore the courtyard to get a Celestial Jade Lotus Pill and then follow your pig friend’s footsteps. You’ll fall into the depths of the Webbed Hollow.
2. Webbed Hollow walkthrough
Webbed Hollow: Upper Hollow
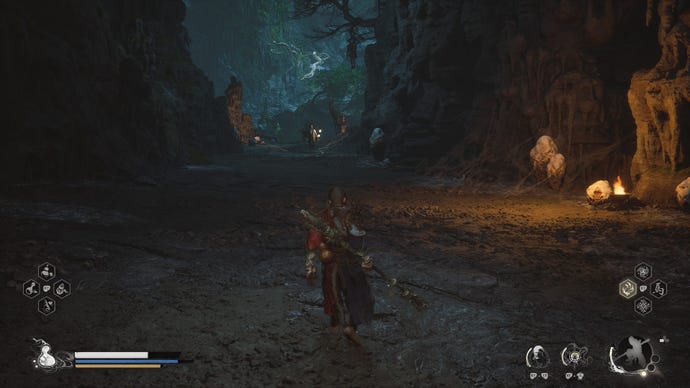
This is the largest area in Chapter 4, and its many twists and turns bring to mind the giant, interweaving areas of Chapters 2 and 3. We’re going to focus on the fastest route through the Webbed Hollow in this guide, but be forewarned that there are several branching tunnels here that lead to items and chests, so don’t be afraid to take your time exploring.
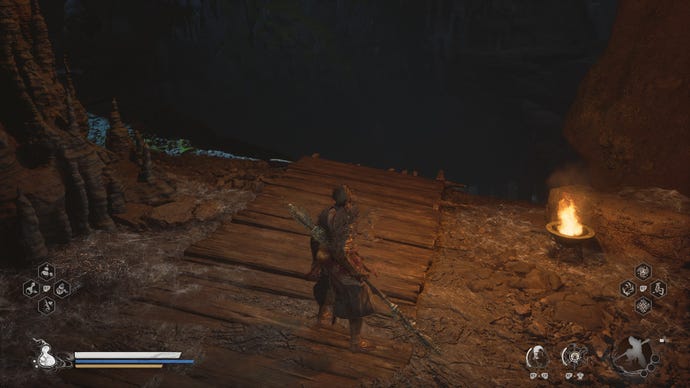
There’s an optional Shrine not far from here that we should unlock now in order to easily access the secret area of this Chapter later. From the egg sac area, follow the torch-lit paths until you spot a wooden platform next to a torch. You can jump down here. Do so, turn right, and continue going downwards.
This is the wooden platform you’re looking for. |Image credit:Rock Paper Shotgun/Game Science
Eventually you will see a crossroads - the right path leads to a room with several Clawed Cocoons hanging from the ceiling. Go past the cocoons, keep following the path until you reach another fork, and go left until you reach a green area with a winding path that leads to a staircase. You can findThe CarvingsMeditation Spot in this area, and the “Pool of Shattered Jade” Shrine isn’t far away.
Webbed Hollow: Pool of Shattered Jade
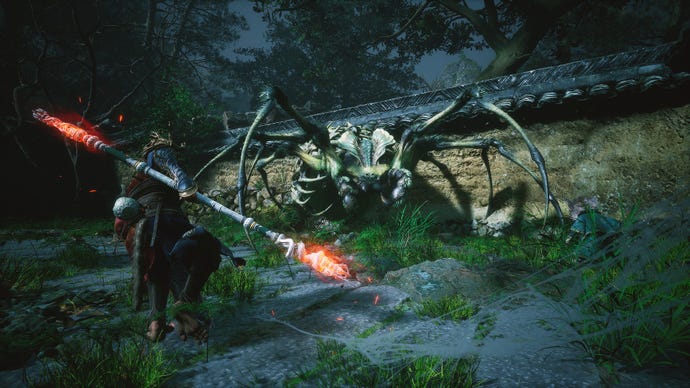
To the right of the “Pool of Shattered Jade” Shrine is the reason we trekked here - a cave that leads to theVenom Daoist, an optional boss that you’ll face twice in this Chapter.
Round one against the Venom Daoist isn’t terribly hard. Take note of his attacks so you know what to expect when he shows up later. |Image credit:Rock Paper Shotgun/Game Science
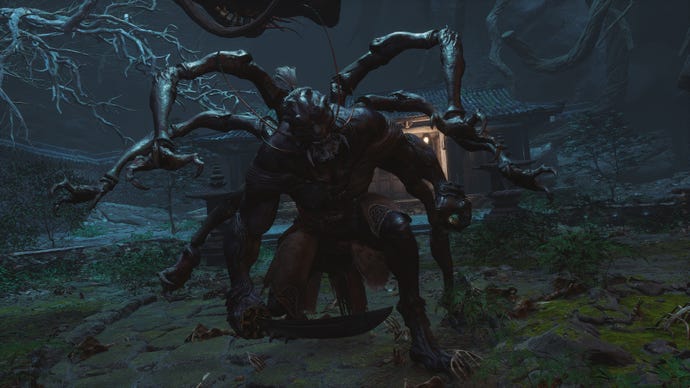
The first time you met this multi-armed bastard, he’ll be trapped in an “OddCocoon.” Hit it a few times with your staff to start the fight. The Venom Daoist is a fast-moving guy who loves to flip around and unleash stabs upon you, but you can stagger him with some well-timed uses of Rock Solid, or the Cloud Step sneak attack if you prefer. If you manage to destroy four of the arms on his back, you’ll get theVenomous Armguard, which lets you inflict Poison upon an enemy after landing a critical hit.
The Venom Daoist will flee once he’s had enough punishment. You’ll run into him later - for now, return to the Shrine and teleport back to the Upper Hollow.
Webbed Hollow: Verdue Bridge
Search for this Lantern Holder if you keep getting lost. |Image credit:Rock Paper Shotgun/Game Science
Once the Amourworm’s dead, head left towards the statue and keep going leftwards. You’ll run into a tough Scorpion Prince along the way, along with a Luojia Fragrant Vine. Finally you’ll see a cutscene with the mysterious Fourth Sister, and aPurple Talisman. Be sure to interact with the Talisman; there are four of them scattered throughout this Chapter and nabbing them all is key to unlocking a scene later.
Keep going past the talisman and you’ll soon run into the trail of the “Middle Hallow” Shrine. Near the Shrine isThe TreeMeditation Spot.
Webbed Hollow: Middle Hallow/Bonevault
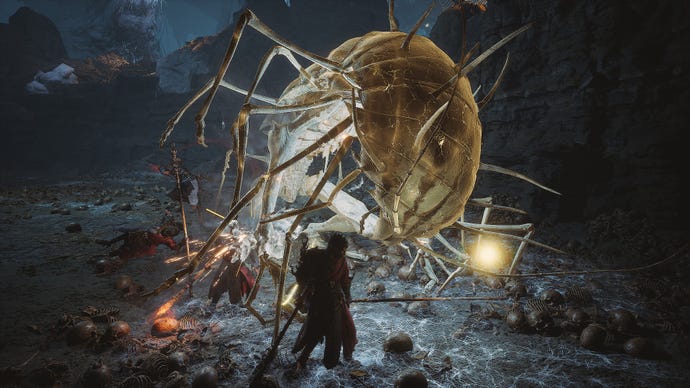
We’re grouping two Shrines together here since they’re very close to each other and make for easy teleportation points. If you’re facing the “Middle Hollow,” turn around, go up the slope, and veer northeast across the bridge. You can drop off the bridge into a large area full of spider eggs. Break the ones that are all arranged neatly in a row, go left, and you’ll reach the “Bonevault” Shrine. From here, veer leftwards to reach a large field full of bones. (You can also reach this field from the “Middle Hollow” Shrine if you go right, move forward past the eggs, and drop down.
This is the lair ofCentipede Guai, an immense horror. Luckily,Centipede Guaiwill also go down fast if you smash its back legs and dodge out of the way when it curls into a ball and comes rolling.
If all the spider Guai weren’t bad enough, why not have a few more legs! |Image credit:Rock Paper Shotgun/Game Science
Turn left from Ma Tianba’s location and keep running until you reach an area with large arrays of spider eggs and worm enemies. Keep moving along the left path until you spot a row of eggs not far from a stone table that look slightly out of place because they’re so neatly assembled. Smash them, move past, and you’ll go up a hill that leads to some structures and anotherPurple Talisman. Remove it and turn left to reach the “Cliff of Oblivion” Keeper’s Shrine.
Webbed Hollow: Cliff of Oblivion
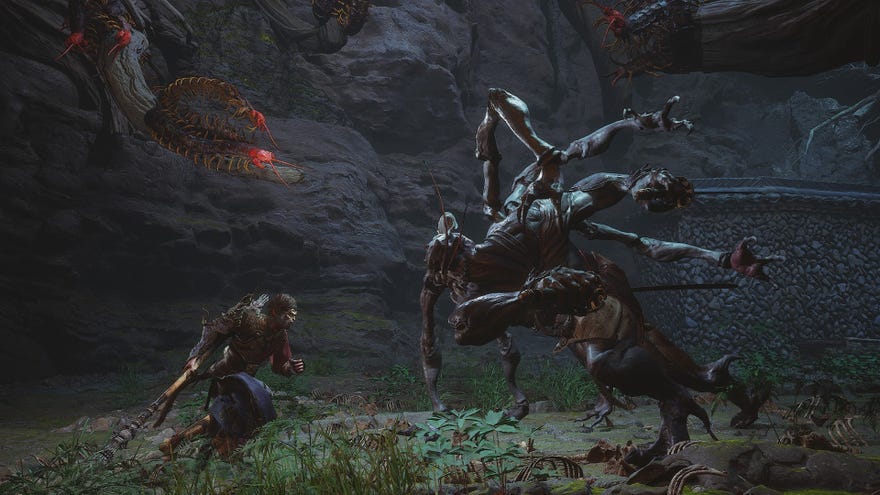
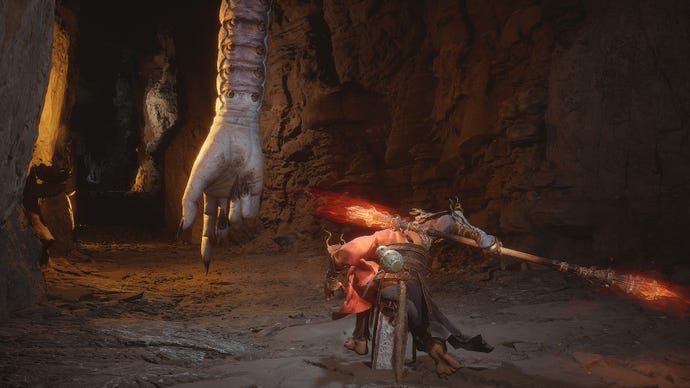
Go east into the tight corridor just beyond the “Cliff of Oblivion” Shrine to encounterBuddha’s Right Hand, a very weird bug Yaoguai Chief with a giant hand attached to it. Cast Immobilize onBuddha’s Right Handafter it uses one of its wall-smacking attacks to deal max damage, and watch out for its poison when it transforms in the second half of the battle.
Wait till you see what this big ol' white hand is attached to. Lovely stuff. |Image credit:Rock Paper Shotgun/Game Science
The corpse of Buddha’s Right Hand forms a bridge after it dies. Cross the corpse, and keep dropping down and heading right until you reach a fork in the road. The left side leads to Chapter 4’s hidden area, “Relief of the Fallen Loong.” We’ll get there in a second - for now, turn right and follow the torches. Eventually you’ll reach a dead end; there’s a narrow passageway hidden to the right here. Enter it, watch the cutscene, head right once more, and keep moving forward via the torch-lit path until you come to a room full of webs and spider eggs. This is a dangerous area full of enemies that can overwhelm you, especially if you proceed into the fissure located in the centre of the room. If you keep moving past the webs, eventually you’ll reach the “Lower Hollow” Shrine.
Webbed Hollow: Relief of the Fallen Loong
If you want to tackleYellow Loong, the strongest of the loong bosses in Black Myth: Wukong, this hidden area is a must-visit. From the fork in the road not far from the “Cliff of Oblivion” Shrine (described above), take the right route. Keep going until you reach a rope bridge that leads across a wide gap. Cross it and proceed forward until you come across a very narrow rope platform with multiple Corpse Cocoons hanging over it. You shouldmost definitelyuse Cloud Step here, or else the cocoons will knock you into oblivion.
Best not to tempt fate and try crossing this teeny bridge without Cloud Step. It’s just not worth it. |Image credit:Rock Paper Shotgun/Game Science

After crossing, it’s only a short distance until you reach a green area located outside the Webbed Hollow. You can find aLuojia Fragrant Vinehere, and to the north is the “Relief of the Fallen Loong” Shrine.
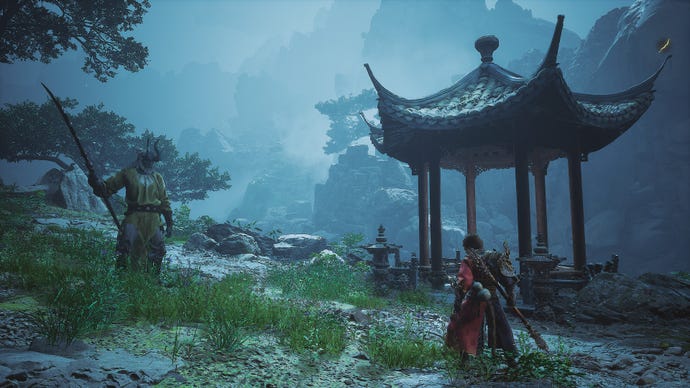
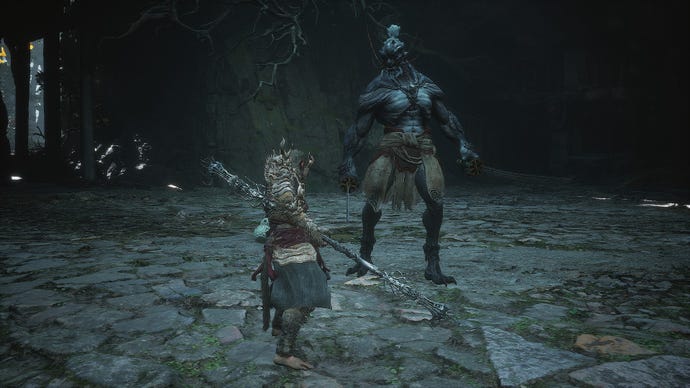
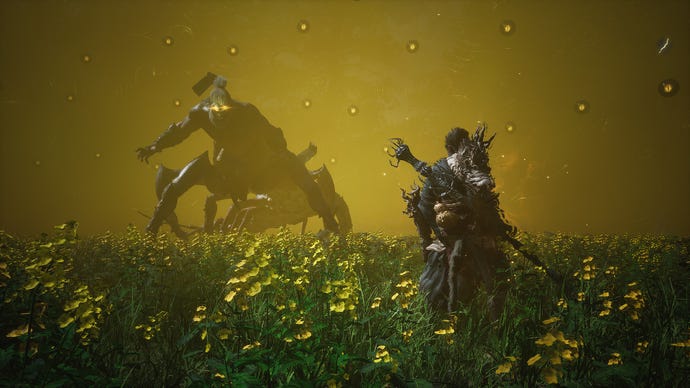
If you previously acquired the Loong Scales and fought all the other secret loongs (see ourChapter 1 boss guidefor info on this sidequest), you’ll spotYellow Loongnot far from the Shrine, brooding as he stares off into the distance. Approach him and get ready for a helluva fight with lightning attacks and some very long combos. Keep your distance while repeatedly using fully charged heavy attacks, which will usually result in Yellow Loong unleashing a lunge. Dodge it and repeat with heavy attacks until he powers up in the second phase of the combat to become more agile. During this phase, he’ll avoid your heavy attacks unless you use them in the middle of one of his lunges. He’ll also charge at you from the air on occasion, which is avoidable via Cloud Step.
Yellow Loong is one of the bosses who’s truly obfusticated a large number of Black Myth players, but his Transformation is worth the pain. |Image credit:Rock Paper Shotgun/Game Science
When Yellow Loong’s defeated, relish in hisGolden LiningTransformation, which might be the best in the game if you can parry well. Heal up at the Shrine, explore the surrounding area until you run into a Scorpion Prince, then proceed beyond the prince into a wide cave with three splitting branches. You can get some loot and a Puppet Tick Spirit on the left and right paths respectively; the middle path is the most important one, as it leads to anotherPurple Talisman. If you follow the torches from the middle path, eventually you’ll loop back to the rope bridge that led you here.
Webbed Hollow: Lower Hollow
Another frog boss! And this one spits tonnes of poison. Great. |Image credit:Rock Paper Shotgun/Game Science
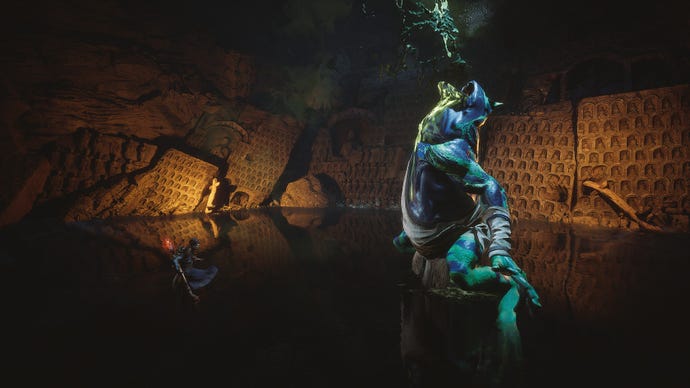
Baw-Li-Guhh-Bawis like his fellow frogs in the previous Chapters, though technically he’s also Buddha’s Left Hand (look at the hand where his tongue should be - how wonderful) and a little more challenging. Watch out for his poison bile, and when he’s dead, exit via the path opposite to where you entered and drop down. Kill the Beetle Guardian before the archway, move forward and follow the torches until you reach the “Hut of Immortality” Shrine.
Webbed Hollow: Hut of Immortality
Just beyond the Shrine is a hut that leads to a fight with your dear piggy companion,Zhu Bajie. This is actually a two-pronged fight, and thefirst encounter against Bajieshould take very little effort. Once he’s defeated, loot the hut for all its worth and then turn around. A newly opened back area is behind you - this leads into a muddy arena that starts the second fight against Zhu Bajie.
Alas, now we must fight Zhu Bajie. If the Destined One could speak, he’d bonk his friend on the head while screaming, “I’m doing this because I love you!” |Image credit:Rock Paper Shotgun/Game Science
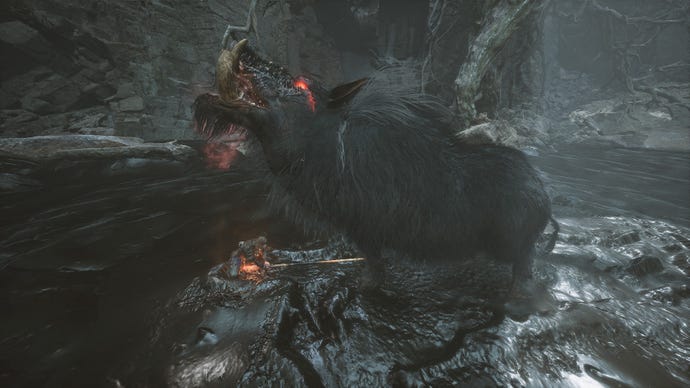
Bajie’s second roundis harder, especially when he morphs into a huge boar and then a catfish halfway through the combat and charges at you. Try to save your mana until these transformations, as they’re much easier to tackle if you have Immobilize or A Flock of Many in your arsenal. Once you’ve won, move forward to find the next Shrine.
Webbed Hollow: The Purifying Spring
This is a fairly straightforward path that winds continuously upwards several stairs. A few Guai lie your path, but the confusing twists and turns of the Webbed Hollow are over. Keep going and be sure to collect theSkandha of Choice, which can be found if you drop down into the pond and move to its far northern edge. OurSkandha locations guidehas more info on finding all of these items, which ultimately let you permanently improve your stats.
Webbed Hollow: The Gathering Cave
After climbing all of the stairs, you’ll be at the “Gathering Cave” Shrine. Save and walk forward to see a cutscene between Zhu Bajie and the mother of the spider sisters, theViolet Spider. When the scene finishes, you’ll have to fight theViolet Spider, who’s a tough opponent mostly due to her propensity to entrap you in webs and knock your health down with the Poison bane.
It’s time for the mama spider to be stomped, tragic romance with Zhu Bajie be damned. |Image credit:Rock Paper Shotgun/Game Science

When the Violet Spider’s dead, the entire arena fills with an army of tiny spiders that chase you out. Run as fast as you can, but don’t worry too much, as the Fourth Sister will save you from utter doom. You’ll be in a new area when all’s said and done.
3. Temple of Yellow Flowers walkthrough (part one)
Temple of Yellow Flowers: Mountain Trail
Free from the darkness of the Webbed Hollow, now you’re in a sunny temple complex. Get the Luojia Fragrant Vine and rest at the “Mountain Trail” Shrine before going up the steps. You’ll get a crash course in several of the foes who inhabit the temple along the way, including Sword Daoists, Fly-Whisk Daoists, Snake Herbalists and Snake Sheriffs, who are the hardest new enemy type. Keep moving forward (be sure to grab theBee Mountain StoneSoak along the way) and go through the cave complex to reach the next Shrine.
Temple of Yellow Flowers: Forest of Ferocity
From the “Forest of Ferocity” Shrine, you can findThe HeightMeditation spot if you follow the path on the right side behind the Shrine. If you keep progressing upwards, you’ll spotCommander Beetletraining a regiment of Daoists in a courtyard. Wreck the Daoist minions as fast as you can and concentrate your damage onCommander Beetlewith A Flock of Many to take him down swiftly.
Commander Beetle looks very cool and seems to be a decent guy. Shame he doesn’t put up much of a fight. |Image credit:Rock Paper Shotgun/Game Science
Once Commander Beetle’s no longer a thorn in your side, nab his Spirit and head up the stairs to reach the “Temple Entrance” Shrine.
Temple of Yellow Flowers: Temple Entrance
From the “Temple Entrance” Shrine, go past the gate and up the stairs to get into the temple proper. Within the temple complex, you can go to the right to fight an array of enemies and meet your sage acquaintance Yuan Shoucheng, who just keeps popping up in the randomest places.The PinesMeditation Spot is also located here.
If you head left within the complex, you’ll eventually reach a dead end. To the left of this dead end is the “Court of Illumination” Shrine.
Temple of Yellow Flowers: Court of Illumination (part one)
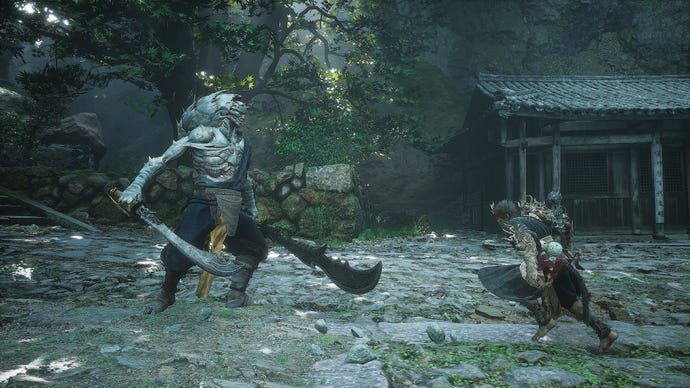
Now retrace your steps and go down the steep slope that leads to a small cave. It’s time for round two with your rivalVenom Daoist. Thesecond fight against Venom Daoistbegins much as the first. Once he sheds his arms, however, the fight becomes deadlier, as he speeds across the arena with a tough charge attack that requires careful dodging. Despite his newfound dexterity, however, Venom Daoist is still vulnerable to a barrage of Spells and Thrust heavy attacks.
One would think that Venom Daoist losing his arms would make him weaker, but no - he gets stronger instead. |Image credit:Rock Paper Shotgun/Game Science
Defeating Venom Daoist for good lets you interact with the painting behind him, which creates a portal to Chapter 4’s hidden area, Purple Cloud Mountain. Since it makes sense to clear this optional region before finishing up the last bits of the Temple of Yellow Flowers, we’ll make a brief diversion now.
4. Purple Cloud Mountain walkthrough
Purple Cloud Mountain: Valley of Blooms
Purple Cloud Mountain is awfully autumnal and full of colours, which is a great change of pace from some of this Chapter’s other dreary environments. It’s also fairly linear, so keep progressing up the foresty path until you come across a snake NPC in a tree lamenting her husband. Talk with her then cross the bridge to reach the “Valley of Blooms” Shrine. Keep going forward until you reach the “Bounds of Deity’s Abode” Shrine. Climbing the hill near here will also give you access toThe LedgeMeditation Spot.
Purple Cloud Mountain: Bounds of Deity’s Abode
From the “Bounds of Deity’s Abode” Shrine, go up the steps and you’ll see theScorpionlordlazing around on the roof of a building. He warns you against bothering him, but if you want the hardest fight in Chapter 4, ignore this sound advice and instead break the alcohol pots on the ground. You can also choose to not engage - Scorpionlord will actually come to your aid against the final boss of Purple Cloud Mountain, Duskveil, if you take this peaceful route. However, you also won’t get all of the drops that come with beating Scorpionlord, including theStained Jade Gourd, which massively increases your drinking speed.
Behold, one of the coolest looking bosses in the game. Also, one of the hardest bastards ever. |Image credit:Rock Paper Shotgun/Game Science
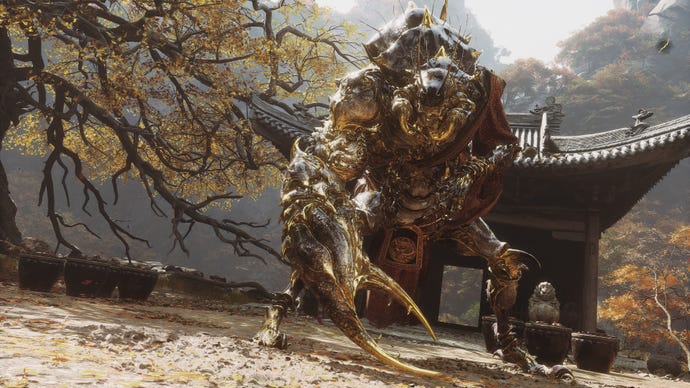
Fighting Scorpionlordwill probably take many, many tries - he didn’t warn you to avoid messing up his booze for nothing! Beware his dangerous tail strikes and practice on recognising his attack patterns, since there’s really no easy way to cheese him. Cloud Step comes in handy for a reprieve here, and focus on unleashing those three Focus Point heavy attacks.
After dealing (or not dealing) with the Scorpionlord, go back to the “Bounds of Deity’s Abode” Shrine and go in the opposite direction to get to the “Petalfall Hamlet” Shrine.
Purple Cloud Mountain: Petalfall Hamlet
Beyond the “Petalfall Hamlet” Shrine you’ll see a masked man ruminating to himself. This isDaoist Mi, who tasks you with getting him theViolet Hail, which is a drop you receive from battling the Daoist enemies in the area.
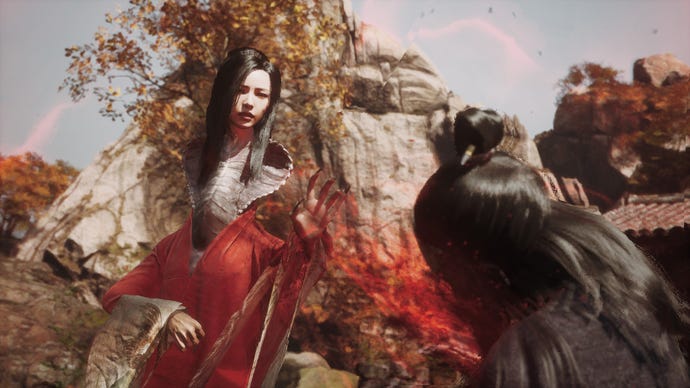
After you giveDaoist Mithe item, he turns on you and attacks, the asshat. Once you beat his first form, he transforms into an Amourworm-esque baddie. Beat him up some more and enjoy the cutscene when the snake NPC you met before - who is named Hong Yi - appears to give you hisViolet HailTransformation.
Hong Yi doesn’t have time for Daoist Mi’s nonsense. She’ll condemn him and then give you the power to transform into a worm - you deserve it much more than he does. |Image credit:Rock Paper Shotgun/Game Science
From where you meet Daoist Mi, go further into the hamlet until you see a well with a large rock near it. Turn right, go down, and you’ll spot the trail of “Cloudnest Peak” Shrine.
Purple Cloud Mountain: Cloudnest Peak
Go up the steps from the Shrine to enter a large area where you’ll come face to face with theDuskveil. This is a tough boss with two stages, though if you didn’t fight the Scorpionlord earlier, he’ll jump into the combat and tag-team alongside you. Fighting alongside the Scorpionlord makes the Duskveil’s first phase a snap, though once the Duskveil unleashes its second health bar and turns the screen red, the Scorpionlord will be insta-killed, alas.
Figure out how to survive the first phase of the battle against Duskveil - the second phase is where the real fun starts. |Image credit:Rock Paper Shotgun/Game Science
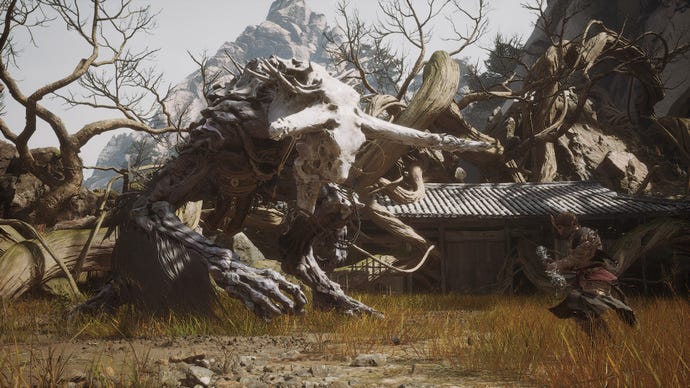
The key tobeating the Duskveilwith or without the Scorpionlord’s assistance is to save your Spells for the second phase. Attack its legs and dodge once it fires red projectiles into the air, as a barrage of these will wreck you in quick order. At the end of the fight, Hong Yi will give you theWeaver’s Needle, which is a handy Vessel that creates a needle that tracks enemy movement and does chip damage slowly.
Following the Duskveil’s defeat, you’re done with Purple Cloud Mountain - let’s go back to the Temple of Yellow Flowers to wrap this Chapter up!
5. Temple of Yellow Flowers walkthrough (part two)
Temple of Yellow Flowers: Court of Illumination (part two)
Return to the “Court of Illumination” Shrine and run north up the steps to find the lastPurple Talismanof the Chapter. If you’ve followed this guide carefully and found all four Talismans, you’ll suddenly be faced withSupreme Inspector. This is a secret, brief “boss battle” that’s actually just a scripted preview of things to come inChapter 6. Enjoy it, and try to figure out what exactly happened to the Fourth Sister, which seems to be what Supreme Inspector’s communicating in his dialogue.
When the fight finishes, get the Celestial Nonary Pill and go back to the “Court of Illumination” Shrine. Go east down the steps to reach the final boss,Hundred-Eyed Daoist Master. This battle begins with the remaining spider sisters working alongside you, which is neat, but they won’t last very long, unfortunately.
The Hundred-Eyed Daoist Master loves his big, dramatic, arena-changing effects. Take revenge on him for the entire spider family. |Image credit:Rock Paper Shotgun/Game Science
Hundred-Eyed Daoist Masterutilises a plethora of Lightning and Poison attacks, and once you’ve done enough damage, he’ll turn the entire screen yellow, swallow his sword, and halve your max Stamina. Use the Weaver’s Needle at the moment he turns everything yellow to destroy the orbs in the sky, stagger him, and make the fight a tonne easier. He’s a pain, but honestly, Yellow Loong and the Scorpionlord probably provide more of a consistent challenge in this Chapter.
Congratulations on completing Chapter 4 of Black Myth: Wukong - the winding webs of the spider sisters (as well as their mother’s heartbreaking relationship with Zhu Bajie) are finally behind you. For a more detailed look at all of the Yaoguai in every chapter of this expansive game, take a deep dive into our guide toall bossesin Black Myth: Wukong. If you’d prefer a quick rundown of places to level up and rest, check out our guides toall Keeper’s Shrine locationsandall Meditation Spots. And last but certainly not least is our guide toall Journal entries, which will help you make sense of Black Myth: Wukong’s awesome take on Chinese legend.
