HomeGuidesElden Ring
Belurat Gaol walkthrough - Elden Ring Shadow Of The ErdtreeHere’s how to clear Belurat Gaol in Shadow Of The Erdtree
Here’s how to clear Belurat Gaol in Shadow Of The Erdtree
Image credit:Rock Paper Shotgun/Bandai Namco
Image credit:Rock Paper Shotgun/Bandai Namco
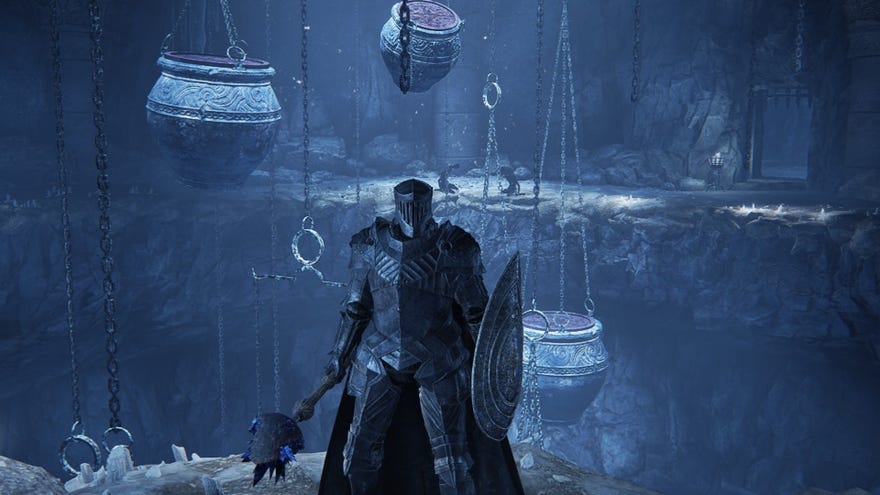
Looking for a full rundown of Belurat Gaol in Elden Ring: Shadow Of The Erdtree?Belurat Gaol is a mini-dungeon inElden Ring’s DLCShadow Of The Erdtreefull of jars - both living and unliving. Get ready to smash some ceramics and engage in jar-to-jar jumps if you want to clear this dungeon of all of its treasures.
In this guide, we’ll explain exactly what you need to do to find everything contained within Belurat Gaol in Elden Ring: Shadow Of The Erdtree.
To see this content please enable targeting cookies.Manage cookie settings
To see this content please enable targeting cookies.Manage cookie settings
Belurat Gaol walkthrough
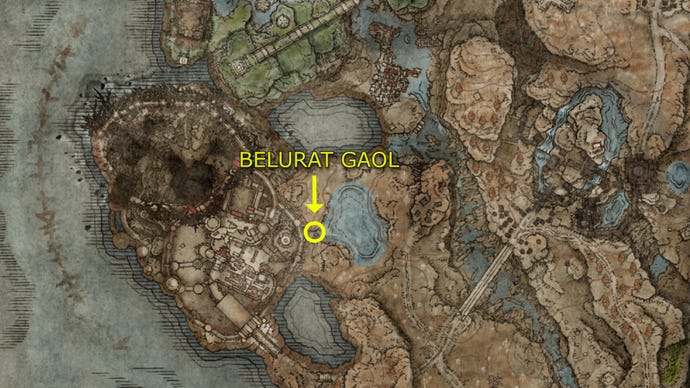
To enter Belurat Gaol, proceed west from theGreatbridge, NorthSite of Grace. Go across the body of water and you’ll reach an area laden with prison cages. There will be a cave opening there; enter it and you’ll descend into the Belurat Gaol.
Proceed deeper into the prison and take note of all the jars hanging from chains. A shadowy undead will hop out of a passageway to your left - these Shadows are a regular presence throughout this dungeon, but thankfully they’ll go down quickly with a well-timed hit or two. Once you’ve killed the Shadow, explore the room it emerged from to find aFrozen Maggot.
Keep going down the walkway until it collapses and you land on a ledge with more Shadows. Once they’re defeated, explore the room behind you to pick up aSilver Horn Tender. Then cross the narrow walkway, take care of the Shadows on the opposite side, and pick up aFrozen Maggotfrom a corpse.
The room beyond has an opening in the wall that you’ll need to jump through, but pick up an extraFrozen Maggoton the ground near the northernmost set of jars before doing so. Then climb through the opening to find a room with two Shadows and anotherFrozen Maggot. After you exit this area, you’ll be in a larger room with several tables. Shadows sit dejectedly against these tables, and you can also find aBroken Runeon a corpse.
Not the jars, anything but the jars! |Image credit:Rock Paper Shotgun/Bandai Namco
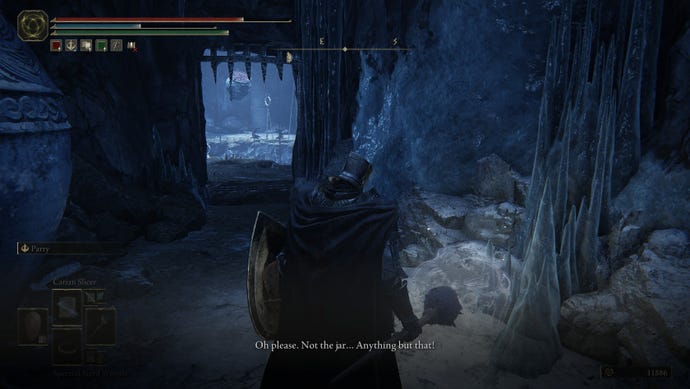
Beyond this room lies another body on a ledge withThawfrost Boluses. Walk west on the ledge and enter a new room where you’ll spot a ghost on the ground. Talk with the ghost and you’ll hear murmurings lamenting the dreaded jar, which is a hint regarding both what you need to do next and the Living Jar enemies you’ll soon face.
The next room has a deep chasm and several jars overhanging it. Kill the Shadows on the ledge bordering the hole and check out a passageway that leads to a room with a corpse holding aShadow Realm Rune [3]. After picking up the rune, a grotesque Jar Innards enemy will lumber out behind you. Take it out quickly before it can grab ahold of you, then leave.
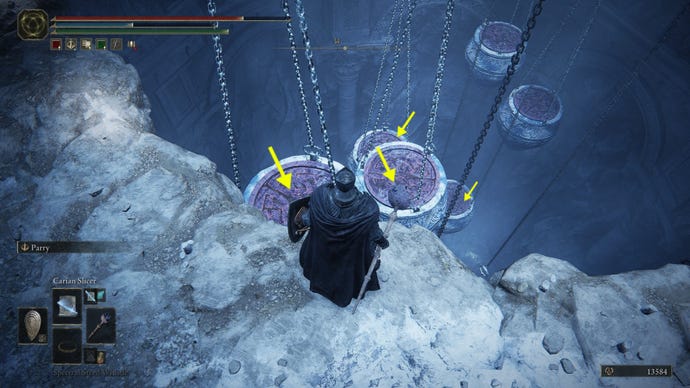
Follow the yellow arrows and time your jumps carefully, as overshooting or undershooting is a quick way to start at the beginning of this dungeon. |Image credit:Rock Paper Shotgun/Bandai Namco
On the ground floor, two small Living Jars, a bigger Living Jar, and two more Jar Innards await you. Keep a close eye out for the Jar Innards, since from this point onwards they’ll often be camouflaged amongst the other jars that scatter this dungeon. After you’ve made short work of these foes, leave the area and take out another Jar Innards lurking to your right.
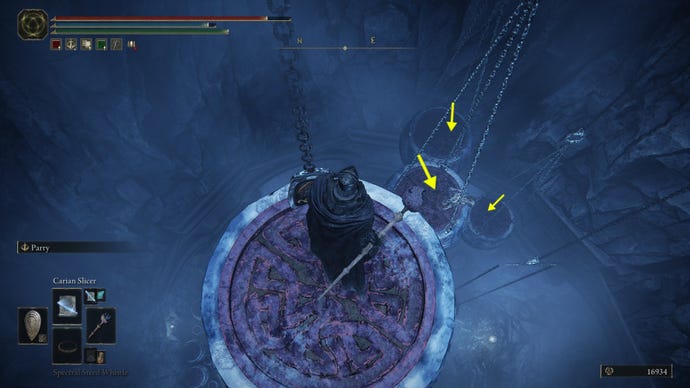
You’ll now be overlooking a pathway that stretches across a pit and turns leftwards. There are three Jar Innards on the path to contend with, and once you reach the stretch of path that begins to turn, the ground will crumple and you’ll fall into a maze of jars.
The yellow arrow here marks where the pathway will collapse, landing you down amidst a maze. |Image credit:Rock Paper Shotgun/Bandai Namco

There are several Jar Innards and Shadows in this maze that’ll try to ambush you, but the actual maze isn’t very big, so it’s unlikely that you’ll get lost. Be sure to pick up theLost Ashes of WarandSmithing Stonefrom the corpses strewn about on the ground. AGreater Potentate’s Cookbook [11]can also be found on the ground, and you can find two fallen lids that you can use as ramps to walk up onto the tops of several jars. Once you’re atop the jars, you can pick upInnard Meat, aHefty Cracked Pot, and anotherHefty Cracked Potlocated on a corpse.
After looting everything the maze has to offer, exit, go beyond a portcullis, and you’ll be on a new stretch of the dungeon. If you look to your left you should see two Living Jars doing stretches and teetering their little arms back and forth. Cute! (Kill them if you’re heartless.)
Look at these little fellas; aren’t they adorable? |Image credit:Rock Paper Shotgun/Bandai Namco
To your right will be aSmithing Stone [3]and a much more aggressive big Living Jar. To your north is a little jump across to a new platform with three Jar Innards and aFrozen Maggoton the ground. Near where you pick up the Frozen Maggot is a drop with another jar hanging from a series of chains. Jump on the jar and it’ll raise you up high, letting you access a new platform that leads to aGreatjar.
After getting the Greatjar, you can drop back down into the jar maze. Retrace your steps, go north, jump across another jar and onto a platform that leads to the boss door.
How to defeat the Belurat Gaol boss
Onze is fast and furious if you let him cut you, but he’s easily staggered. |Image credit:Rock Paper Shotgun/Bandai Namco
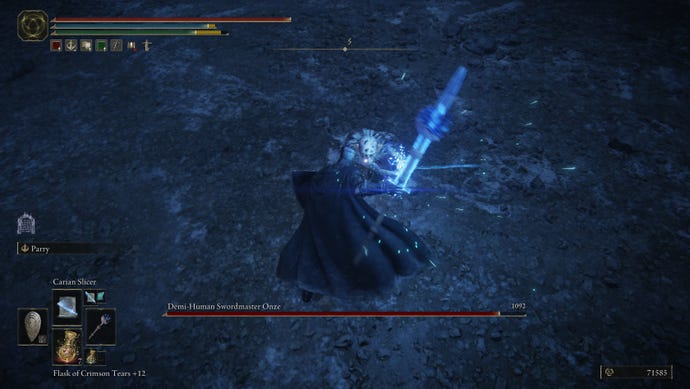
The boss of Belurat Gaol isDemi-Human Swordmaster Onze, a fast little fellow who will eagerly cleave off your heath bar in just a few strikes if you let him hit you with his big swings. He’s easy to stagger with a repeated series of melee strikes, however, so as long as you corner him and aggressively attack away, he’ll go down in short order. Do watch out for his jump attacks, and when he slowly pulls his blade backwards and glints, roll backwards, as he’ll unleash a circular aura of slashes all around him.
That’s a wrap on Belurat Gaol. For more Elden Ring: Shadow of The Erdtree dungeon walkthroughs, take a look at our guides to theRuined Forge Lava Intake,Taylew’s Ruined Forge, theFog Rift Catacombs, and theDarklight Catacombs. If you’d rather read up on reaching tricky areas of the Shadow Realm, check out our guides for getting to theCerulean Coast, theCathedral of Manus Metyr,Charo’s Hidden Grave, and theStone Coffin Fissure.
