HomeGuidesBlack Myth: Wukong
All Black Myth Wukong secrets and hidden detailsDiscover the secrets hidden in every Chapter of Black Myth: Wukong
Discover the secrets hidden in every Chapter of Black Myth: Wukong
Image credit:Rock Paper Shotgun/Game Science
Image credit:Rock Paper Shotgun/Game Science

Want to find all of the dozens of Black Myth: Wukong secrets hidden across all 6 Chapters?Soulslikes are known for their hidden passageways, obscure questlines, and secret bosses, butBlack Myth: Wukonghas still surprised its playerbase with both the quality and the sheer opaqueness of certain secrets dotted about its six Chapters. There are extremely important items hidden behind walls; numerous secret boss encounters per Chapter; unique dialogue options from certain enemies and NPCs; and even ways to get certain bosses to fight one another in epic matchups.
There’s a lot to discover in this game, folks, and it’s unlikely you’ll have seen all of Black Myth: Wukong’s secrets in just your first playthrough. In this guide, we’ll walk you through all of the dozens of secrets we’ve encountered in Black Myth: Wukong and exactly how to find them yourself, so you can leave no stone unturned throughout your own Journey To The West.
This guide is divided into sections for each of Black Myth: Wukong’s Chapters, so use the below links to skip ahead to the Chapter you’re on and discover all the secrets buried there.
To see this content please enable targeting cookies.Manage cookie settings
To see this content please enable targeting cookies.Manage cookie settings
Chapter 1 secrets
Chapter 1is comparatively short and linear compared to later Chapters, but there’s still a fair few secrets to uncover in the Forest Of Wolves and beyond. Here are all the Black Myth Wukong secrets available to find in Chapter 1.
Skandha Of Form
Image credit:Rock Paper Shotgun/Game Science
Red Tides Spell
Image credit:Rock Paper Shotgun/Game Science
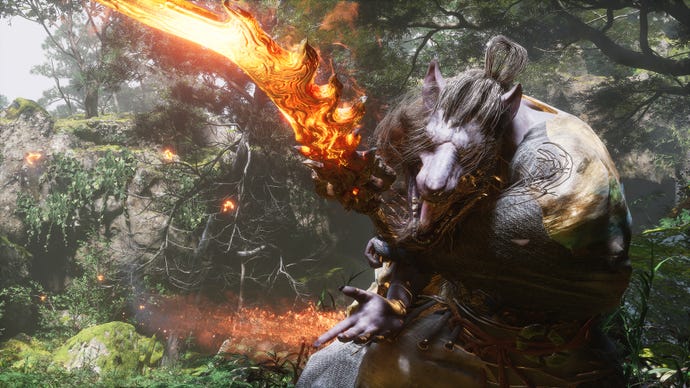
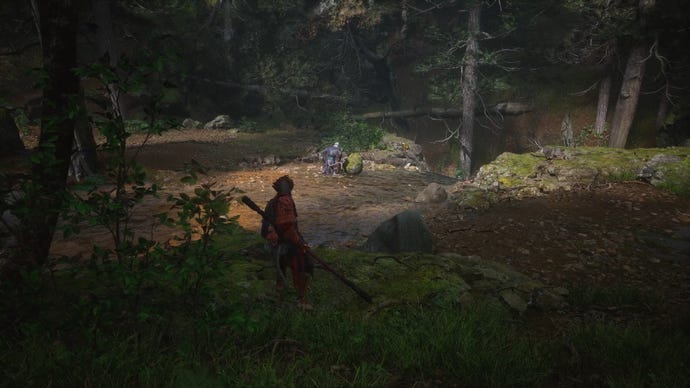
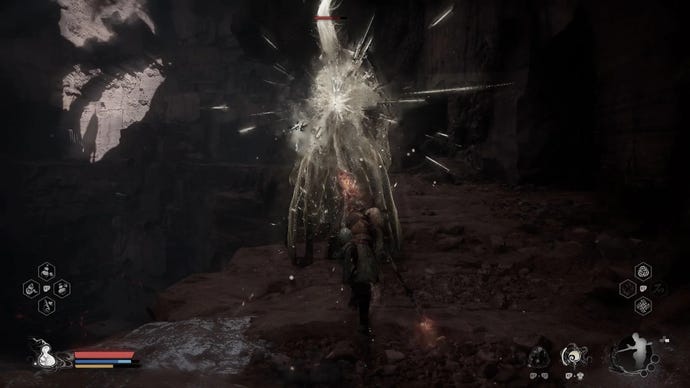
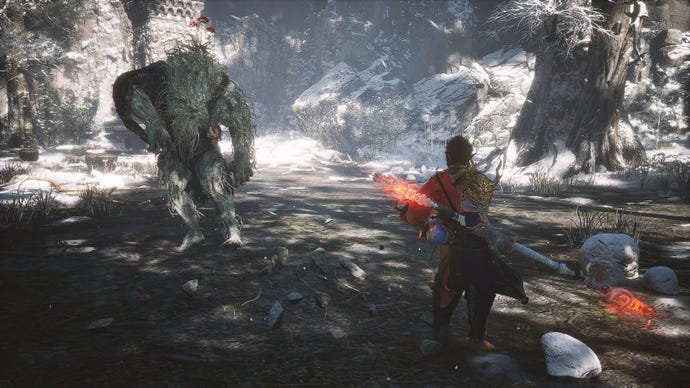
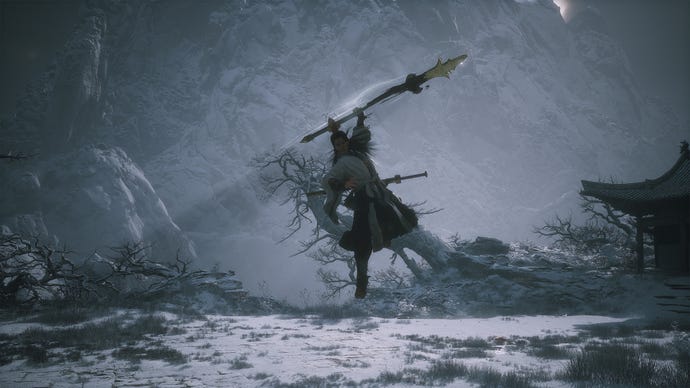
Black Myth: Wukong is chock full of easily missed boss encounters, and the earliest of them isGuangzhi- an enemy hidden away at the far back-left corner of the “OutsideThe Forest” area. Take the left path across the bridge and turn left again, then follow the path to reach Guangzhi’s arena.
Why’s it so important to find and beat Guangzhi? Two reasons. First: there’s a bell you can ring in his arena which is part of the quest for unlocking Chapter 1’s secret area (more on this below). Second: defeating Guangzhi unlocked the Red Tides Spell, your very first Transformation Spell in Black Myth: Wukong. This powerful spell allows you to temporarily transform into Guangzhi himself, giving you a powerful new moveset of scorching attacks, and a new health bar whenever you need it in battle.
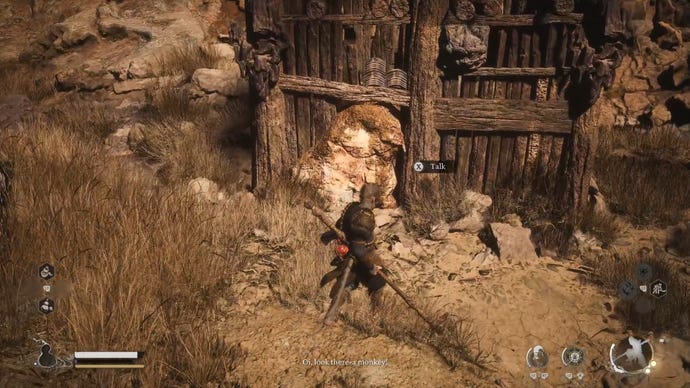
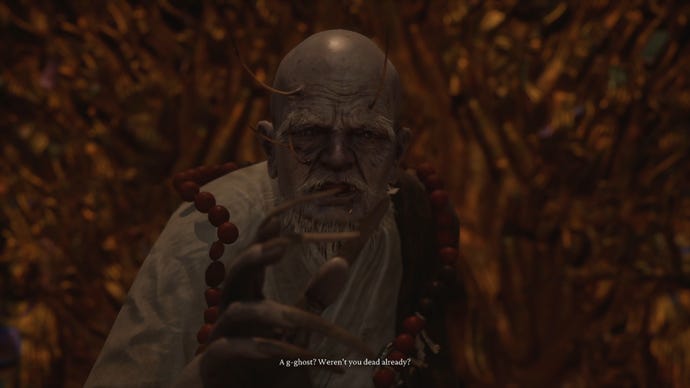
Guangmou’s special dialogue
Image credit:Rock Paper Shotgun/Game Science
It’s not much, but it’s a nice little extra detail.
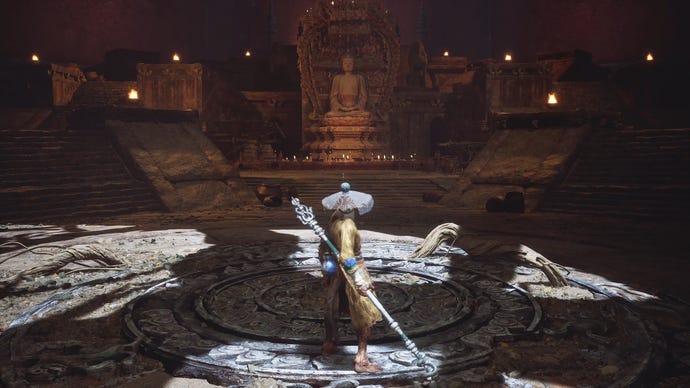
Chapter 1’s Secret Area: Ancient Guanyin Temple
Image credit:Rock Paper Shotgun/Game Science

The Red Loong
Image credit:Rock Paper Shotgun/Game Science
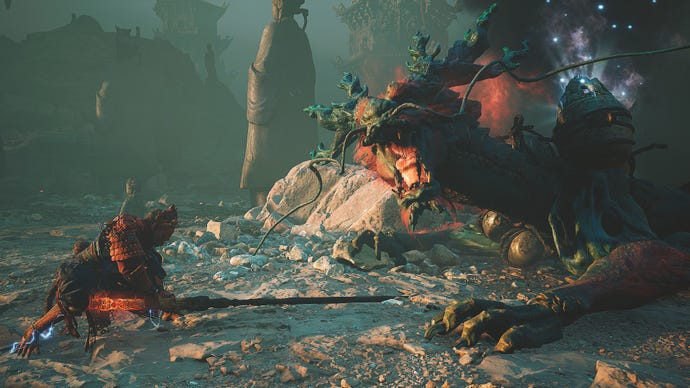
Another important series of secrets that spans the entire game is the Loong bosses, a group of dragons which can only be found in their respective arenas using the Loong Scales item. To get this item, you actually need to progress into Chapter 2 - we explain morejust below. Once you have this item, return to the “Outside The Forest” Shrine in Chapter 1 and head to the giant waterfall to the far left of the area. Interact with the waterfall to reveal a passage, through which you can fight the powerful and secretRed Loongboss.
Chapter 2 secrets
Chapter 2is much larger and more complex in nature than Chapter 1, and the number of secrets to discover rises significantly. Here are the Chapter 2 secrets to keep an eye out for while you play.
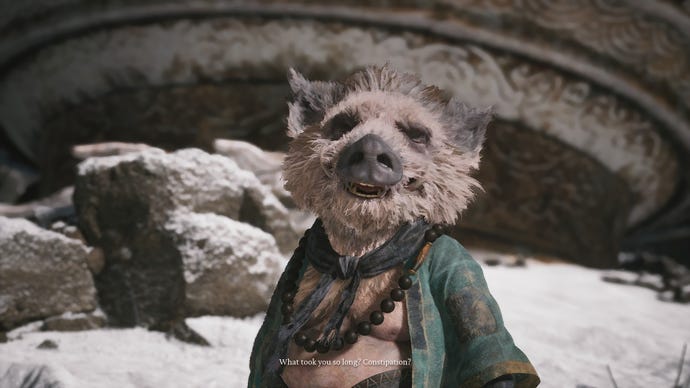
The Hiding Rat Captain
Image credit:Rock Paper Shotgun/Game Science
You know the big open area to the right of Sandgate Village, where the two-headed Rat Captains patrol? Well, towards the end of that area there’s a little shack, and if you approach it you’ll hear voices from inside. Interact with the shack and you’ll have a brief (one-sided) conversation with a hiding Rat Captain who mentions the “Third Prince” if you clear the area of enemies.
This isn’t important right now, but once you reach Chapter 3, there are two different ways to get theAshenSlumber Transformation Spell depending on whether you spoke to this hiding Rat Captain or not. If you do speak to them, you can simply loot the Spell off the Rat Captain’s body in the Third Prince’s cell. If you don’t speak to them in the shack, then you’ll have to find them elsewhere in the Pagoda and defeat them in combat to obtain the Spell.
The two ways to encounter the First Prince
Image credit:Rock Paper Shotgun/Game Science
One of the earliest major bosses in Chapter 2 is the dual fight between you and both theRat King and the Second Princesimultaneously. What many players don’t realise is that there are two ways to win this fight, and depending on how you win, you’ll encounter the next available boss (theFirst Prince) slightly differently.
It all depends on who you kill first in the Rat King/Second Prince fight. If you dispatch the Second Prince first, the Rat King will flee, and a short distance into the cave to the left, you’ll prompt a cutscene where the Rat King summons the First Prince himself. However, if you kill the Rat King first, you’ll be forced then to also kill an aggrieved and more powerful Second Prince, who drops a unique item: the Pungent Flesh Chunk. With this item, you can interact with the edge of the cliff in the First Prince’s boss arena inside the cave to summon him yourself.
How to get the Loong Scales
Image credit:Rock Paper Shotgun/Game Science

The First Prince fight holds another key secret: the Loong Scales item. This item is what allows you to unlock all of the hidden Loong fights across every Chapter of the game, but it’s an item that’s extremely easy to miss. To get it, you must break the clay wall to the side of the First Prince arena - but you can only break it with a particularly powerful attack. Here are the methods we know that can break the wall:
Once the wall is broken, squeeze through the gap and open the chest to obtain the Loong Scales item. Using this item you can find and defeat the various Loong enemies. Speaking of which…
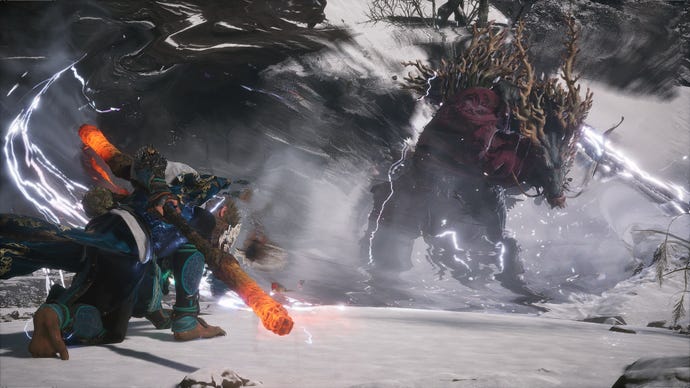
Black Loong
Image credit:Rock Paper Shotgun/Game Science
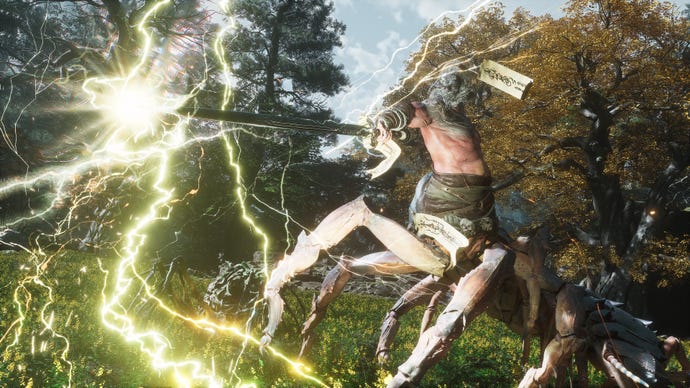
Once you’ve obtained the Loong Scales from the First Prince arena, you can unlock the first couple of Loong bosses. There’s the Red Loong in Chapter 1, but there’s another boss hiding in Chapter 2 as well: theBlack Loong. To find him, head to the “sand waterfall” to the right of the “Rockrest Flat” Shrine, and interact with it to open another secret passageway.
Follow the passage to a new enclosed boss arena where you can face the Black Loong and his powerful lightning-infused weapons. Quick tip - stand on the large rock in the centre of the arena to dodge all of his shockwave attacks.
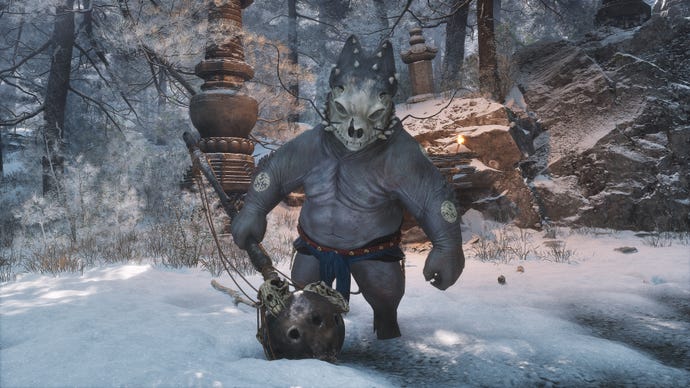
The Man-In-Stone NPC
Image credit:Rock Paper Shotgun/Game Science
Collect the 6 Buddha’s Eyeballs
Image credit:Rock Paper Shotgun/Game Science
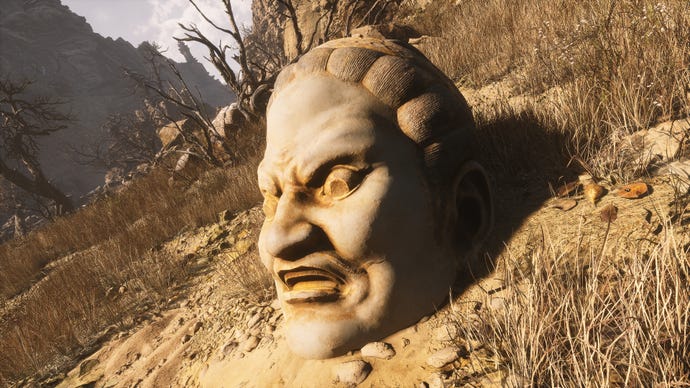
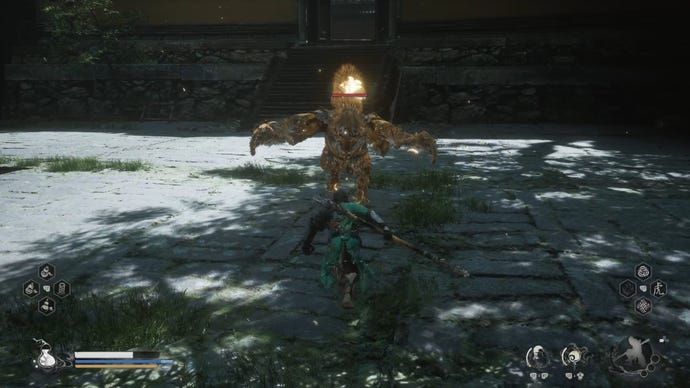
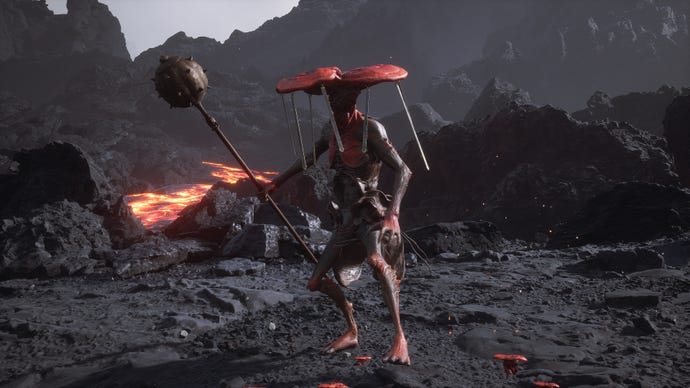
While you’re in the Squall Hideout area, keep an eye out for chanting Buddha heads. These large heads can be looted for a Buddha’s Eyeball. There are six Buddha’s Eyeballs to be found in Squall Hideout, and once you’ve obtained all six, you can insert them into the large rock in the Stone Vanguard boss arena at Rock Clash Platform to summon a new, even more powerful boss:Shigandang.
Defeating Shigandang will give you Chapter 2’s Skandha item - the Skandha Of Feeling - so it’s well worth doing, even if you weren’t interested in the spectacle of fighting another powerful Chapter 2 boss. If you’re having trouble tracking down all the Buddha heads, consult our guide onall 6 Buddha’s Eyeball locations in Black Myth: Wukong.
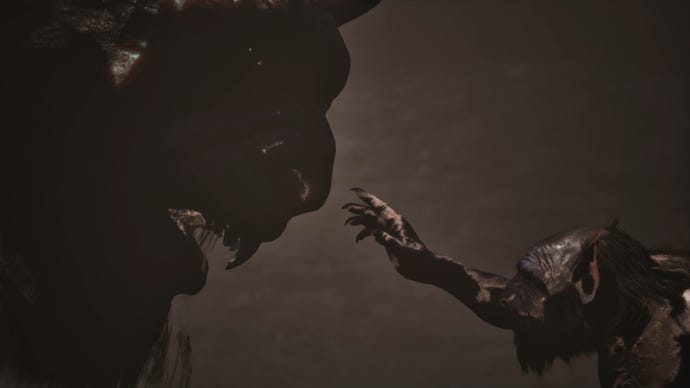
The Stone Vanguard vs Shigandang
Image credit:Rock Paper Shotgun/Game Science
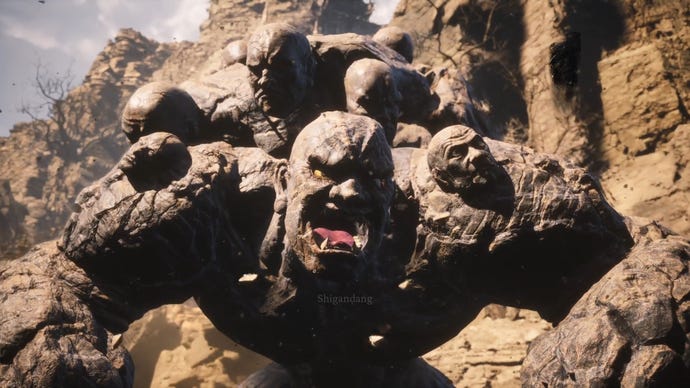
Many players defeat theStone Vanguardin Chapter 2 quite early on, as there are multiple paths which lead to this arena. But if you hold off defeating the Stone Vanguard until after you’ve collected all six Buddha’s Eyeballs (see above), then you’ll unlock quite an easter egg. Turns out, if you awaken Shigandang while the Stone Vanguard is still alive, they’ll start fighting each other in grand kaiju fashion.
Aside from being extremely cool, it also takes out the Stone Vanguard (Shigandang is stronger), and also weakens Shigandang a little to make the subsequent fight easier for you.
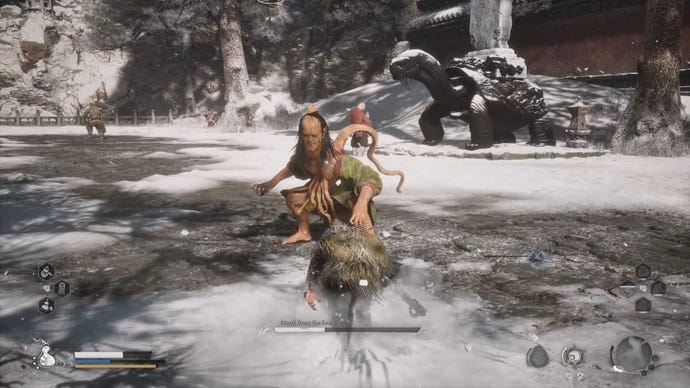
The Old Rattle-Drum and the Mad Tiger
Image credit:Rock Paper Shotgun/Game Science

Possibly the most easily missed of Chapter 2’s secret questlines is theOld Rattle-Drum quest, which leads you to a fight against the powerfulMad Tigerway back in Sandgate Village. To uncover this secret, defeat the Tiger’s Acolyte at Windrest Hamlet to obtain the Old Rattle-Drum item. After that, go to the following three locations:
Chapter 2’s Secret Area: Kingdom Of Sahālī
Image credit:Rock Paper Shotgun/Game Science
Chapter 2’s largest secret is the Kingdom Of Sahālī, a region which you can only reach be completing theDrunken Boar questline. The Drunken Boar’s actual name is the Yellow Robed Squire, and he can be found (very drunk) at the back of the Rockrest Flat area. Give him a Sobering Stone (you can purchase one from the Man-In-Stone or find one in Windrest Hamlet), and he’ll move to the Crouching Tiger Temple. After that, give him a Jade Lotus, and he’ll go back to near where you first found him.
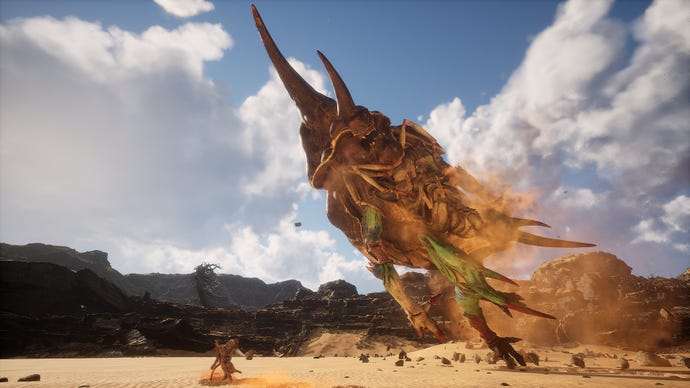
Approach the Yellow Robed Squire back at the Rockrest Flat, and he’ll attack you. Best him, and he’ll guide you to the start of the Kingdom Of Sahālī, a wide-open desert area where you can face first the"Tiger Vanguard"and then the mythical beetle,Fuban. Defeating Fuban will reward you with the Wind Tamer, Chapter 2’s Vessel.
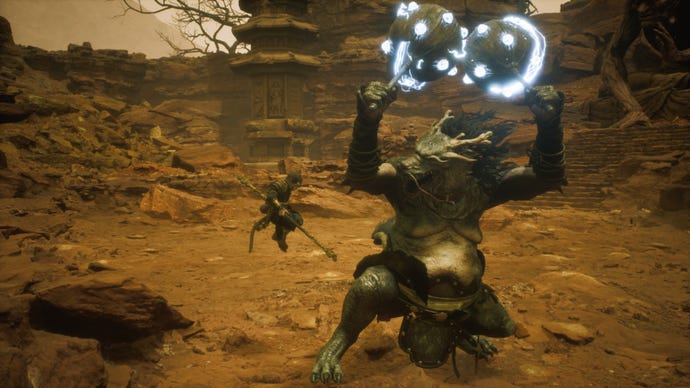
The Yellow Wind Sage and the Wind Tamer
Image credit:Rock Paper Shotgun/Game Science
Using the Wind Tamer will effectively render all his wind-based attacks completely useless, making the final fight of Chapter 2 much, much easier.
Chapter 3 secrets
Chapter 3is the longest of the 6 Chapters on offer, and so a comparatively large number of Black Myth: Wukong’s secrets can be found inside the regions of The New West. Here’s every secret to watch out for in Chapter 3:
Kill all the Lantern Wardens for a curio reward
Image credit:IGN/Game Science
Here’s the secret that most players miss: if you kill all 9 Lantern Wardensbeforeyou stop the curse (i.e. before you defeatCaptain Wise-Voice), then you’ll obtain a powerful curio: the Auspicious Lantern. This curio gives you increased attack but reduced max health while using the Cloud StepSpell. So be sure to hunt down all 9 Lantern Wardens before you ascend out of the Pagoda.
Unlocking the Purple Seals in the Pagoda Realm
Image credit:Rock Paper Shotgun/Game Science
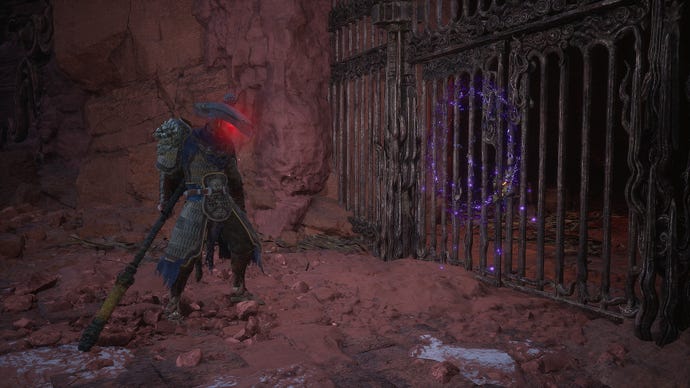
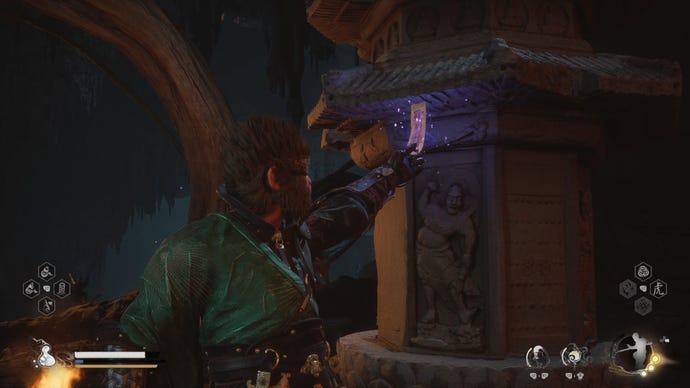
The other major mystery in the Pagoda Realm is that several of the cell doors are locked behind a purple magical seal. Among them is the cell in which the Third Prince NPC resides; you can talk to him from outside his cell, but in order to complete his short questline you need to dispel these purple seals. To do that, simply defeatCaptain Lotus-Vision, an enemy residing down the hole right next to the “Upper Pagoda” Shrine. Once you’ve done that, you canopen all the cell doors in the Pagoda Realm.
The Third Prince and the Four Captains
Image credit:Rock Paper Shotgun/Game Science
The Third Prince is an NPC who can be found very early on in the Pagoda Realm, and once you dispel the Purple Seal on his cell door (see above) you can speak to him properly. His questline involves collecting the Spirits of the four Captain bosses in Chapter 3. Here’s where to find all four Captains:
Once you’ve defeated all four Captains and obtained their Spirits, speak to the Third Prince again back in the Pagoda Realm, and you’ll receive the Chu-Bai Spearhead, a key material used to craft the Chu-Bai Spear weapon. This is one of just two weapons in the game which has a different moveset from the rest, because it incorporates spear techniques into your attacks instead of just blunt staff swings.
The Ashen Slumber Spell
Image credit:Rock Paper Shotgun/Game Science
If you spoke to the Hiding Rat Captain, then you’ll find him dead in the Third Prince’s cell, and once you gain admittance you can loot the body for the Ashen Slumber Spell. If you didn’t speak to the Hiding Rat Captain, then there’ll be no corpse in the Third Prince’s cell, and you’ll instead be forced to find and fight theRat Captain bossin the Upper Pagoda in order to obtain the Spell.
The Great Pagoda
Image credit:Rock Paper Shotgun/Game Science
At first, you may be a bit mystified when you come across the Great Pagoda area of Chapter 3 during your first playthrough. This beautiful interior appears to serve no purpose except as a house for an out-of-the-way Keeper’s Shrine. However, it harbours one of Black Myth: Wukong’s biggest secrets: thesecret True Ending. You’ll need to come back here later on, near the end of the game, in order to fully explore the Great Pagoda.
Cyan Loong
Image credit:Game Science
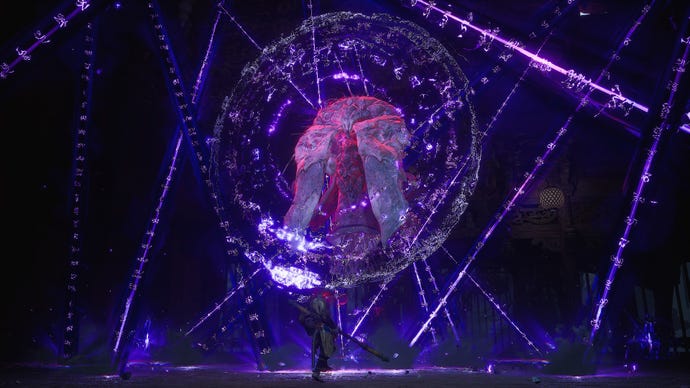
TheCyan Loongis the third of the secret Loong bosses which you can only be unlocked and defeated once you’ve procured the Loong Scales item from Chapter 2. This particular Loong is found on the right-hand edge of Turtle Island, near where you fightKang-Jin Star. If you don’t yet have the Loong Scales, he’ll just appear as an uninteractable statue. But with the Loong Scales in your possession, approaching him will begin a fairly tough fight which ranks among the most difficult in Chapter 3.
Pissing off Zhu Bajie…
Image credit:Rock Paper Shotgun/Game Science
Chen Loong and the Zodiac Village hub area
Image credit:Rock Paper Shotgun/Game Science
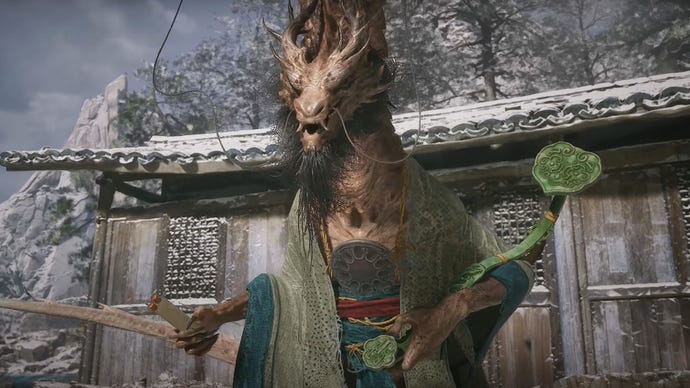
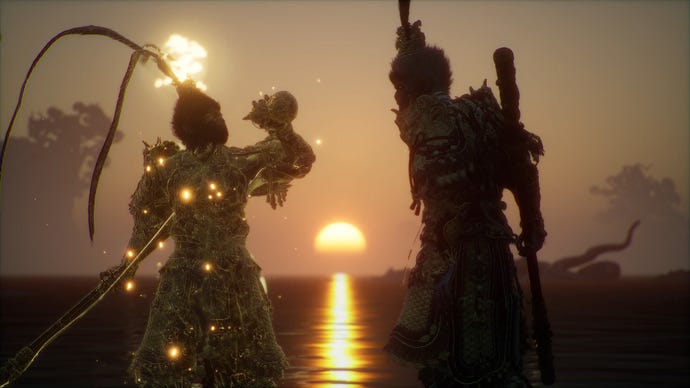
There is another Loong enemy in Chapter 3, but he doesn’t count amount the secret Loong bosses because you can find and fight him even without the Loong Scales. However,Chen Loongis special in a different way: completing his quest will unlock Black Myth: Wukong’s secret hub area, Zodiac Village.
You can find Chen Loong not far from the “North Shore Of The Bitter Lake” Shrine, a little way out into the water. Defeat him with Zhu Bajie’s help, and he’ll become a regular old NPC. After that, travel back to the Cellar in Chapter 2 and speak with Xu Dog to obtain a special pill for Chen Loong. Deliver it back to Chen Loong, and you’ll gain admittance to the Painted Realm, where Zodiac Village awaits you. This is a hub area to which most of the vendor NPCs will automatically transport - and you’ll also get to meet an important new character: Yin Tiger!
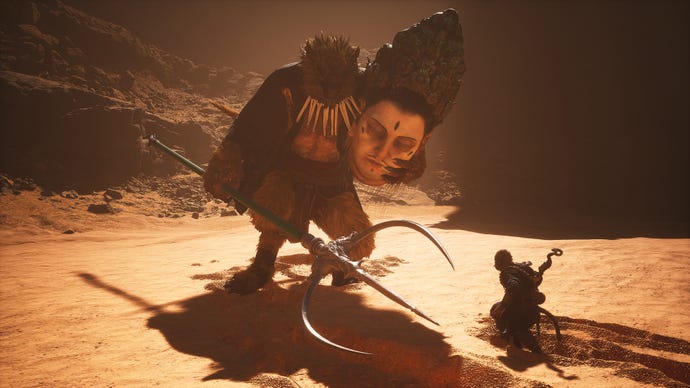
Duel and defeat Yin Tiger for huge rewards
Image credit:Rock Paper Shotgun/Game Science
Yin Tigeris found in Zodiac Village once you unlock it through Chen Loong’s questline. He’s a blacksmith, and can craft new weapons and armour for you, as well asupgrading existing armour. But you can also choose to “Challenge” Yin Tiger at any time.
Be warned: Yin Tiger is probably the most difficult boss in Chapter 3, so don’t go in unprepared. If you do manage to defeat him in single combat, however, you’ll gain some exceptional benefits, including anew curio slot, and the powerful Ebon Flow Transformation Spell.
Turtle Tear Soak
Image credit:Rock Paper Shotgun/Game Science
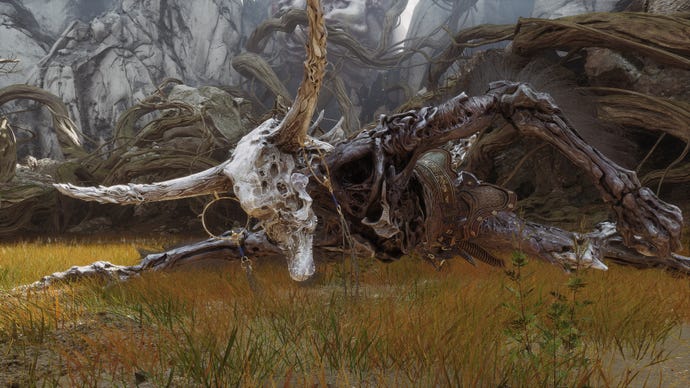
While you’re pottering about the North Shore Of The Bitter Lake, head along the shoreline until you reach a gigantic skeleton. Here, you can fight an optional boss called theApramāna Bat. He’s an irritant, but not too much of a threat. What’s good about this fight is that once you defeat him, a cutscene will ensue during which the great Turtle sheds a tear for the loss of his serpent companion (the skeleton).
You can pick up this tear in the form of the Turtle Tear Soak, which you can add to your Gourd in order to gain a moderate amount of Mana whenever you drink the Gourd while at full Health.
Skandha Of Thought
Image credit:Rock Paper Shotgun/Game Science
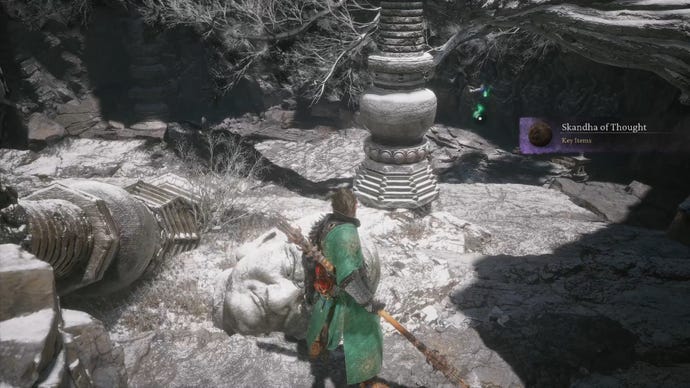
The Skandha Of Thought is probably the most well-hidden Skandha of the lot. To find it, jump down the side of the cliff directly in front of the “Mindfulness Cliff” Shrine, and follow the path all the way to the end. At the top of a small set of stone steps, you’ll see the telltale monkey scrounging about a partially snow-covered Buddha head. Interact with the head to obtain the Skandha Of Thought.
The Treasure Hunter
Image credit:Rock Paper Shotgun/Game Science
Not only is this questline very useful for the reward you receive after defeating the Green-Capped Martialist (the Spell Binder Spell), but it’s a required quest that you must complete if you want to reach Black Myth: Wukong’s True Ending.
Old Ginseng Guai
Image credit:Rock Paper Shotgun/Game Science
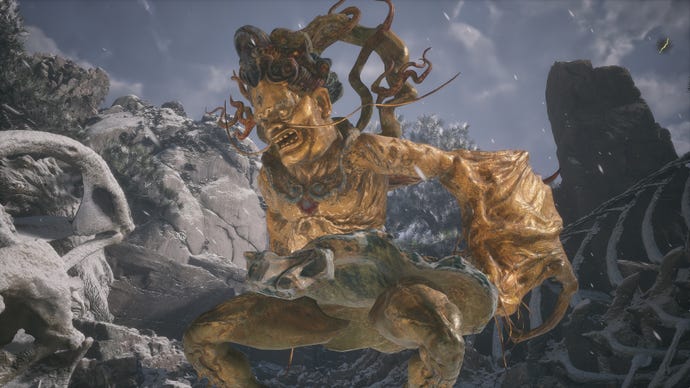
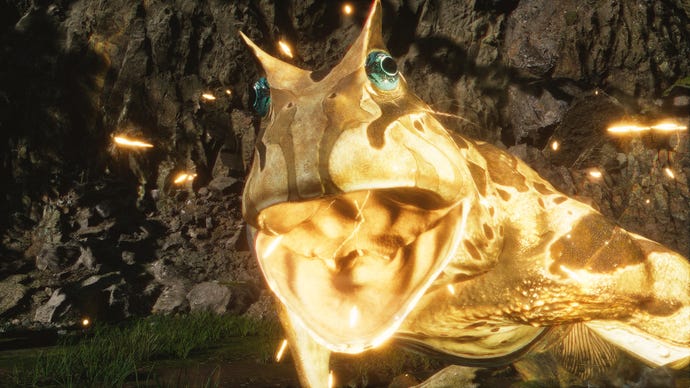
TheOld Ginseng Guaiis a very easy boss to miss when you’re struggling to make head or tail of the Valley Of Ecstasy in your first journey through Chapter 3. He’s the first of a handful of secret buried plant bosses which you’ll encounter over the next few Chapters, and each of them has to be plucked from the ground like an ordinary plant in order to “summon” them for a fight.
The Old Ginseng Guai can be found just a short distance on from the “Towers Of Karma” Shrine, in a dirt clearing with several plants in the ground. Pick the central plant to unleash the Old Ginseng Guai.
Skull Of Turtle Treasure
Image credit:Rock Paper Shotgun/Game Science
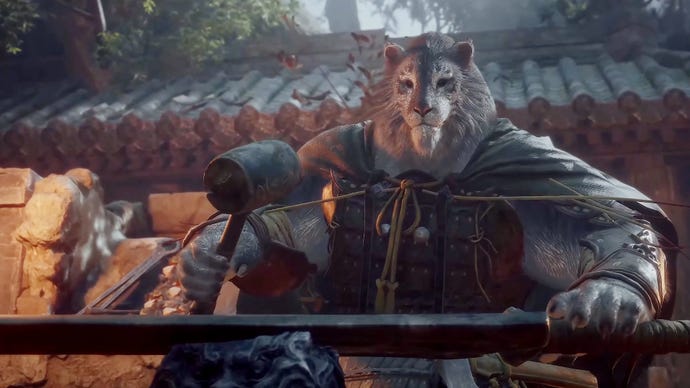
While not technically a secret, the Skull Of Turtle Treasure is a fairly rare drop which many players may miss, so I’m highlighting it here. This armor headpiece has the unique effect of increasing your chances of obtaining materials from a defeated enemy, so it’s well worth wearing whenever you’re farming for any items. The Skull Of Turtle Treasure drops from Turtle Treasure enemies - rare Lesser Yaoguai with large mace-like hammers. You can find one of them in Chapter 3, up the steps left of the “Longevity Road” Shrine.
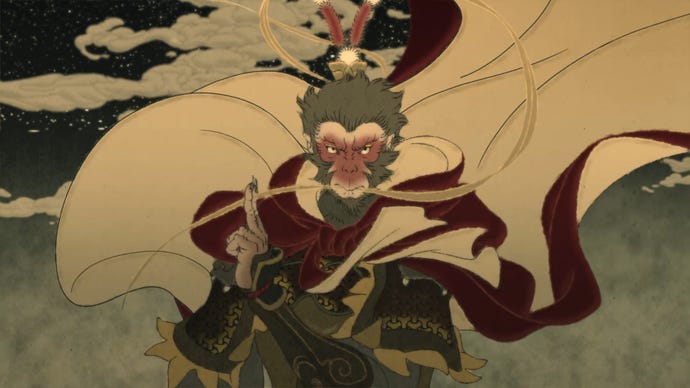
The Fox
Image credit:Rock Paper Shotgun/Game Science
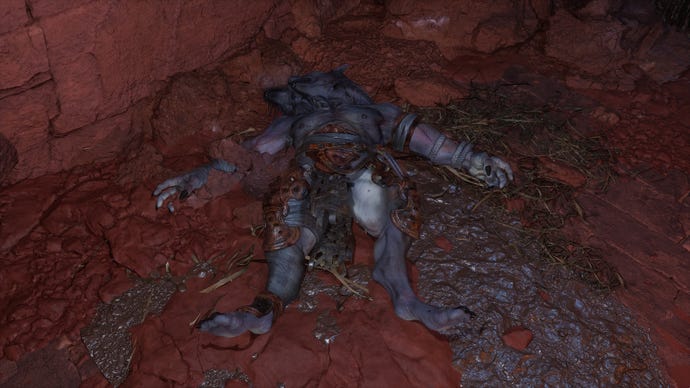
You’ll first meet the Fox character in an animation at the end of Chapter 2. This same Fox can be spoken to at the “Forest Of Felicity” Shrine in the Valley Of Ecstasy. Sadly, time has passed and the fox spirit is now a remnant inside a corpse sitting next to the archway in front of the Shrine. Speak to it and it’ll give you the Snow Fox Brush, which you can use to transform into a Fox at will.
To complete thisFox questline, you need to enter the temple where the bossNon-Voidis waiting. You can find him in New Thunderclap Temple, and as long as you enter his temple while in Fox form, you’ll gain some special dialogue from Non-Void before the fight. Once you’ve defeated him, return to the corpse at the “Forest Of Felicity” Shrine to gain your final quest reward: the Snow Fox Brush curio, which increases the duration of Transformations.
Hoarfrost Spell
Image credit:Rock Paper Shotgun/Game Science
Chapter 4 secrets
Chapter 4is generally more straightforward than Chapter 3, although it’s quite easy to get lost and miss some key secrets in the Webbed Hollow region in particular. To help avoid that, have a peruse through our list of all the Chapter 4 secrets in Black Myth: Wukong.
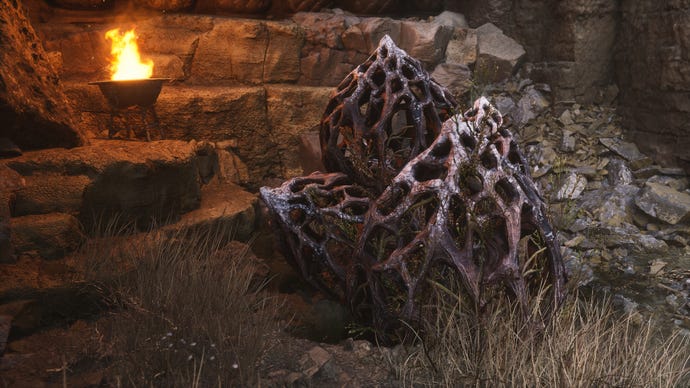
Feeding the Proto-Amourworm
Image credit:Rock Paper Shotgun/Game Science
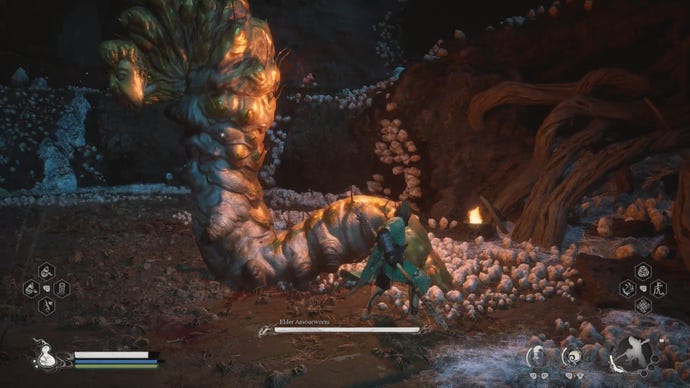
You may have discovered that there’s a boss called the Elder Amourworm a short way into the Webbed Hollow. You can find it at the end of the path near the “Verdure Bridge” Shrine where the two creepy lanterns with faces chanting “Big day!” at you. Defeat theElder Amourworm, and you’ll obtain the Proto-Amourworm item, which has a rather obscure function quite unlike any other item in Black Myth.
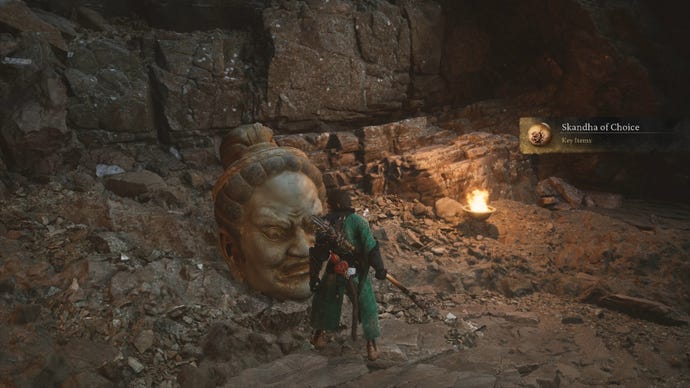
Skandha Of Choice
Image credit:Rock Paper Shotgun/Game Science
The Immortal Blessing Gourd
Image credit:Rock Paper Shotgun/Game Science
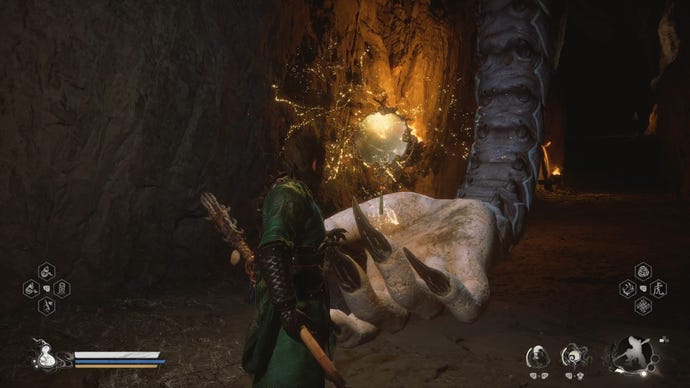
A requirement of making your way through the Webbed Hollow is defeating theBuddha’s Right Hand, a very strange Yaoguai Chief found along a narrow corridor just beyond the “Cliff Of Oblivion” Shrine. Defeating it will give you the “Buddha’s Right Hand” item, which is useless without its companion - the Buddha’s Left Hand.
Yellow Loong
Image credit:Rock Paper Shotgun/Game Science
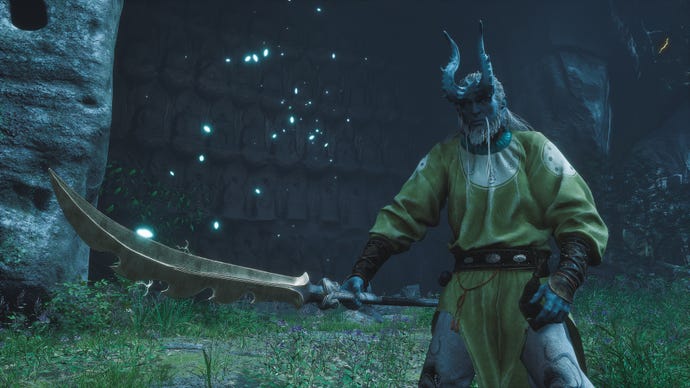
The strongest of all the secret Loong bosses, theYellow Loongcan be found at the end of a long secret passage through the Webbed Hollow in Chapter 4. Again, the first step is to obtain the Loong Scales from Chapter 2; after that, you need to defeat all the previous Loong bosses from the last few Chapters.
Cross the bridge made from the Buddha’s Right Hand, then turn left a short way down this path and drop onto a platform at one side of a long bridge. Follow this bridge path all the way, and then use Cloud Step to get through the array of Clawed Cocoons hanging in your way. At the very end of this secret path is the “Relief Of The Fallen Loong” Shrine area, and on the edge of the cliff you can face the powerful Yellow Loong and best it for its best-in-class Golden Lining Transformation Spell.
The Venomous Armguard
Image credit:Rock Paper Shotgun/Game Science
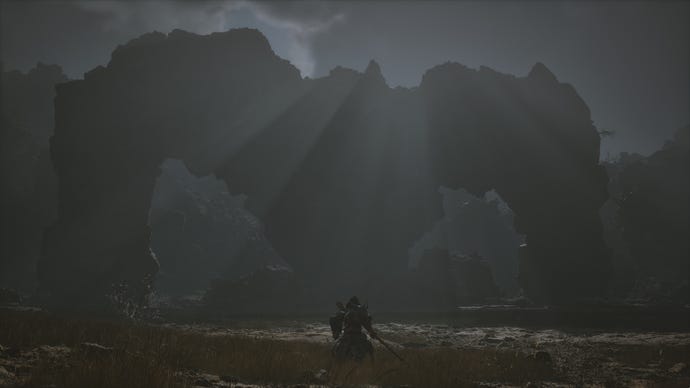
Chapter 4’s Secret Area: Purple Cloud Mountain
Image credit:Rock Paper Shotgun/Game Science
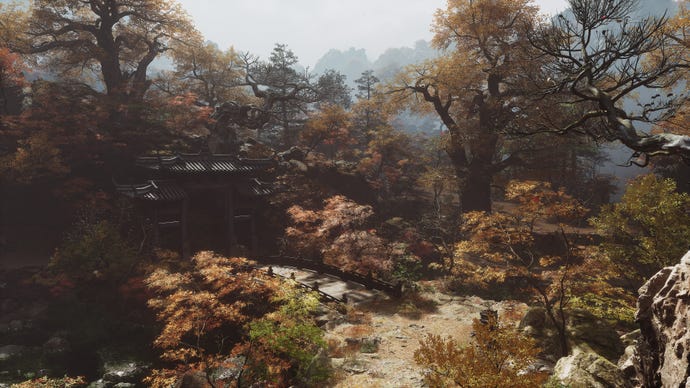
The beautifully autumnal Purple Cloud Mountain is the secret area of Chapter 4, and it contains a couple of very challenging boss fights. To get there, you must find and defeat the Venom Daoisttwice. The first time, he’s trapped in a large cocoon in the Pool Of Shattered Jade. After you defeat him there,he can be found againin a cave down a large slope a short distance before the “Court Of Illumination” Shrine.
Once you defeat the Venom Daoist the second time, he’ll reveal an entrance to the Purple Cloud Mountain via a mural on the cave wall, which you can interact with in order to transport yourself to the new secretive region.
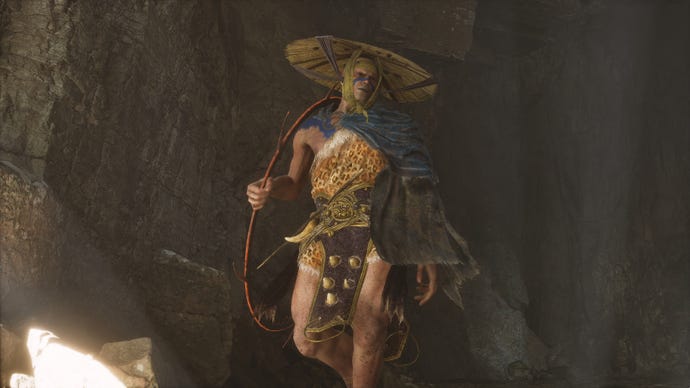
Daoist Mi
Image credit:Rock Paper Shotgun/Game Science
Return the Violet Hail to Daoist Mi, and he’ll reveal his true intentions - to use the Amourworm’s power for himself, and kill you with it. Defeat him once, and he’ll consume the Violet Hail to grow into an unappetising human-Amourworm hybrid. Beat him round the head again, and you’ll receive the Violet Hail Transformation Spell for your troubles.
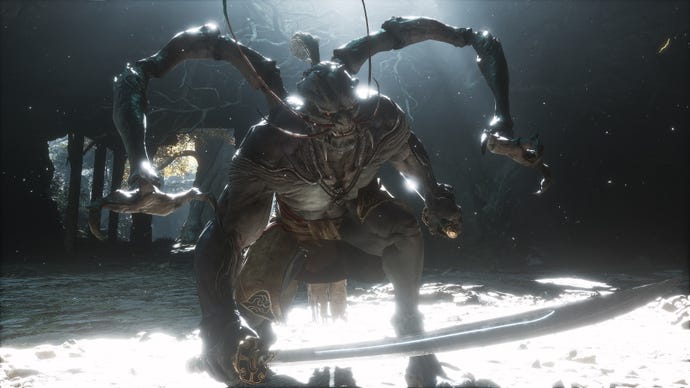
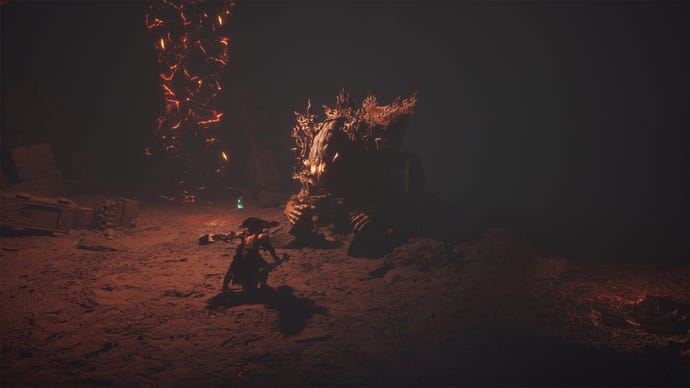
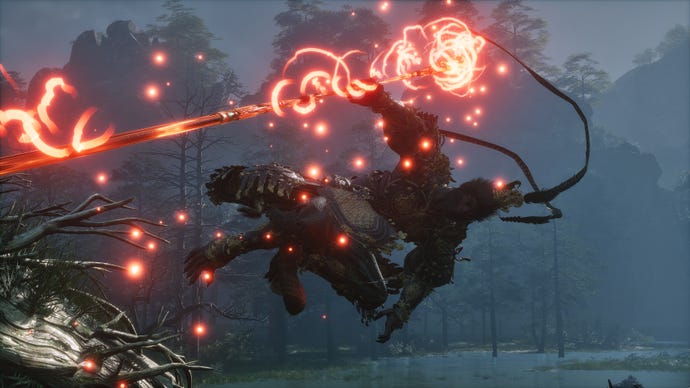
Fighting the Scorpionlord
Image credit:Rock Paper Shotgun/Game Science
Be warned - the Scorpionlord is a tremendously powerful foe, and easily the most difficult boss you’ve faced so far. Level up your skills, use consumables, and learn his attack patterns well!
The Scorpionlord vs The Duskveil
Image credit:Rock Paper Shotgun/Game Science
Another nice little easter egg comes about in Chapter 4 if you decide not to mess with the Scorpionlord’s stash of alcohol. Instead, make your way to the very end of the region, to the “Cloudnest Peak” Shrine, where the creature known as theDuskveilawaits you. If you left the Scorpionlord alone, he’ll actually arrive and fight the Duskveil himself. Sadly, he doesn’t last too long against the Duskveil (despite in my opinion being a much more fearsome foe), but at least he softens the Duskveil up a little bit for you!
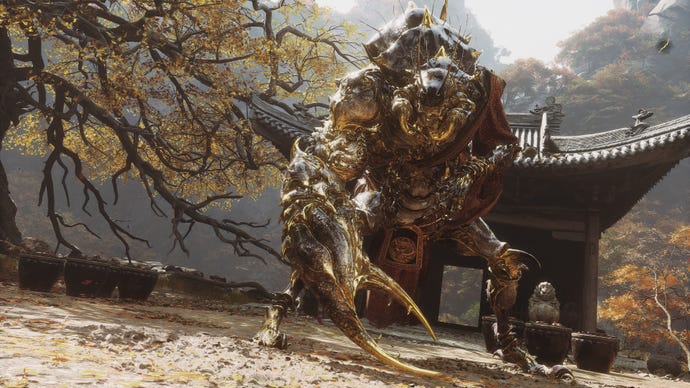
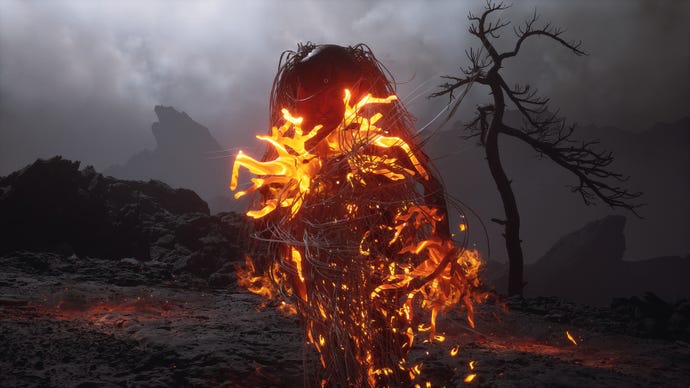
Fungiwoman
Image credit:Rock Paper Shotgun/Game Science
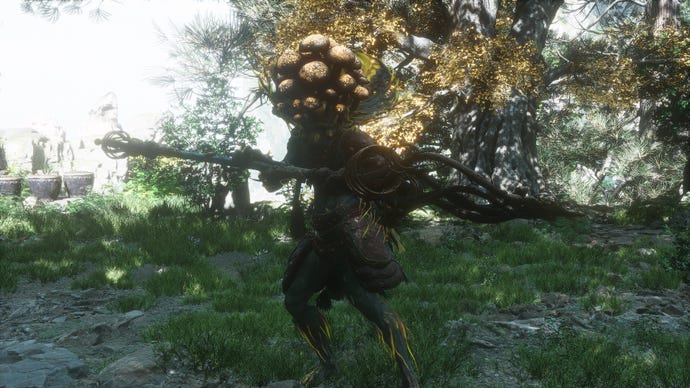
TheFungiwoman, like the Old Ginseng Guai, is a well-hidden and easily-missed boss masquerading as a regular old plant in the ground. In this case, you’ll find the Fungiwoman breathing in the dirt at the end of the path opposite the “Court Of Illumination” Shrine at the end of the Temple Of The YellowFlower. Pick the plant and she’ll emerge and attack you, after which you can beat her to a pulp and take her Spirit for yourself.
Find all the Purple Talismans
Image credit:Rock Paper Shotgun/Game Science
Starting in the Webbed Hollow and reaching all the way into the Temple of The Yellow Flower, there are purple talismans dotted about the environments of Chapter 4. Each of these talismans can be plucked from their stone altar, doing nothing on their own until you collect all four of them. Here’s where they can be found:
Be sure to take all of the talismansbeforeyou enter the final boss arena. If you do this, then you’ll prompt a brief fight against theSupreme Inspector- a dangerous foe who you’ll later properly encounter in Chapter 6. The fight is brought to an end before either of you win or lose, but it’s a cool little secret detail of Chapter 4 which results in a Stamina-increasing Celestial Nonary Pill for the effort it took to track down all four talismans.
Farming for the Tiger Tendon Belt
Image credit:Rock Paper Shotgun/Game Science
The Tiger Tendon Belt is one of the rarest loot drops in Black Myth: Wukong, and the best place to farm for it happens to be in Chapter 4, right at the very end of the Temple Of The Yellow Flower. The Tiger Tendon Belt is a powerful legendary curio which increases your attack if you “see through” the enemy (i.e. “parry” them with a Resolute Strike in Smash Stance). It drops only from Snake Sheriff enemies, so to farm it effectively you should spawn at the “Court Of Illumination” Shrine, turn back, and attack the Snake Sheriff that spawns each time on the left in the water just past the archway.
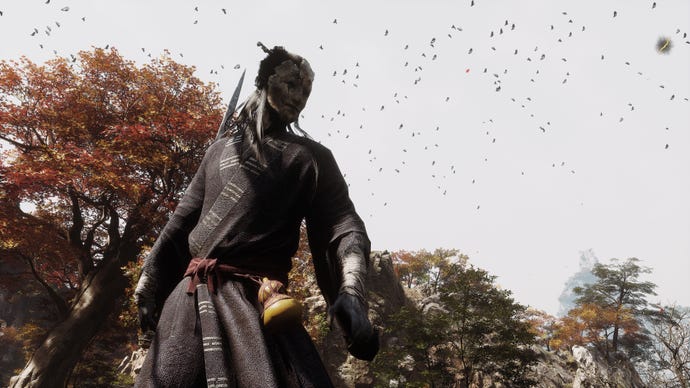
The Hundred-Eyed Daoist Master and the Weaver’s Needle
Image credit:Rock Paper Shotgun/Game Science
It tends to be the case that defeating the boss at the end of a Chapter’ssecretarea gives you a Vessel which is extremely useful against the final boss of that Chapter. The same is very much true of Chapter 4: the Weaver’s Needle Vessel (i.e. Yondu’s arrow from Guardians Of The Galaxy) which you receive from defeating the Duskveil is fantastic against Chapter 4’s final boss, the Hundred-Eyed Daoist Master.
In the second phase of the fight, the Hundred-Eyed Daoist Master will send his eyes into the sky all around you in order to shoot nasty little beams of damage at you from above. Use the Weaver’s Needle to quickly cancel out this powerful attack, and bring the fight back to the realms of sanity, making it a much easier time overall.
Chapter 5 secrets
Comparatively simpler than the last two lengths of your journey,Chapter 5nonetheless holds a handful of easily missed details and secrets. Below we’ve laid them all out for you so you don’t miss a thing.
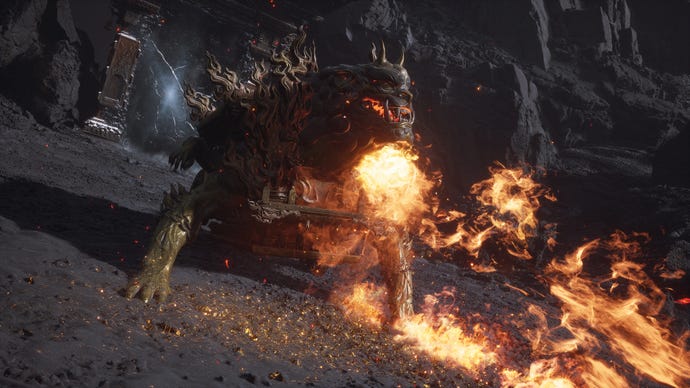
Ma Tianba and the Dark Thunder Spell
Image credit:Rock Paper Shotgun/Game Science
You know Ma Tianba? The horse guy who’s randomly appeared in every Chapter before now? Well, his questline finally comes to an end in Chapter 5. You must have spoken to Ma Tianba in all four previous Chapters in order for him to appear; after that, head into the lava on the right-hand side of the downward slope in front of the “Valley Entrance” Shrine. There you’ll find a broken down Cart enemy, with a rope hanging from its “mouth”. Interact with it to speak to Ma Tianba inside.
To complete his quest, you must progress to the Emerald Hall and defeat theKeeper Of The Flaming Mountains. Once you’ve done that, return to Ma Tianba and interact with the rope to pull it away from the Cart, earning you his powerful Transformation Spell: Dark Thunder.
If Ma Tianba isn’t in the Cart, it means you must have missed one of the previous Chapter locations where you can speak with him. Here they all are for your reference:
The Staff Of Blazing Karma
Image credit:Rock Paper Shotgun/Game Science
Chapter 5’s Secret Area: Bishui Cave
Image credit:Rock Paper Shotgun/Game Science
Note:before you enter the cave properly, hug the left cave wall to find another easily-missed boss,Baw-Lang-Lang!
Top Takes Bottom, Bottom Takes Top Spirit
Image credit:Rock Paper Shotgun/Game Science
Nine-Capped Lingzhi Guai
Image credit:Rock Paper Shotgun/Game Science
The last and most dangerous of the fake-plant bosses, theNine-Capped Lingzhi Guaican be found in the clearing right next to the “Ashen Pass III” Shrine. Head into the clearing and pick the central plant, and you’ll summon the boss. Don’t underestimate this one - it has a nasty habit of throwing its own head at you in order to blind and slow you, allowing it to take down your health in a matter of seconds.
The Supreme Gourd
Image credit:Rock Paper Shotgun/Game Science
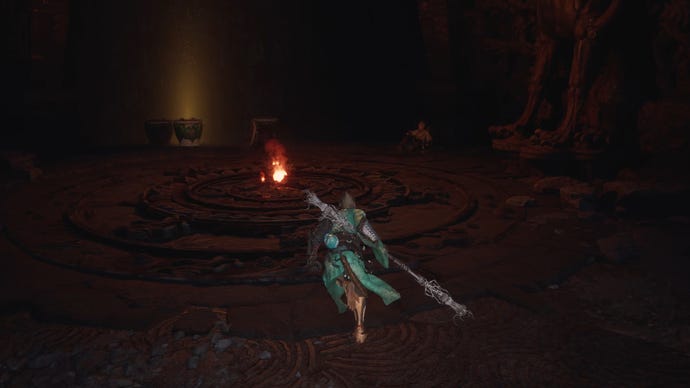
From the “Rakshasa Palace” Shrine, follow the path across the various bridges and then turn left into the lava to reach a circular stone temple with a flame in the centre of the floor. You can also find Yuan Choucheng, the old master who give you theBlessed Gourdway back in Chapter 1, inside this room. Speak to him, and interact with the flame in order to obtain the Supreme Gourd - the mythical final form of your Old Gourd.
Chapter 6 secrets
Chapter 6, the final Chapter of Black Myth: Wukong, flips the usual Chapter formula on its head in a few ways, not least with its giant open-world level design and the introduction of the Somersault Cloud Spell. Given this design choice, it’s very easy to miss some of the fascinating secrets that are hidden away in this final step of your journey.
The Fortune’s Favor Armor Set
Image credit:Rock Paper Shotgun/Game Science
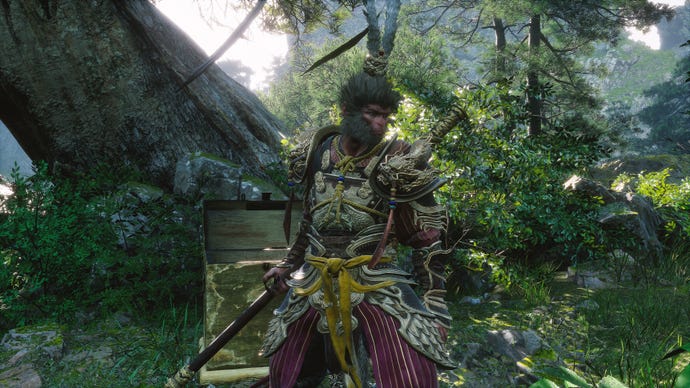
One of the most well-hidden secrets in all of Black Myth: Wukong is the Fortune’s FavorArmor Set. This set was initially considered for the design of Sun Wukong’s original armour before it became what we see in the final game. But rather than remove it altogether, the devs decided to put the entire armor set in a hidden chest in the Verdant Path.
To find the chest, start at the “Verdant Path” Shrine, and then head backwards, all the way to the broken tree where you first spawned in Chapter 6. Once you’re there, look up and to the left a little, and you should see that you’re standing under a big tree with a nice thick trunk. Hop onto your Somersault Cloud and investigate the other side of that tree trunk. Voila! A chest, containing the secret Fortune’s Favor Armor Set!
This armor set has the unique set benefit of increasing your Defense depending on how many Relic skills you’ve unlocked. You can unlock more and more Relic skills through New Game Plus, so its effectiveness increases dramatically with future playthroughs.
The purpose of the Tadpoles
Image credit:Rock Paper Shotgun/Game Science
Once you kill Lang-Baw-Baw and obtain all the Tadpoles in Black Myth: Wukong, you can upgrade theBaw-Li-Guhh-LangSpirit from Chapter 1 to its highest possible level. Yes, unlike other Spirits, this Spirit requires 1 Tadpole per upgrade. Once you upgrade it to the highest level, it becomes the game’s only mythical-level Spirit, and activating it randomly chooses one of the different frog types to determine its type of attack.
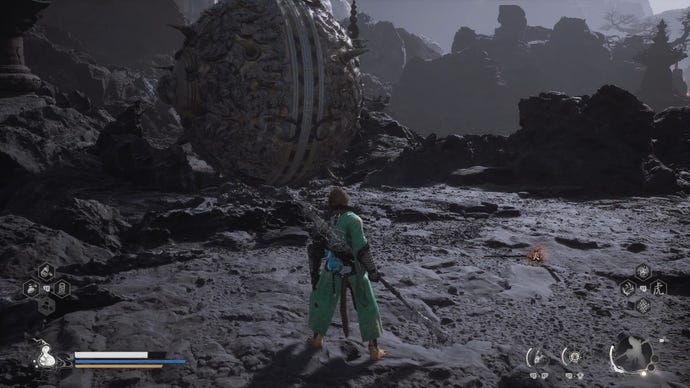
Giant Shigandang
Image credit:Rock Paper Shotgun/Game Science
TheGiant Shigandang, considering its gargantuan size, is remarkably well-hidden in the landscape of Chapter 6. This secret boss can only be summoned if you’ve collected all four Skandha items from the previous Chapters. Once you’ve done that, you can follow the right-hand path up the cliff in front of the “Mantis-Catching Swamp” Shrine to the colossal lair of the Giant Shigandang.
The Five Skandhas Pill
Image credit:Rock Paper Shotgun/Game Science
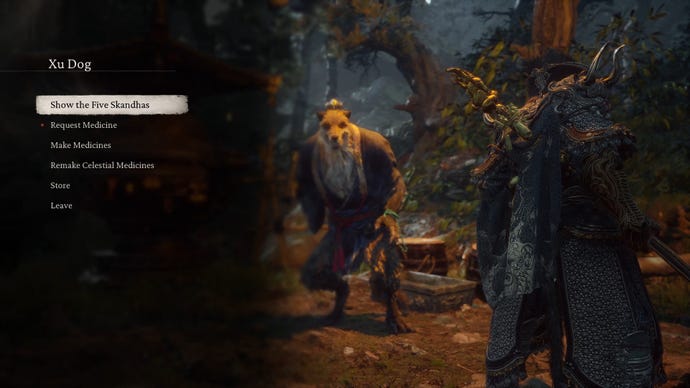
One final additional secret awaits you after the Giant Shigandang fight. Once you’ve obtain all five Skandha items, their function can finally be revealed. Head back to Xu Dog in Zodiac Village (or the Cellar in Chapter 2 if you never unlocked Zodiac Village), and present him with the five Skandhas. He’ll fashion the Five Skandhas Pill out of them - a one-time permanent stat-increasing Pill which increases all your attributes at once.
Chapter 6’s Secret Area: Mount Mei
Image credit:Rock Paper Shotgun/Game Science
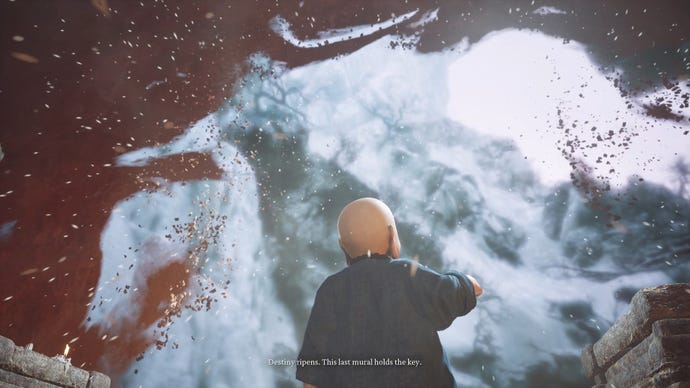
We alluded to it earlier, but now is the time to explore the most secretive of Black Myth: Wukong’s secret areas: Mount Mei, home of the game’s True Ending. To unlock this area, you must have fully completed all the previous secret regions in each Chapter (i.e. defeated the bosses at the end of each one), and also completed the Treasure Hunter questline in Chapter 3.
Once you’ve done all of that and reached Chapter 6, head back to the “Great Pagoda” Shrine in Chapter 3 and approach Maitreya at the top. He’ll let you into the land of Mount Mei, where you can finally have your long-awaited rematch withErlang, The Sacred Divinity, the boss you fought in the prologue.
Erlang has unique dialogue for each of your Transformations
Image credit:Rock Paper Shotgun/Game Science
During the first phase of Erlang’s fight (where you’re fighting him as a human), you’ll have the opportunity - as with any other fight - to use a Transformation Spell. What’s unique about this fight is that Erlang has unique dialogue for every Transformation in the game, remarking on each one as you transform. For instance, if you transform into Yin Tiger, Erlang will say: “A most fitting time. My spear is in need of sharpening.” Badass.
The True Ending
Image credit:Rock Paper Shotgun/Game Science
If you managed to defeat Erlang once and for all (and good luck to you, it’s easily the hardest boss fight in the game), then you’ll unlock the so-called True Ending when you later defeat the final boss of Black Myth: Wukong. Once you’ve reached the ending, you’ll be treated to an extra (and quite lovely) animation about Wukong’s journeys if you defeated Erlang first.
The Great Sage’s Broken Shell can steal your Gourd
Image credit:Rock Paper Shotgun/Game Science
Probably the most jaw-dropping moment in the final boss fight of Black Myth: Wukong is something which some players may not even encounter. If you attempt to drink from yourGourdin the final phase of the fight against theGreat Sage’s Broken Shell, then he will Immobilize you, take your Gourd, and heal himself with it in a scripted cutscene before throwing it back to you. Doing so will obviously replenish his health a little, while also using up a Gourd charge. At least he gives it back afterwards, eh?
New Game Plus exclusives
Image credit:Rock Paper Shotgun/Game Science

The ultra-secret Wukong Stance
Image credit:Rock Paper Shotgun/Game Science
The final secret we’ll reveal in this guide is the secret of the Wukong Stance. This ultra-secret fourth staff stance is one that you temporarily unlock in Chapter 6 of your first playthrough once you’ve donned Wukong’s armour and the Jingubang staff, and it unlocks a colossally powerful four-Focus Point overhead smash attack which can bring almost any enemy to its knees. What most players don’t know is that you can unlock this Wukong Stance permanently.
Unfortunately, in order to unlock the Wukong Stance you need to first unlock every single Relic Skill in the game. That means completing the True Ending in order to unlock the final Free Mind Relic, and then playing through all of Black Myth: Wukongthree timesin successive New Game Plus playthroughs. Once you’ve unlocked all 18 Relic Skills, you’ll gain the ability to use the Wukong Stance for your fourth playthrough. An achievement worth bragging about, that is.
That concludes our lengthy and comprehensive guide on all the Black Myth: Wukong secrets to uncover throughout your playthrough (or multiple playthroughs). For more help getting through the game and discovering all these secrets, check out our handy guides on thebest weapons,best curios, andbest spiritsin Black Myth: Wukong.
