HomeGuidesBlack Myth: Wukong
All Black Myth: Wukong Chapter 6 bosses and where to find themFind all 19 Chapter 6 bosses in the vast openness of Mount Huaguo
Find all 19 Chapter 6 bosses in the vast openness of Mount Huaguo
Image credit:Rock Paper Shotgun/Game Science
Image credit:Rock Paper Shotgun/Game Science
Trying to find all 19 bosses in Chapter 6 of Black Myth: Wukong?The expansive final Chapter ofBlack Myth: Wukongflips the usual semi-linear environmental progression on its head; after thefirst bossof Chapter 6, Mount Huaguo opens up into a dauntingly colossal landscape through which you can fly at high speeds with the help of your new Somersault Cloud Spell.
It’s very cool stuff, but the sheer scale of the environment makes tracking down all the Chapter 6 boss locations an annoyingly difficult task. So, we’ve put extra focus into the below Chapter 6 bosses guide to help ensure you know exactly where to go to track down all 19 bosses in this final section of Black Myth: Wukong. We’ll even go over the optional secret endgame bossErlang(and the other bosses which form part of this endgame quest) so you can fully experience every boss encounter in the game before you finish your playthrough.
To see this content please enable targeting cookies.Manage cookie settings
To see this content please enable targeting cookies.Manage cookie settings
Skip to a different Chapter here!
All Chapter 6 bosses in Black Myth: Wukong
Below we list a grand total of 19 bosses in Chapter 6 of Black Myth: Wukong. However, these also include the three back-to-back secret bosses of Mount Mei, a region which is technically part of Chapter 3. I’ve included them as part of our Chapter 6 bosses guide because they can only be tackled once you’ve completed all the secret areas of all the previous Chapters, and they’re the toughest challenge in the game, so you should only embark on this endgame boss quest once you’ve done everything else (except perhaps the final Chapter 6 boss).
Here’s the full list of all Chapter 6 bosses in Black Myth: Wukong, and where to find them:
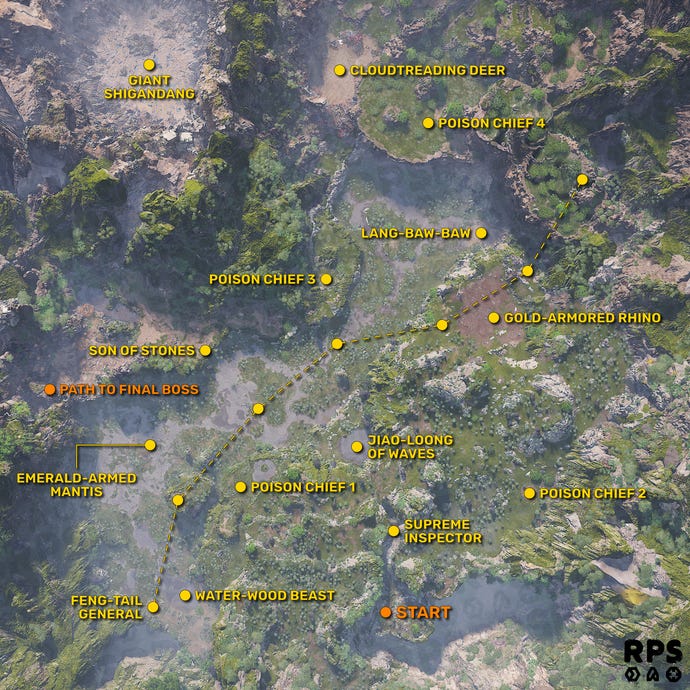
Chapter 6 boss locations map
Because Chapter 6’s environment is so open compared to the other Chapters, in this guide we’ll be helping you to find the exact location of each boss with the addition of a top-down map. This map was created with the help of theSimple Map modfor Black Myth: Wukong, which can be found onNexusMods.
Use the below map to find the exact location of every boss in Chapter 6:
This handy map details the exact location of all the bosses in Chapter 6, minus the final bosses from #15 to #19. |Image credit:Rock Paper Shotgun/Game Science
Now, we’ll take you through each of these endgame Chapter 6 bosses in order, supplementing the above map with some descriptions of exactly where to go to reach each boss location, and how to defeat them once you’re there.
1. Supreme Inspector
Image credit:Rock Paper Shotgun/Game Science
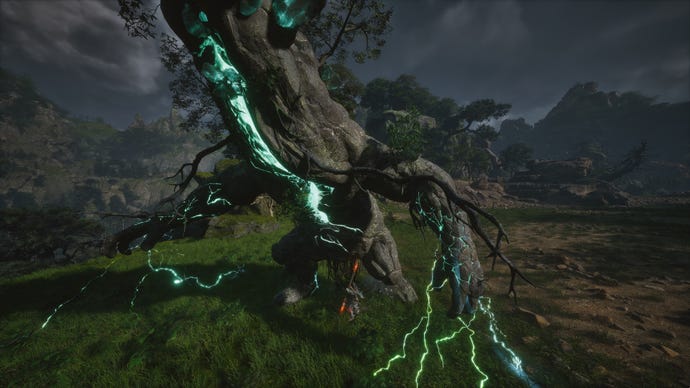
The path from the beginning of Chapter 6 to the Supreme Inspector fight is short and straight. All you need to do is defeat a handful of Soldiers on the way to the “Verdant Path"Keeper’s Shrine, and after that head into the clearing in front of the Shrine. The Supreme Inspector awaits you there, and he starts the Chapter’s boss encounters off in grand fashion.
2. Jiao-Loong Of Waves
Image credit:Rock Paper Shotgun/Game Science
Jiao-Loong Of Waves is the closest boss location you can reach after defeating theSupreme Inspector. Once you unlock the Somersault Cloud Spell and can fly through the air at will, use it to cross the gap in front of you beneath the giant chains; and then just head straight forward off the edge of the cliff and straight down into the pool of water directly below you. At the bottom, hop off the Somersault Cloud and into the lake, and Jiao-Loong Of Waves will automatically emerge from the water to fight you.
After the Supreme Inspector, Jiao-Loong is a breath of fresh air. That is to say - quick and easy. He has low health, fairly obvious attacks, and a tendency to get overwhelmed easily. You can tackle him however you like - I whittled him down extremely quickly with a combination of A Flock Of Many and the lightning-infused attacks of my Golden Lining Transformation.
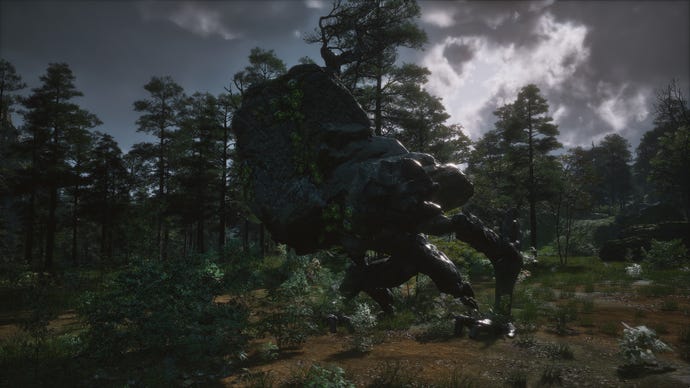
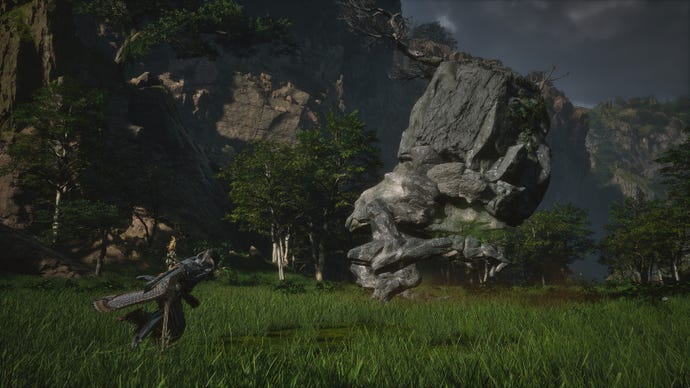
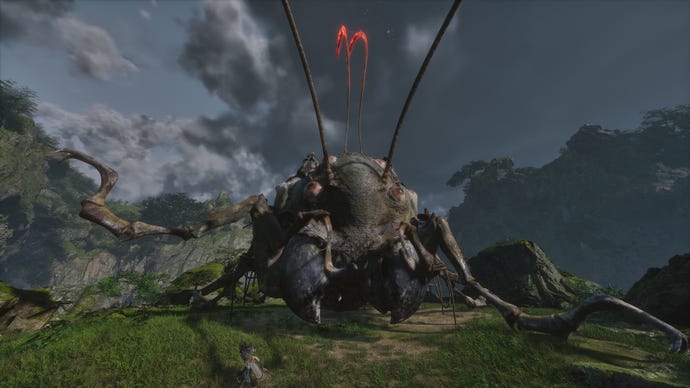
3. Son Of Stones
Image credit:Rock Paper Shotgun/Game Science
Son Of Stones is probably the most easily noticeable of all the bosses strewn about the Foothills of Mount Huaguo. He’s a big stone fella lounging on the very edge of a clifftop overlooking the vast expanse of water that dominates the Foothills region. If you fly above theJiao-Loong Of Waveslake, and face away from the Supreme Inspector arena, then you should be able to clearly see Son Of Stones ahead and to the left of you. Fly over to him and start hitting him in the backside to start the fight.
Immediately after you attack him, Son Of Stones will just swipe behind him a couple of times before deciding that you’re enough of a nuisance to warrant turning around. Once he gets up, you can whale away at his legs while dodging his (slow but powerful) attacks, as you would any other big beefy Black Myth boss. Don’t bother using Immobilize - it doesn’t work on him. Instead, look out for his large lightning area-of-effect attack; it’s fairly easy to avoid the lightning, and it’s a great opportunity for you because after the attack, Son Of Stones lies down for a while, exhausted. Perfect timing for a Charged Heavy Attack or two.
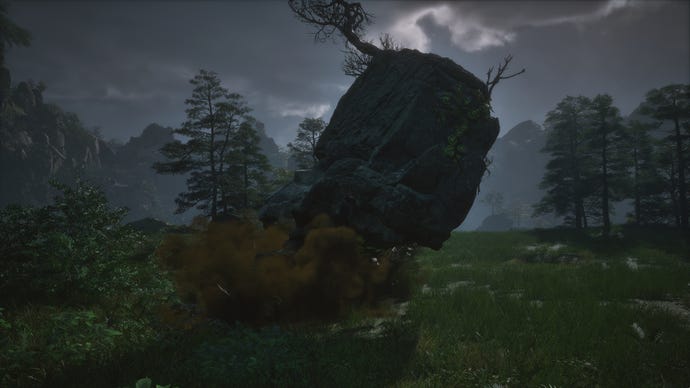
4. Poison Chief 1
Image credit:Rock Paper Shotgun/Game Science
There are four Poison Chief minibosses hidden away in the Foothills of Chapter 6, and they can be pretty hard to spot, because each one masquerades as a large slab of environmental rock until you disembark from your Somersault Cloud and get close. To find the first Poison Chief, fly above theJiao-Loonglake again (it’s a good starting point for most of these locations), and then look to your left for another similar-sized lake that’s a bit higher up. Like the Jiao-Loong lake, this lake is also pressed up against the cliffside, and you’ll know when you’ve found it because it has a small island in the centre. The first Poison Chief is resting in the small clearing right next to the lake.
It’s easy to underestimate the Poison Chief bosses; they’re not too challenging to kill, but they can also kill you very easily with the enormous damage output of their poison bombs. The explosions that occur after each attack are more dangerous than the attacks themselves, so this is one situation where you should avoid being overly aggressive. Take your time, dodge the attacks that come your way, and use Cloud Step to get up close and deliver damage before moving away again.
5. Poison Chief 2
Image credit:Rock Paper Shotgun/Game Science
The second Poison Chief in the Foothills is quite well-hidden amongst the forested area to your right as you exit theSupreme Inspectorarea. To get there, fly as high as you can over theJiao-Loong Of Waveslake, and then soar directly over the highest peak on your right and slightly behind you. This sets you directly on the path towards a dirt clearing in the centre of the forest beyond. Touch down in the clearing and you’ll encounter the second Poison Chief.
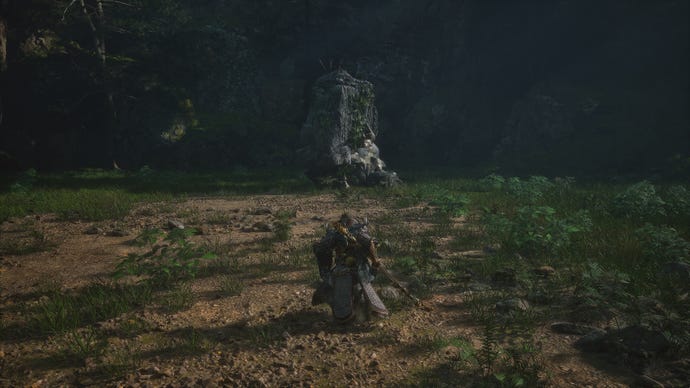
6. Poison Chief 3
Image credit:Rock Paper Shotgun/Game Science
7. Poison Chief 4
Image credit:Rock Paper Shotgun/Game Science
The fourth and final Poison Chief of Chapter 6 is located very near to the “Deer Sight Forest” Shrine. From this Shrine, fly up and to the right (facing theCloudtreading Deerarena), and you’ll find a forest atop the cliff next to you. Fly over the top of the particularly gnarled tree on the rock in the middle of this forest, and behind it you’ll find another clearing (a grassy one this time) where you can fight Poison Chief 4.
8. Lang-Baw-Baw
Image credit:Rock Paper Shotgun/Game Science
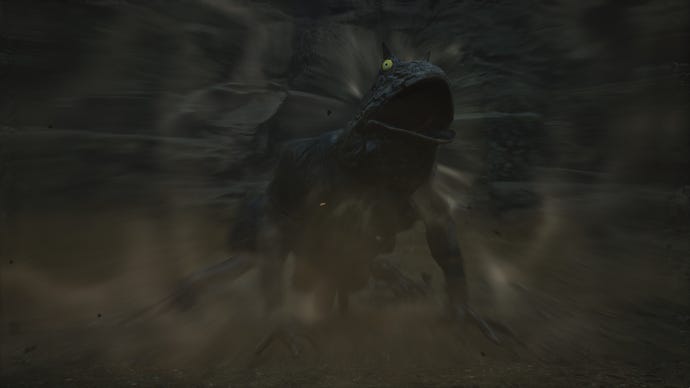
At long last, here we have a frog boss that poses something of a challenge. Lang-Baw-Baw has all the usual froggy moves - the tongue, the backwards kick, and so on - but changes the tempo of the fight with his stone skin form, which repels your melee attacks. You still deal damage with each attack, but it’s so tiny as to be negligible. It’s best to just wait out his stone form using your Transformation, and then punish him once he reverts with your usual Immobilize + enormous damage combos.
Once you defeat Lang-Baw-Baw - and assuming you’ve defeated all the other frog bosses in the previous Chapters - you’ll finally have enough Tadpoles to upgrade yourBaw-Li-Guhh-LangSpirit at any Shrine. Upgrading it all the way will transform it into a new Spirit - Baw-Baw-Lang-Lang - which allows you to take the form of a random one of the Frogs you’ve faced, each with a different ability. It’s the only Mythical-level Spirit in the game, and now it’s yours!
9. Cloudtreading Deer
Image credit:Rock Paper Shotgun/Game Science
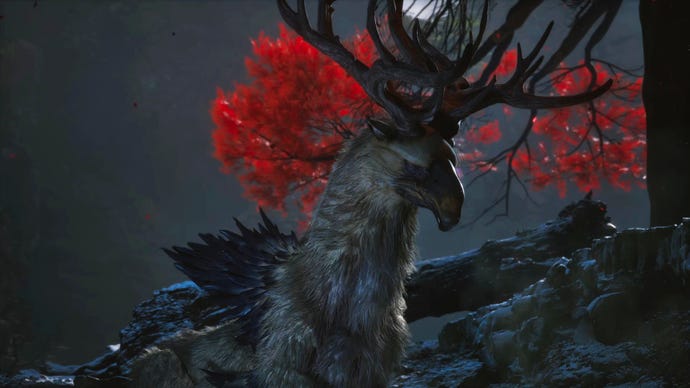
The Cloudtreading Deer is the first of fourrequiredbosses which you need to kill in order to gain the pieces of Sun Wukong’s armor - a requirement for reaching the final boss. Thankfully, this Deer is easy to find - just head towards those red trees in the distance that I’ve mentioned multiple times already. Touch down in the arena (might be an idea to rest at the “Deer Sight Forest” Shrine first though), and the fight against the Cloudtreading Deer will begin.
I’d call the Cloudtreading Deer the most challenging of the four key bosses in the area (bosses 9-12). And strangely, his first phase is more challenging than the second, thanks to those incredibly annoying whirlwinds which follow you around and deal enormous damage if they catch you. Cloud Step is imperative here, ensuring you have the mobility to outpace the whirlwinds and keep up the pressure against the Deer. Once you deplete his first health bar, he’ll start a second phase where instead of calling forth whirlwinds and frost, he’ll use poisonous blood pools and projectiles against you - which are much easier to deal with, honestly.
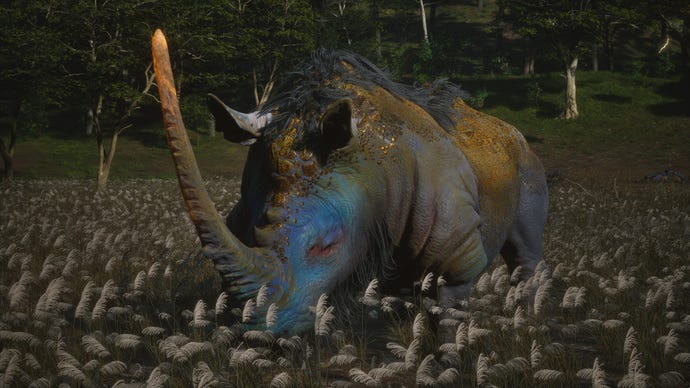
10. Gold Armored Rhino
Image credit:Rock Paper Shotgun/Game Science
11. Feng-Tail General
Image credit:Rock Paper Shotgun/Game Science
The Feng-Tail General is unique among Black Myth: Wukong’s bosses, because it’s more of a skill-check puzzle than a fight. You can’t damage the Feng-Tail General in a conventional sense. Instead, you must, umm, ride it to completion? Hmm. Probably could have phrased that better.
To beat the Feng-Tail General, you need to use Somersault Cloud to land on its back. Then, interact with the antennae on its head to hold on while it jumps three times in succession. This is a Stamina skill-check - your Stamina will deplete over the course of the three jumps, and if it reaches zero, you’ll fall off and have to start again. You need about 300 Stamina to pass this test.
After the third jump, you’ll need to interact with the antennae again to perform another skill-check - this time based on Health. The antennae will burn you as you hold on, chunking down your health over time. You need to last the entire check without losing all your health, or you’ll die. You need an enormous amount of HP and/or Scorch Resistance to pass this test, but there’s a much easier way - just activate the Fireproof Mantle just before the second skill-check, and you’ll take no damage from the flames. Beating this test will beat the Feng-Tail General.
12. Emerald-Armed Mantis
Image credit:Rock Paper Shotgun/Game Science
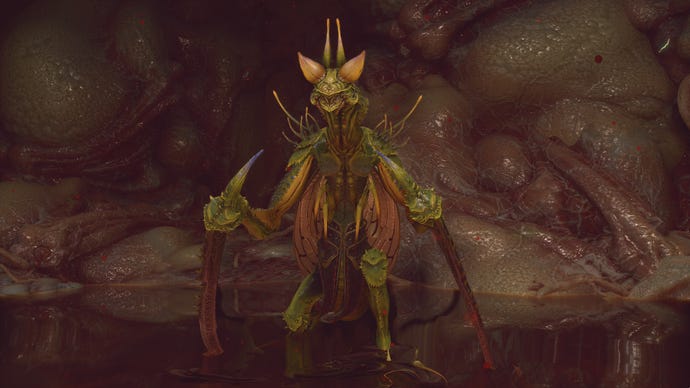
The Emerald-Armed Mantis is the last required boss you must defeat before you can take on the final boss of the game. It only spawns once you’ve defeated the other three required bosses:
Once you’ve killed all three bosses, just head to the “Mantis-Catching Swamp” Shrine, and approach Zhu Bajie, who’ll be standing a few metres from the Shrine. This will trigger a cutscene that leads to the (rather uniquely set) Emerald-Armed Mantis boss fight, which takes place inside Zhu Bajie’s stomach.
The hallmark of this fight is the Emerald-Armed Mantis’s long and dangerous combo attacks, which become longer-ranged and even more dangerous once he hits about two-thirds health. Pick your poison between Cloud Step and Rock Solid - both Skills are very potent at interrupting the Mantis’s flow and rendering him vulnerable to lots of damage. If you run into trouble, pop your Transformation for a period of relative safety, but this shouldn’t be a particularly difficult fight. Not after theSupreme Inspectorand the Cloudtreading Deer, anyway.
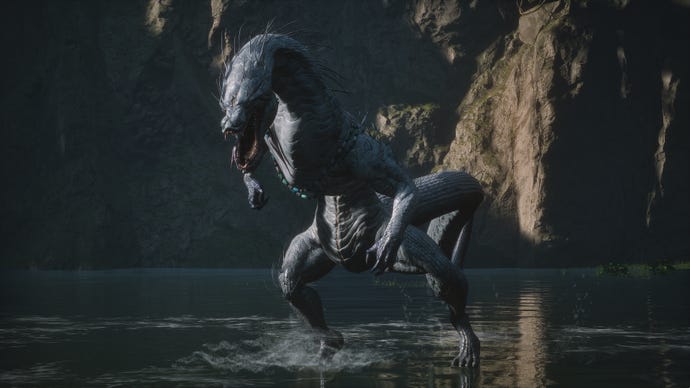
13. Water-Wood Beast
Image credit:Rock Paper Shotgun/Game Science
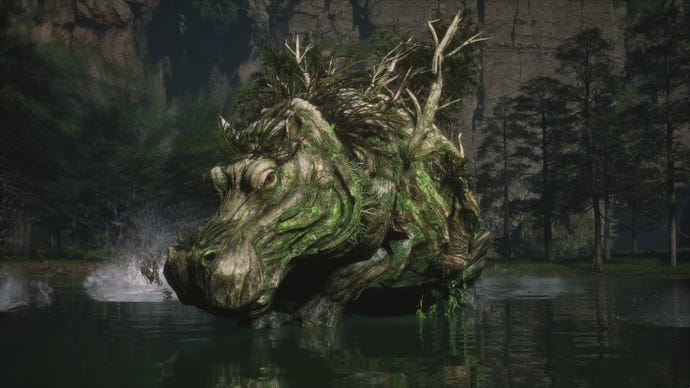
There are plenty of Water-Wood Beasts dotted about the lakes of Chapter 6, but only one of them is the actual Water-Wood Beast boss. This one can be found in the lake behind the “Mantis-Catching Swamp” Shrine, right next to the first clearing where theFeng-Tail Generalcan be found. You’ll first see the Water-Wood Beast as just a patch of bubbles rising from below the water in the middle of the lake; approach it, and the fight against the oversized hippo will begin.
This Water-Wood Beast is actually more challenging than you might expect. He’s much larger and deadlier than his lesser kin elsewhere in the Foothills, and a slightly janky hitbox around his maw makes things more difficult than they need to be. While submerged, his attacks do mega-damage, so it’s a good idea to use Cloud Step or Rock Solid to take away that possibility. Stay around the Water-Wood Beast’s back legs while it’s above the water, and Immobilize it for periods of uninterrupted damage. Enough attacks will make him stagger, leading to even more damage and eventually (hopefully) death.
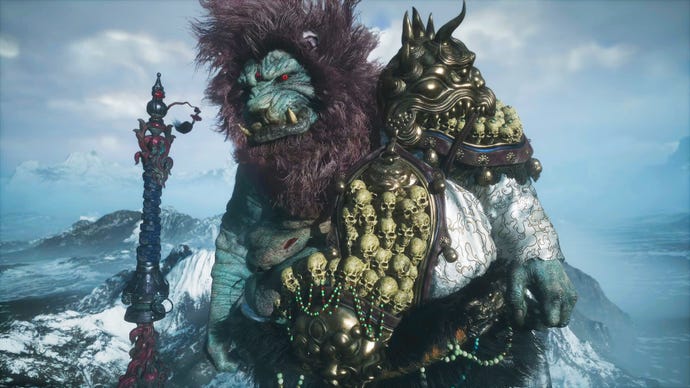
14. Giant Shigandang
Image credit:Rock Paper Shotgun/Game Science
If you’ve collected all of these Skandha items, then once you reach the “Mantis-Catching Swamp” Shrine in Chapter 6, fly up to the clifftop ahead of you, and follow the middle path through the ravine. You’ll soon come to a gigantic boss arena, at the centre of which is the Giant Shigandang.
The first thing to do is fly down towards the ground if you’re on Somersault Cloud, because it lets out a roar that knocks you off the Cloud, and if you’re up high, the fall could be fatal.
Now then, onto the fight itself. The Giant Shigandang is another boss that can’t be fought conventionally - it’s just too big. Instead, hang around on the very edge of its arm range, and jump over its shockwave attacks. Wait for a moment where it leaves its arm on the ground for a few seconds, and run towards it. Target the blue crystals on its arms with your largest and most powerful attacks; each time you break a crystal, it deals enormous damage. Rinse and repeat this process, and the Giant Shigandang will fall very quickly.
Once you defeat the Giant Shigandang, climb up its arm to trigger a cutscene, during which you obtain the fifth and final Skandha item: the Skandha Of Consciousness. Take all five Skandhas to Xu Dog at Zodiac Village, and he’ll give you a special Celestial Pill which increases all your attributes at once. Pretty neat.
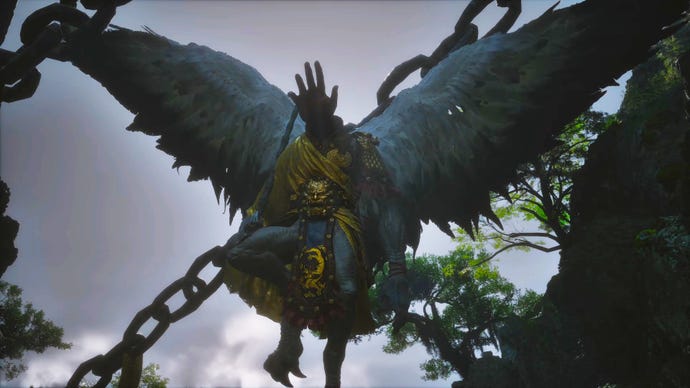
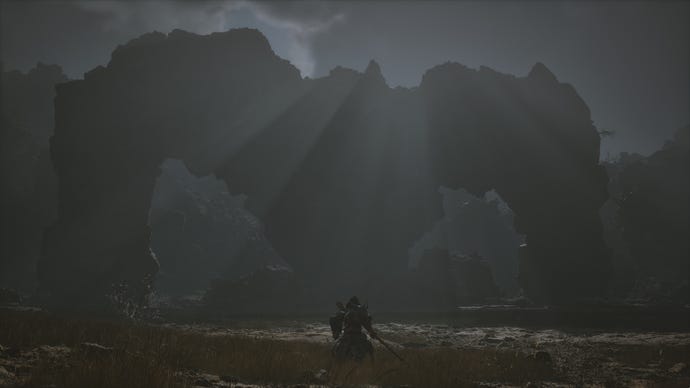
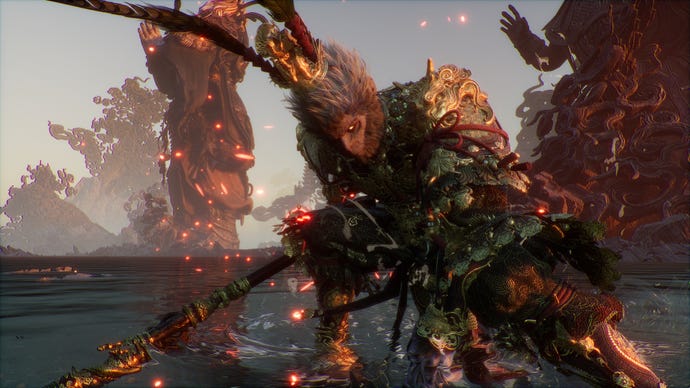
15. Erlang, The Sacred Divinity
Image credit:Rock Paper Shotgun/Game Science
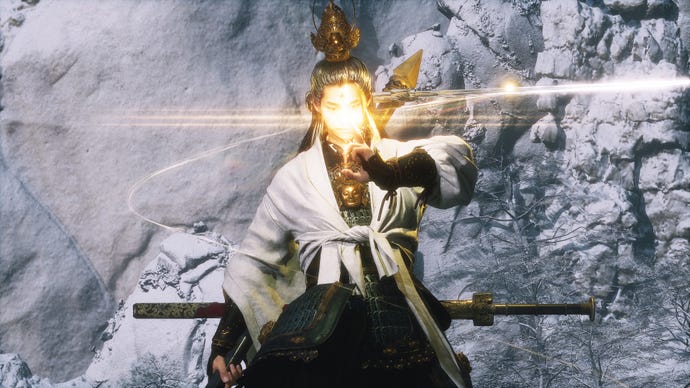
To reach Erlang, The Sacred Divinity, follow these steps:
As for beating Erlang, that’s the toughest challenge that Black Myth: Wukong has to offer. Erlang has a poise meter which allows him to resist most attacks until you wear him down. He has very long combos, hits hard, uses unpredictable timings, and can automatically sidestep your most powerful Charged Heavy Attacks. He also goes through three phases during this one health bar. In the second phase, he gains a plethora of very powerful and unpredictable lightning-infused attacks featuring different weapons, including an axe and a sword. And in the final phase, he gains the ability to create duplicates of himself to shoot beams at you before sending a barrage of projectiles towards you.
This is not the place for a full boss fight walkthrough, but I’ll leave you with these fairly essential tips:
Best of luck to you!
16. The Four Heavenly Kings
Image credit:Rock Paper Shotgun/Game Science
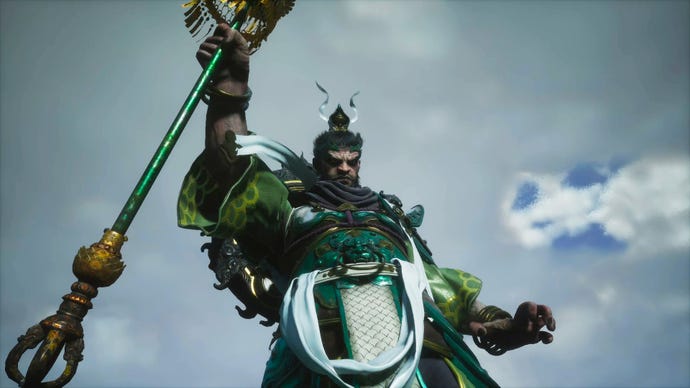
17. Erlang Shen
Image credit:Rock Paper Shotgun/Game Science
Erlang Shen is the dramatic final phase of theErlangfight, and it begins automatically the moment you defeat theFour Heavenly Kingsin the previous phase. At this point, Erlang steps back into the fray, using his true guise to match your giganticStone Monkeyform.
There’s more of a risk of you dying here than there was in the Four Heavenly Kings fight, because Erlang Shen hits much harder (particularly in the second phase), and can keep you stunlocked unless you remember to dodge. Otherwise, the fight is fairly straightforward. Pummel him as much as possible, use Rock Solid to deflect his attacks, and for god’s sake remember to heal yourself up with Heavy Attacks. A scripted moment will come halfway through the fight where Erlang Shen breathes fire on you and burns away all your health; don’t panic. As part of the same scripted cutscene, you’ll shortly afterwards heal all the way back to full health, and after this point all your attacks will deal even more damage. So if you reach this point, the end is nigh for dear old Erlang.
Once you defeat Erlang and go through the extended cutscenes that follow, you’ll be well rewarded with the only weapon in the game to rival Sun Wukong’s Jingubang - the Tri-Point Double-Edged Spear. A fantastic weapon if, like me, you’re a fan ofThrust Stance.
18. Stone Monkey
Image credit:Rock Paper Shotgun/Game Science
The Stone Monkey is the first phase of the final boss fight in Black Myth: Wukong. I’m listing the two phases separately because - just like with theRed BoyandYaksha Kingfrom Chapter 5, once you beat the first phase, it gives you a checkpoint there so that if you die, you don’t have to repeat the first phase before reaching the second phase.
After a cutscene where you retrieve the Jingubang staff, you can follow the path through several groups of Warriors in order to arrive at the “Peak Of Innocence” Shrine. Just ahead of this Shrine is a large boulder which you can interact with to reach the “Birthstone” region - the location of the Stone Monkey boss fight.
The Stone Monkey’s first health bar should be comparatively quick and painless to deplete. He attacks with fairly normal swipes for the most part; the only thing to watch out for is when he pummels the ground, releasing a series of shockwaves to jump over. His second phase is when things get complicated. In this second phase, a number of rather unsettling things can happen:
The key is to focus one Monkey at a time. With Jingubang equipped, work your way up to four Focus Points and unleash them on the Monkeys to deal massive damage. The Golden Lining Transformation is also magnificent at dealing with the enemy onslaught due to the ease with which you can parry them. However, you should try to save the majority of your Mana for theGreat Sage’s Broken Shellfight if you plan to take them both out in one life.
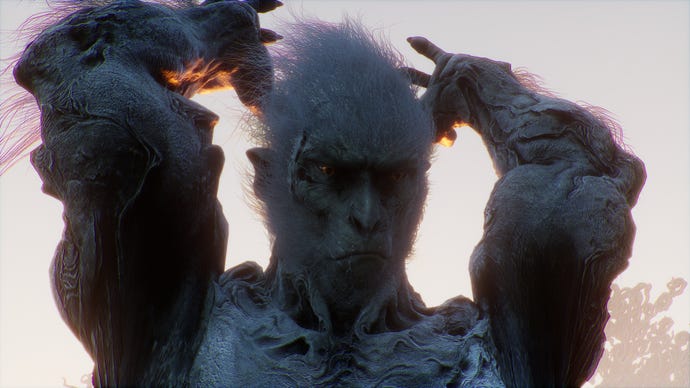
19. The Great Sage’s Broken Shell
Image credit:Rock Paper Shotgun/Game Science
The Great Sage’s Broken Shell is the second phase of theStone Monkeyfight, and as such it begins immediately after defeating the Stone Monkey inside the Birthstone region. Happily, once you defeat the Stone Monkey, you never again need to face him - if you die to the Great Sage’s Broken Shell, he’ll still be there when you respawn, so you can pick things up from the start of the second phase each time.
Here we are - the very final boss of the game. The Great Sage’s Broken Shell is, quite literally, Sun Wukong. Or part of him. He is a fellow monkey with your armour, your Spells, your Stances, your abilities. And he’ll use every one of them in quick succession in order to try and overwhelm you, including sneaky uses of Rock Solid and chaining together multiple Heavy Attacks with different Stances.
Immobilize won’t work for long at all on the Great Sage’s Broken Shell. The most important things you can use to tip the fight in your favour are:
Deplete the Great Sage’s first health bar and you’ll start the second phase, where you’ll be stripped of Sun Wukong’s special Heavy Attack ability and the option to build up a fourth Focus Point without it depleting. But the fight largely remains the same. The only other thing to watch out for is healing - if you use your Gourd after a certain point in the fight, it will trigger a scripted moment where the Great Sage steals your Gourd and drinks from it himself before returning it, costing you a Gourd charge and healing himself up slightly. It’s a cool moment, but it’s honestly not that big a deal in the grand scheme, as long as you have a Gourd with plenty of heal charges in it.
The Great Sage’s Broken Shell is obviously a tough fight (you’d expect the last fight of the game to be a challenge!), but he still pales in comparison toErlang. So if you’ve defeated Erlang already, you shouldn’t find this fight to be nearly as tricky.
And with that, you’ve successfully located and defeated every boss in Chapter 6 - and therefore, the entirety of Black Myth: Wukong. Congratulations! Of course, if you’re still having trouble with Erlang or the Great Sage’s Broken Shell, be sure to check out our other handy guides on thebest Skills to get first, and all theBlack Myth: Wukong Journal Entries.
