HomeGuidesBlack Myth: Wukong
All Black Myth: Wukong Chapter 3 bosses and where to find themTrack down all 23 bosses in Chapter 3 of Black Myth: Wukong
Track down all 23 bosses in Chapter 3 of Black Myth: Wukong
Image credit:Rock Paper Shotgun/Game Science
Image credit:Rock Paper Shotgun/Game Science
In this guide, we’ll walk you through how to find the locations of all 23 Chapter 3 bosses in Black Myth: Wukong, covering not only story boss Yaoguai Kings and Yaoguai Chiefs, but also multiple secret and optional NPC boss fights (one of which will likely give you the most challenging fight so far in your playthrough).
Skip to a different Chapter here!
All Chapter 3 bosses in Black Myth: Wukong
Make use of thisChapter 3 mapto keep track of your position within Chapter 3, and any bosses, Shrines, or collectibles you may have missed!Image credit:Rock Paper Shotgun

There’s a grand total of23 bossesin Chapter 3 of Black Myth: Wukong, including 5 Yaoguai Kings. Unlike the previous Chapters, comparatively few of these boss locations can be called “secret”, although Chapter 3 is so large and its landscapes so complex, it’s a good idea to use this guide to track them down regardless.
Here are all the Chapter 3 bosses in Black Myth: Wukong:
To see this content please enable targeting cookies.Manage cookie settings
To see this content please enable targeting cookies.Manage cookie settings
1. Macaque Chief (first encounter)
Image credit:Rock Paper Shotgun/Game Science
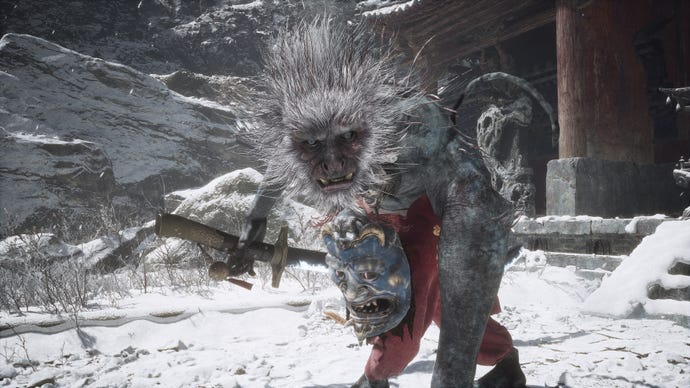
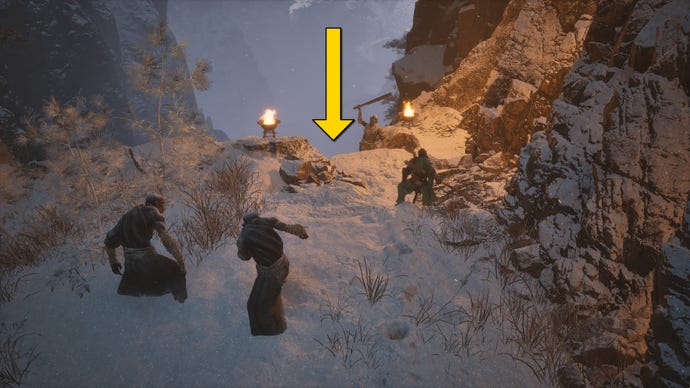
The Macaque Chief is a recurring Yaoguai Chief boss that you’ll encounter throughout Chapter 3, and you’ll see him very early along the main route in the Snowhill Path, a small distance on from the “Frost-Clad Path"Keeper’s Shrine. After a brief cutscene where the Macaque Chief sees you and awakens a couple of frozen corpses to attack you, progress up the slope to fight the Macaque Chief himself for the first time.
The Macaque Chief acts very much like the Tiger enemies from the previous Chapter - dancing around and striking with fast combos of claws and sword attacks. Thankfully, he doesn’t have a huge amount of health, and staggers quite easily against heavy attacks. He also doesn’t seem to have much of an answer to the clones you can spawn using the “A Flock Of Many” Spell.
2. Kang-Jin Loong
Image credit:Rock Paper Shotgun/Game Science
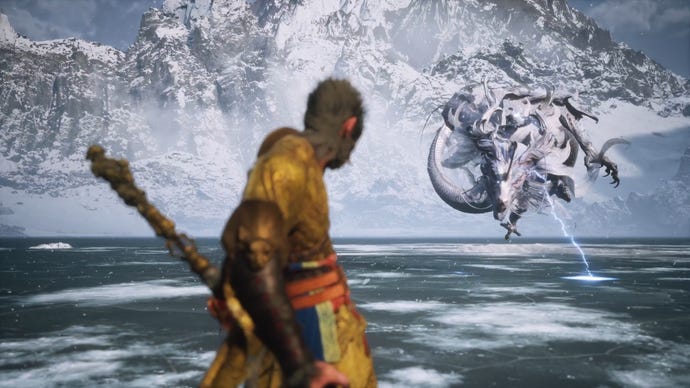
The powerful lightning dragon Kang-Jin Loong awaits you in the frozen lake in the “Mirrormere” region of the Snowhill Path. To get there, simply proceed through the “Frost-Clad Path” until you prompt a cutscene where you transform into a a bat and follow another flying character along a scripted route until you land next to the “Mirrormere” Shrine. After that, the frozen lake is ahead and on your left; just head towards the building there to trigger the boss fight for the first time.
Kang-Jin Loong is a very tricky enemy to land hits on, because she’s constantly snaking about the sky and calling down lightning upon you. Your best opportunity to deal damage is when she slams her tail into the ground. Dodge this, then Immobilize her for a few seconds of free and safe damage. Charged Heavy Attacks while in Thrust Stance is also excellent for delivering damage even while Kang-Jin Loong is in the air.
3. Captain Lotus-Vision
Image credit:Rock Paper Shotgun/Game Science
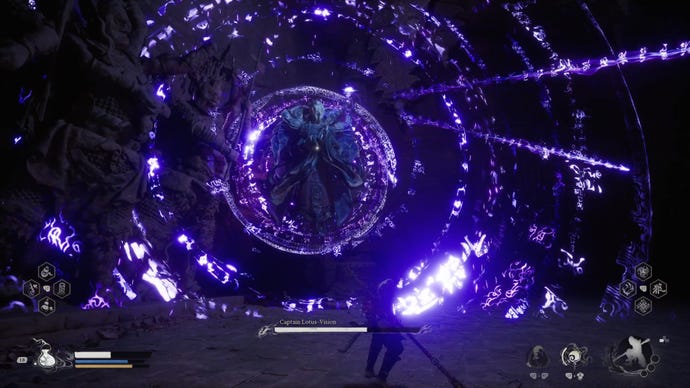
Captain Lotus-Vision is more irritating than dangerous. He likes to teleport around the arena, sending out projectiles and energy beams to hound you, while allowing his corpsified minions to distract you. There’s no particular trick to this boss; you just need to keep chasing him down, dodging his attacks, and dealing as much damage as possible. When he does, he’ll drop the Spirit of Captain Lotus-Vision - a unique item which actually doesn’t act like usual Spirits you absorb. It’s actually a quest item, and you need to defeat all four Captains and collect their Spirits in order to unlock all the sealed doors of the Pagoda.
4. Captain Wise-Voice
Image credit:Rock Paper Shotgun/Game Science

Captain Wise-Voice is the second Captain boss you’ll come across in Chapter 3, and he’s much more dangerous thanCaptain Lotus-Vision. You can find him at the top of the Pagoda, just across the rock bridge from the “Mani Wheel” Shrine. The path up the Pagoda to reach this boss locations is rather winding, but basically just keep an eye out for ramps upward inside cells, and take each one you can find until you reach the top.
This Yaoguai King is no pushover. You must attack him repeatedly on his right front leg (the glowing one) until he falls, and then deliver as much damage as possible to his head before he recovers. Which is all easier said than done, because Captain Wise-Voice has some very nasty attacks which reduce your maximum health, and call forth lightning to litter the entire arena floor. Your Transformation isn’t terribly useful here because his screams can take off all your health very quickly. Instead, focus on using Immobilize and Cloud Step to deliver damage, and charging up your strongest Heavy Attacks whenever possible.
5. Rat Captain
Image credit:Rock Paper Shotgun/Game Science
If you did this, then when you meet the Third Prince inside the cell next to where you start in the Pagoda Realm, then the Rat Captain is already dead - slain inside the cell. You can interact with it to receive theAshenSlumber Transformation Spell.
However, if youdidn’tcomplete these steps, then the Rat Captain will be alive and in a different cell in the Pagoda Realm. Follow these steps to reach him:
The Rat Captain uses some tricky combos, but thankfully you barely need to worry about them. He has low health and can be Immobilized and overwhelmed with your other Spells extremely quickly. Kill him, then take his Ashen Slumber Transformation as your reward.
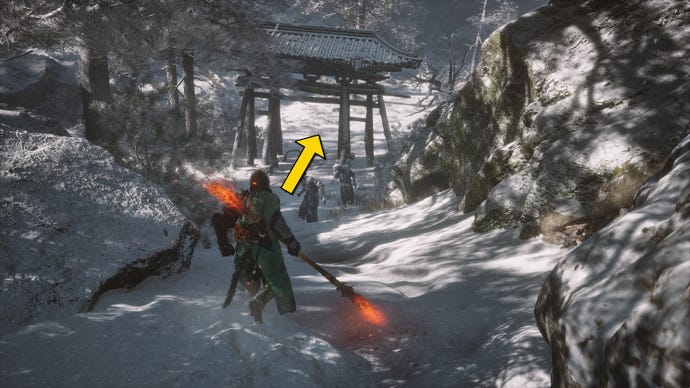
6. Macaque Chief (second encounter)
Image credit:Rock Paper Shotgun/Game Science
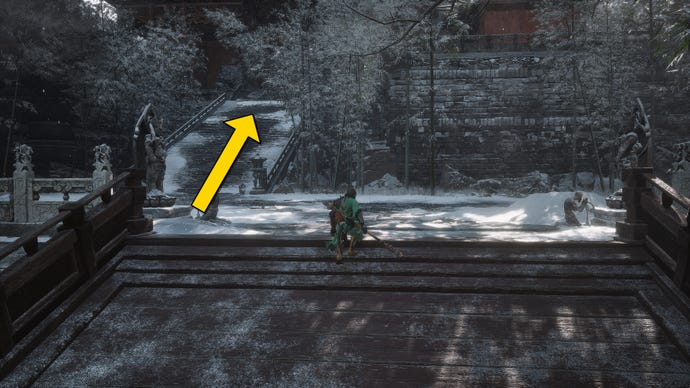
Your next encounter with the Macaque Chief awaits you just a few steps from the “Warding Temple” Shrine further into the Pagoda Realm (but thankfully away from the prison itself now). Just follow the linear path all the way to the “Snow-Veiled Trail” from theCaptain Wise-Voicearena, then turn left up the stairs, and proceed straight forwards up the winding snow-covered steps up to the temple in the distance.
7. Kang-Jin Star
Image credit:Rock Paper Shotgun/Game Science
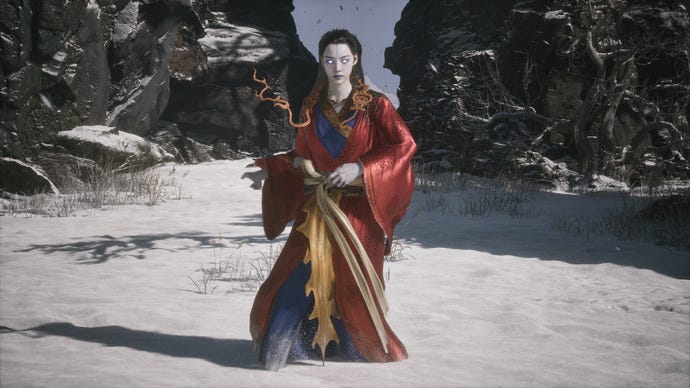
Just a short, linear walk onward from thesecond Macaque Chief fightinside the Warding Temple, and you’ll meet your next Yaoguai King boss fight against Kang-Jin Star. This is the human form of the dragon you fought earlier in Chapter 3,Kang-Jin Loong, and she’s about as tough as she was previously.
As with her dragon form, Kang-Jin Star is very difficult to pin down in one location. She likes to float and zap about the arena, calling down lightning everywhere. Mercifully, Immobilize does seem to do the trick with her most of the time, so you can use this to keep her still at pivotal moments. You must stay aggressive, as she deals plenty of damage but staggers easily.
8. Cyan Loong (secret boss)
Image credit:Rock Paper Shotgun/Game Science

The Cyan Loong secret boss is located on the right-hand side of Turtle Island, not at all far from where you fightKang-Jin Star. You first need to pick up the Loong Scale from theFirst Princearena in Chapter 2 if you haven’t already. Without it, you’ll only find a statue of the Cyan Loong sitting on the edge of the island fishing. With the Loong Scale in your possession, however, the Cyan Loong will come alive and attack you as you draw near.
9. Apramāṇa Bat
Image credit:Rock Paper Shotgun/Game Science
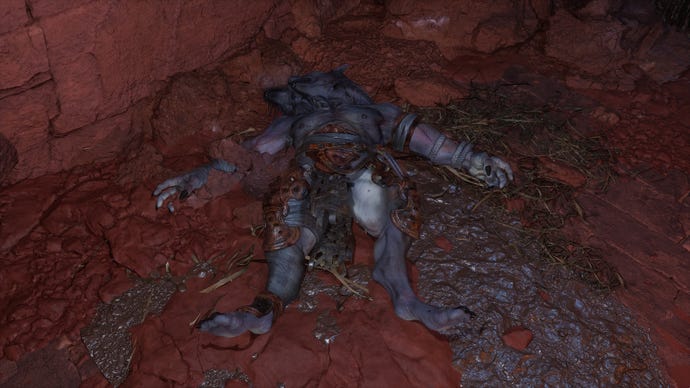
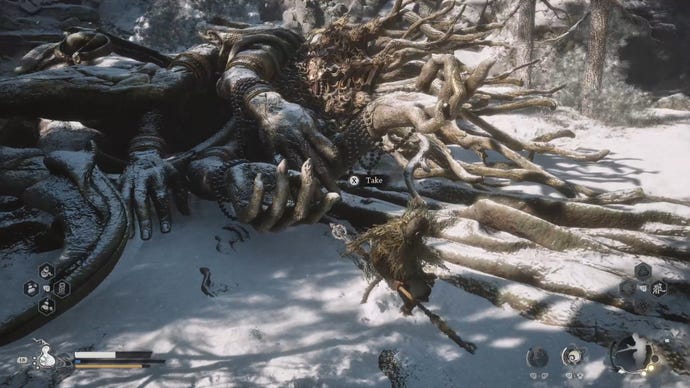
After reaching the “North Shore Of The Bitter Lake” Shrine after defeatingKang-Jin Star, if you proceed as far as you can go along the coast (to your left if you’re facing the sea), you’ll arrive at the skeletal remains of a giant serpent. Within this area you’ll find the Apramāṇa Bat, a flying Yaoguai Chief with an intimidating visage.
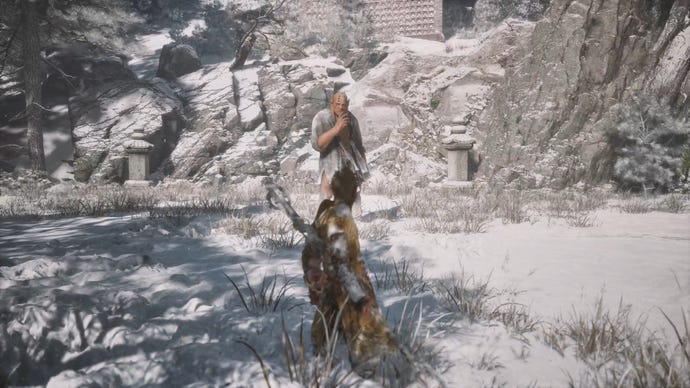
10. Chen Loong
Image credit:Rock Paper Shotgun/Game Science
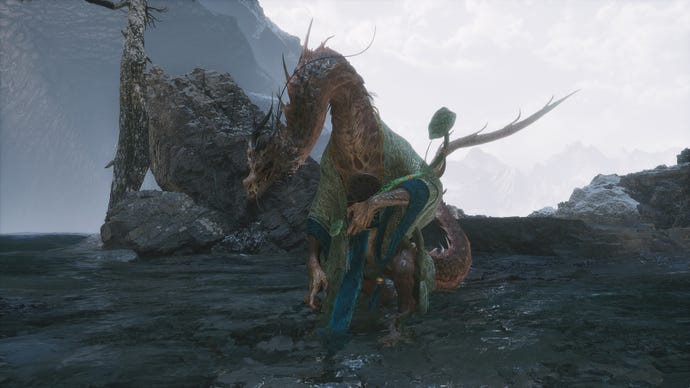
Chen Loong, while technically a Loong, is not a hidden secret boss like its draconic brethren. Just head a short way down the North Shore coast (the opposite way from theApramāṇa Bat), and a little way out into the water, near a hut, you’ll find Chen Loong.
Like most Loong enemies, Chen Loong is quite flighty and agile, making him difficult to pin down and deal reliable damage against. Immobilise is very handy here, of course. You’ll also have to be alert for his lightning beam attacks and all sorts of other lightning-infused moves, but on the whole he’s considerably easier than other Loong encounters. After you beat him, he becomes a non-hostile (albeit depressed) NPC, and you’ll be able to embark on a quick quest involving him to unlock a new hub area.
11. Yin Tiger
Image credit:Rock Paper Shotgun/Game Science
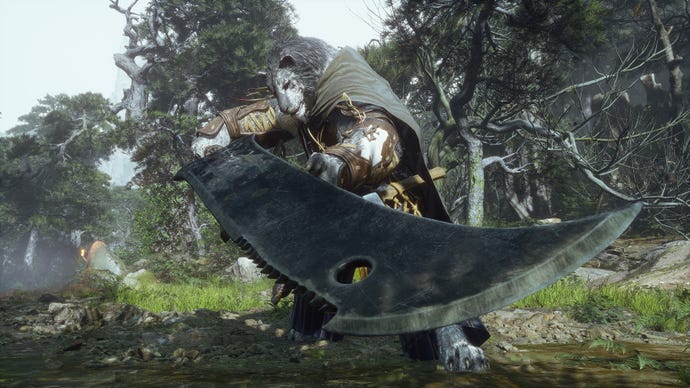
Once you’re inside Zodiac Village, head down the left-hand path and you’ll soon reach the Yin Tiger, smithing away as he always does. Speak to him, and you’ll have the option to Challenge him.
Once you defeat Yin Tiger, you’ll gain his excellent Ebon Flow Transformation Spell, as well as the ability to unlock a new curio slot from him once you speak to him again!
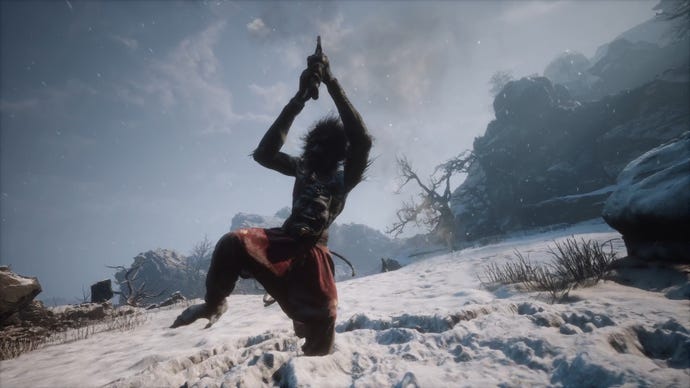
12. Non-White (first encounter)
Image credit:Rock Paper Shotgun/Game Science
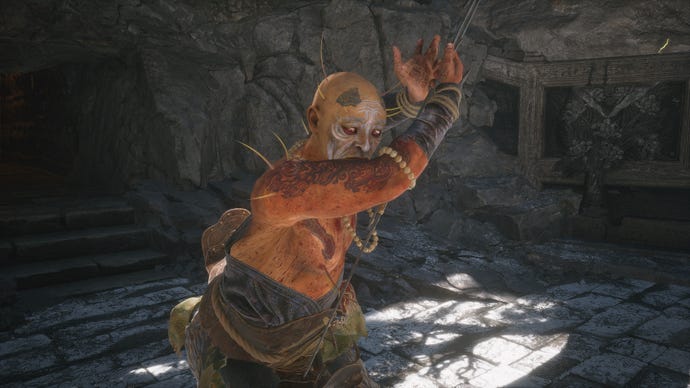
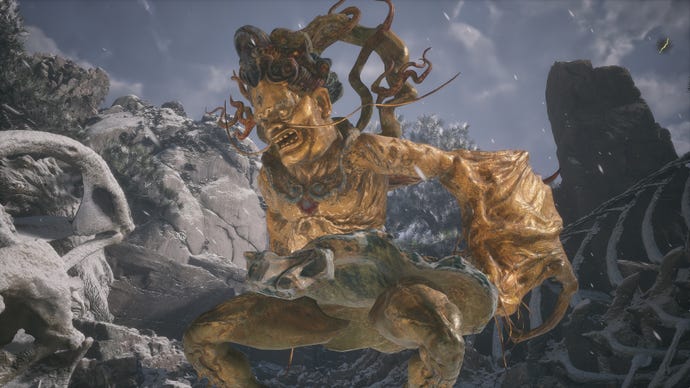
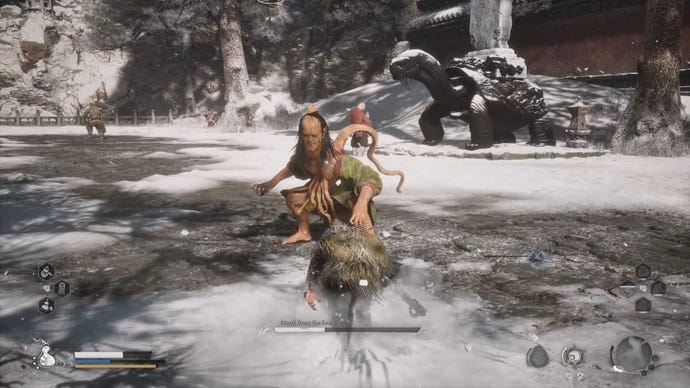
Push past the dangers of the Bitter Lake, and you’ll arrive at the much more pleasantly-named Valley Of Ecstasy. Just a short distance past the “Mindfulness Cliff” Shrine is a platform where you’ll fight Non-White, a crazy-looking guy with spines protruding from his head and shoulders.
Non-White has a varied skillset involving ice attacks, poison projectiles, and the ability to block your strikes. However, he really doesn’t have enough tricks up his sleeve to deal with your best Spells. Immobilize, A Flock Of Many, and charged-up Heavy Attacks will work wonders on him.
At around 40% health, Non-White will disappear; you can catch up to him further along the linear story path.
13. Non-White (second encounter)
Image credit:Rock Paper Shotgun/Game Science
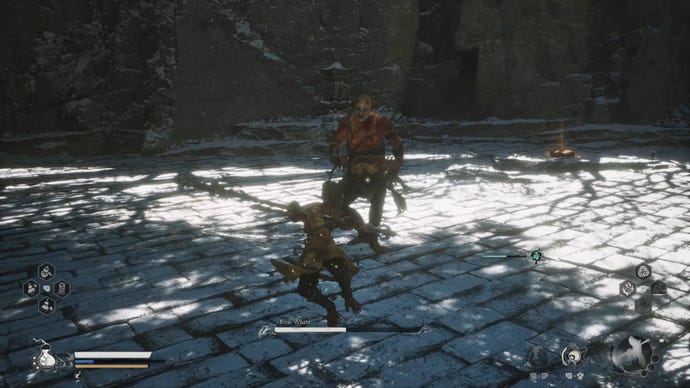
This time, Non-White is more powerful, with a series of poison-inflicting jump attacks that can deal huge damage if they land. He’s thankfully still as susceptible as ever to your various Spells, so just time your dodges well and finish him off to gain his Spirit form as a reward.
14. Lang-Li-Guhh-Lang
Image credit:Rock Paper Shotgun/Game Science
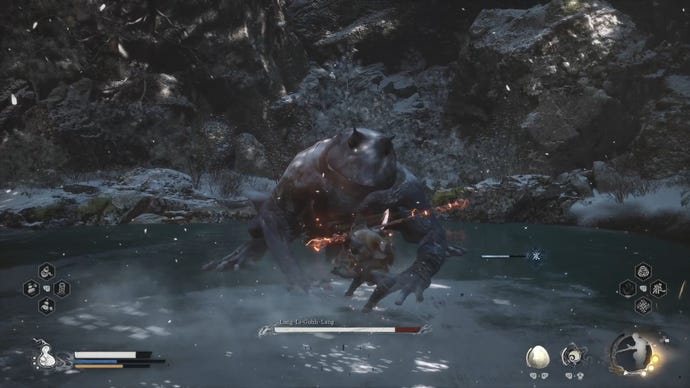
Lang-Li-Guhh-Lang is Chapter 3’s big old frog boss, and it hangs around in an area very close to the “Forest Of Felicity” Shrine in the Valley Of Ecstasy. To get to the Shrine, just use the snow slide at the end of the second Non-White arena, and the Shrine is directly in front of you when you stop. Just before the Shrine, however, there’s a shallow path through the cliff on your left, which leads directly to Lang-Li-Guhh-Lang.
Lang-Li-Guhh-Lang is like all the other frog bosses, but an icy variant that can freeze you if you stay within its chilling gales for too long. It doesn’t have much health though, so you can basically outpace its damage output with your Transformation and other Spells to make this a fairly trivial boss encounter.
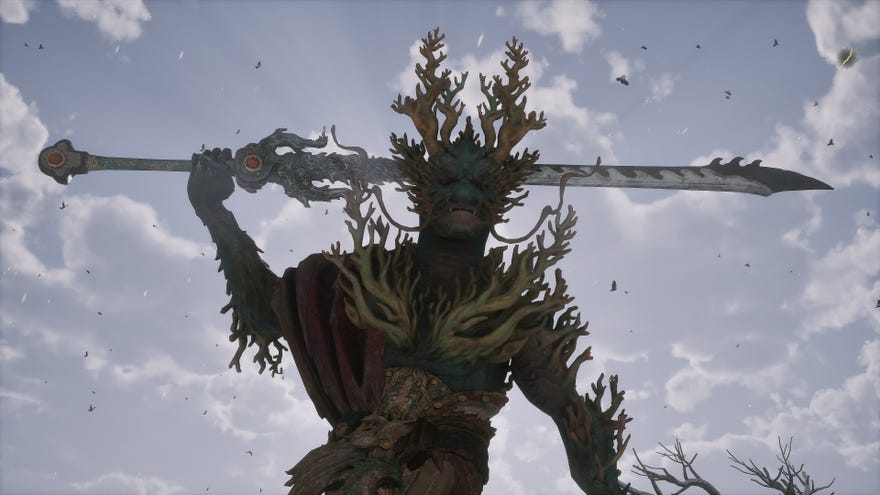
15. Old Ginseng Guai
Image credit:Rock Paper Shotgun/Game Science
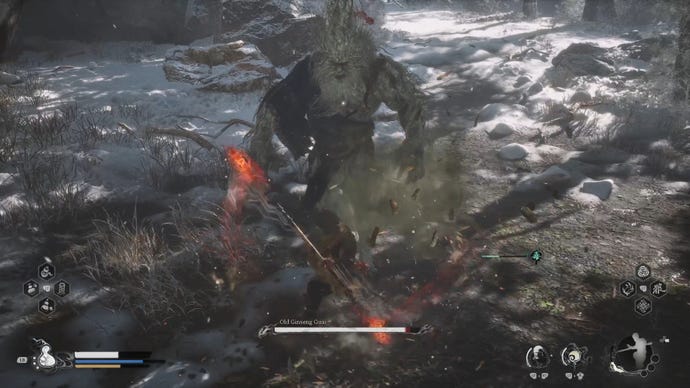
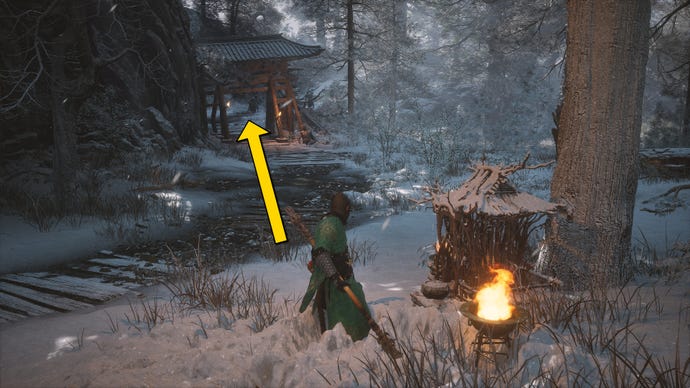
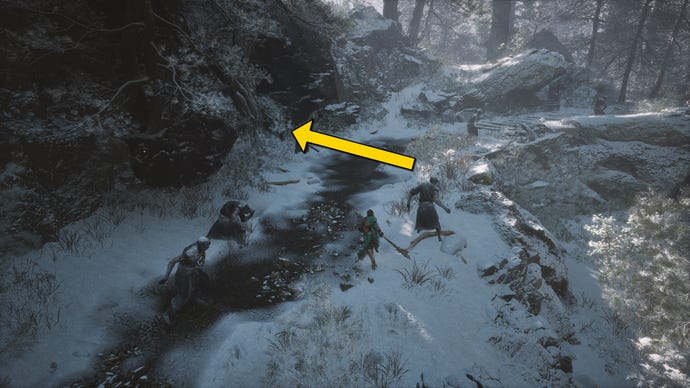
The Old Ginseng Guai is a well-hidden Yaoguai Chief boss located in the Forest Of Felicity. This place is a real maze, so here’s how to get to this particular boss location:
Follow the arrows to reach the Old Ginseng Guai boss from the “Forest Of Felicity” Shrine. |Image credit:Rock Paper Shotgun/Game Science
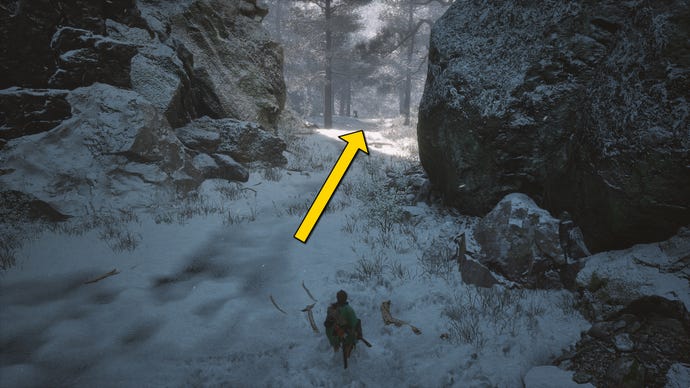
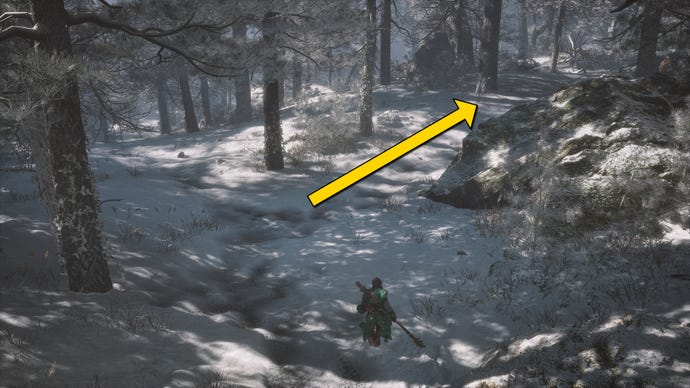
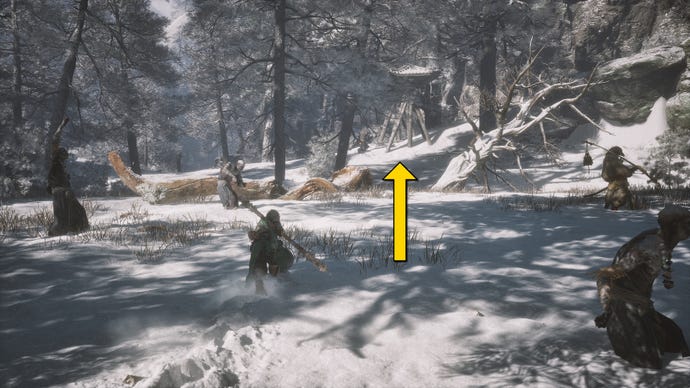
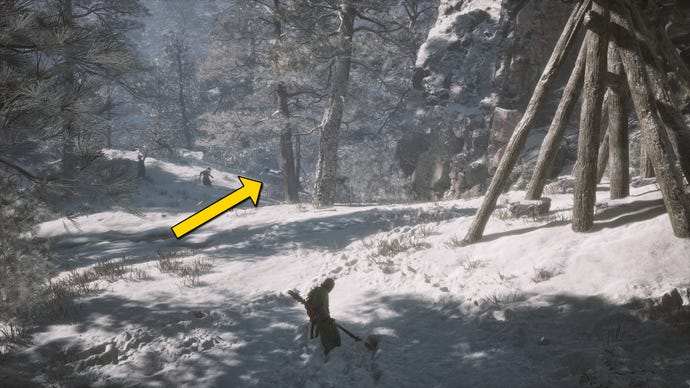

The Old Ginseng Guai is another of those fairly simple Chiefs who doesn’t really have an answer when you use all your Spells in quick succession. Watch out for his minions, but otherwise this won’t be a difficult fight. At least you receive a nice Ginseng Cape at the end of it.
16. Non-Able
Image credit:Rock Paper Shotgun/Game Science
Non-Able can be located very near the “Brook Of Bliss” Shrine adjacent to the Forest Of Felicity. To get there, follow the path down the slope to your immediate right at the “Forest Of Felicity” Shrine, and head into the water at the end. Turn left, then keep going forward and the “Brook Of Bliss” Shrine will be down the steps in front of you.
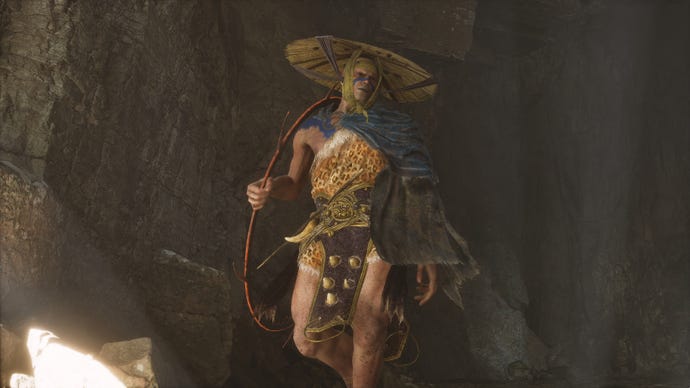
17. Green-Capped Martialist
Image credit:Rock Paper Shotgun/Game Science
Drop off the ledge at the end of the frozen lake to reach the Melon Field and the Green-Capped Martialist. |Image credit:Rock Paper Shotgun/Game Science
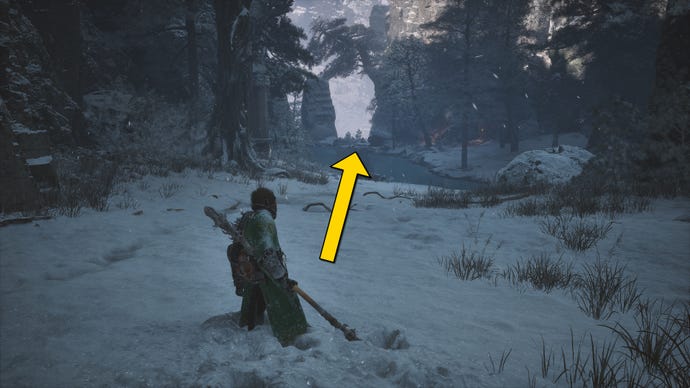
Once you’re at the Melon Field Shrine, head into the cave to trigger the fight against the Green-Capped Martialist - the true name of the Treasure Hunter. He’s a tricky fellow who likes to teleport around and become a giant spinning wheel of fire. As you do. Rock Solid works well against this boss’s attacks, and you can buy yourself breathing room with Immobilize or any Transformation Spell.
18. Captain Void-Illusion
Image credit:Rock Paper Shotgun/Game Science
To find Captain Void-Illusion, you need to reach the “Longevity Road” Shrine at the end of the Valley Of Ecstasy. Instead of going forward from this Shrine, turn around and head left. After a few seconds, you’ll see the giant-esque body of Captain Void-Illusion on the ground at the foot of a large statue. Interact with it to receive the Spirit Of Captain Void-Illusion.
19. Captain Kalpa-Wave
Image credit:Rock Paper Shotgun/Game Science
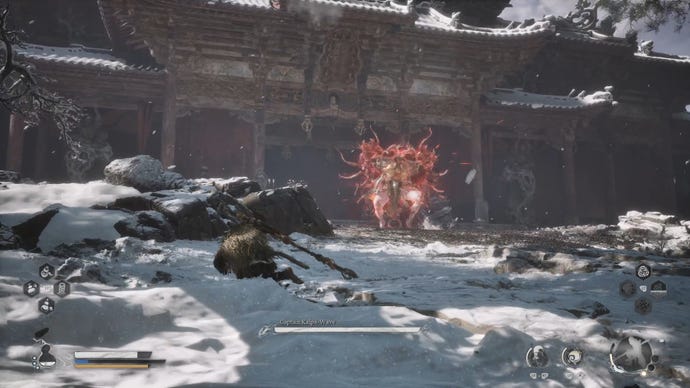
Captain Kalpa-Wave, the final of the four Captain bosses in Chapter 3, is located at the transition point between the Valley Of Ecstasy and the Chapter’s final region, New Thunderclap Temple. To reach it, simply head to the “Longevity Road” Shrine, and take the right-hand path at the end of the clearing in front of you. Up the stairs towards the temple, you’ll be faced with Captain Kalpa-Wave.
20. Non-Void
Image credit:Rock Paper Shotgun/Game Science
After that, you can de-transform and continue playing as usual, but when you reach Non-Void,enter the arena as the foxusing the Snow Fox Brush item in your inventory.
Follow the arrows from the “Temple Entrance” Shrine to find Non-Void. |Image credit:Rock Paper Shotgun/Game Science
If you transform into the fox before approaching Non-Void, you’ll trigger an extra cutscene before the fight, but otherwise the fight itself remains unchanged. Non-Void presents more of a challenge than his fellow “Non” bosses because of his slippery nature; he can turn to spirit-form and dodge away while invincible, as well as rebuff many of your basic attacks fairly effectively with counters.
Once Non-Void is defeated, return to the corpse at the “Forest Of Felicity” Shrine for an end-of-questline reward!
21. Non-Pure
Image credit:Rock Paper Shotgun/Game Science
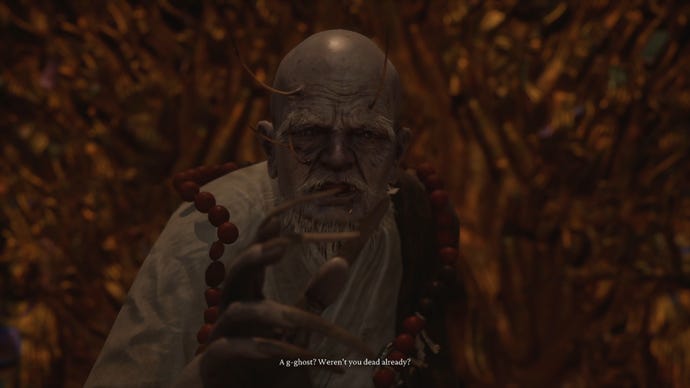
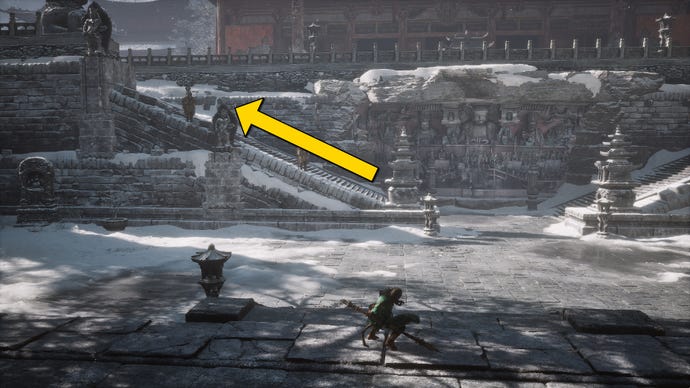
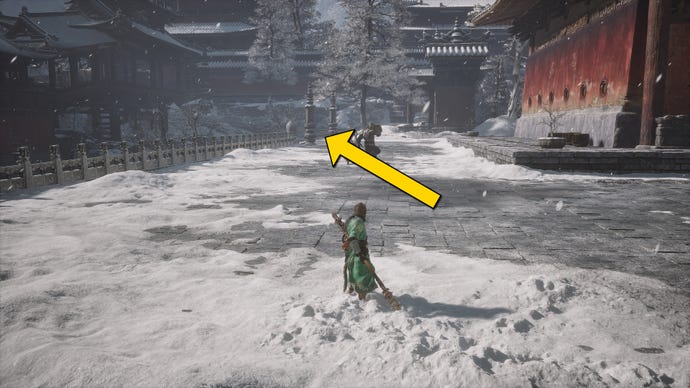
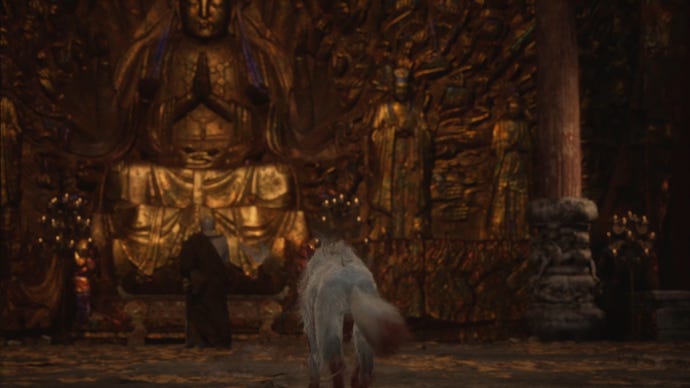
Non-Pure, the final of the four “Non” bosses in Chapter 3, can be found near the end of New Thunderclap Temple. Head straight on from the “Temple Entrance” Shrine, and keep heading on as straight as you can until you go up the massive steps and reach the courtyard area with the two giants. Once here, enter the temple to your right to fight Non-Pure.
22. Monk From The Sea
Image credit:Rock Paper Shotgun/Game Science
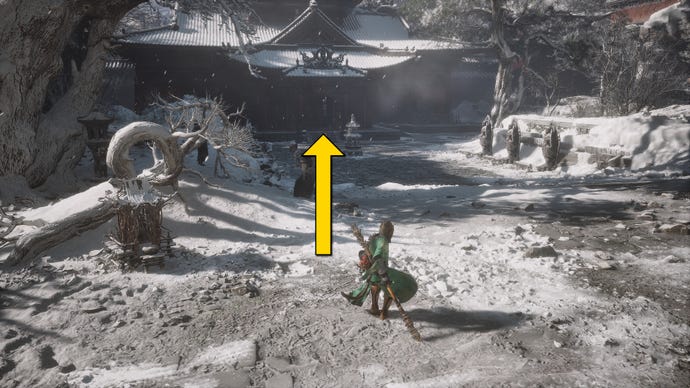
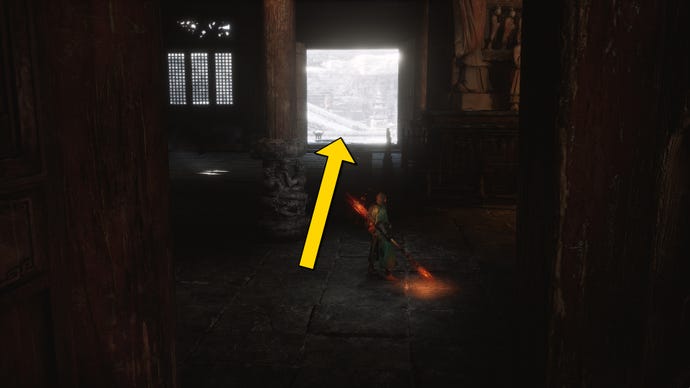
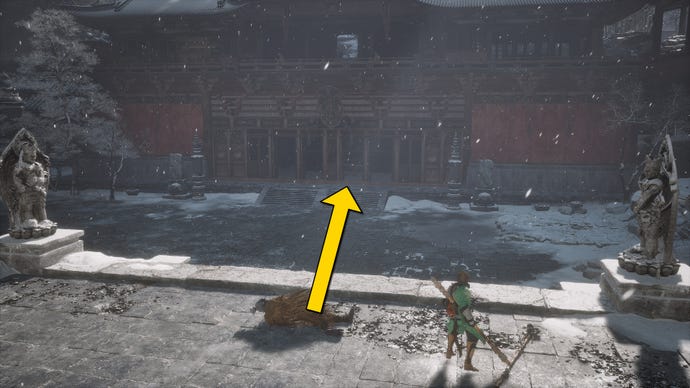
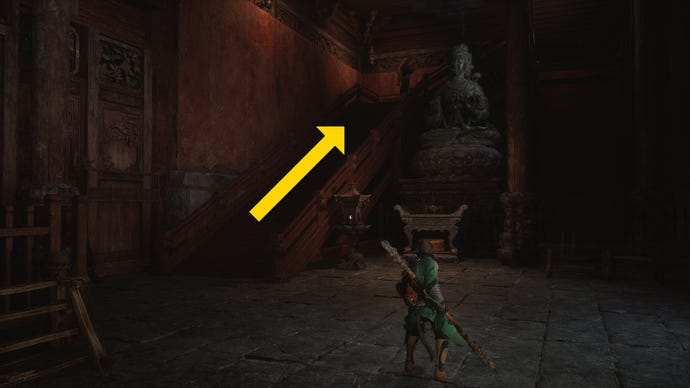
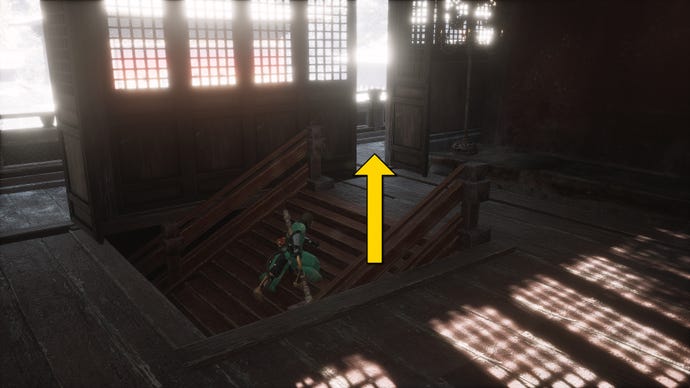
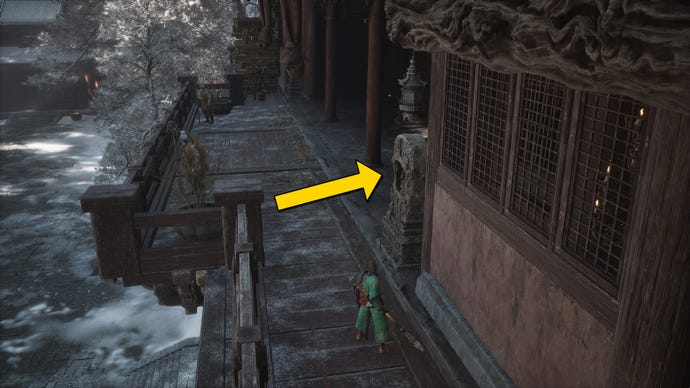
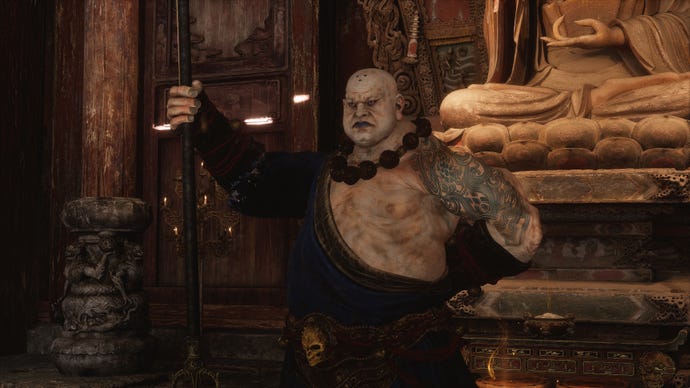
The Monk From The Sea is located in a corner of New Thunderclap Temple. The most direct path to him involves heading right from the “Temple Entrance” Shrine, heading up the ramp and the steps, and then going through the large doorway in the next area. In front of you, just past this doorway, is a stone plinth out of which the Monk From The Sea rises when you approach.
With his whipping tentacles and area-of-effect ice attacks, the Monk From The Sea can deal tonnes of damage to a single target or rid the arena of multiple enemies at once, making “A Flock Of Many” a weak attack against this foe. Instead you should either use Immobilize with your strongest attacks and Transformations, or forego magic entirely with the Spell Binder Spell.
23. Yellowbrow + Macaque Chief
Image credit:Rock Paper Shotgun/Game Science
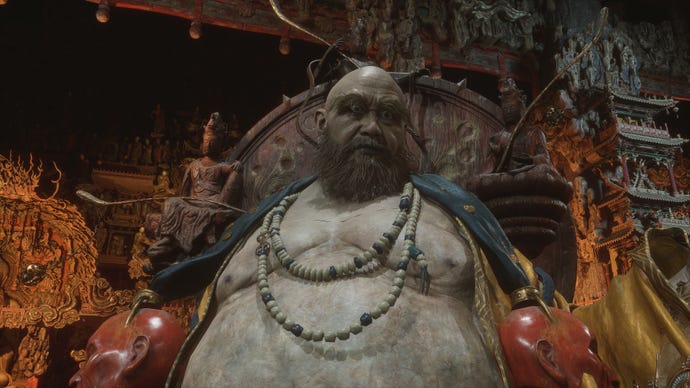
Chapter 3’s ultimate Yaoguai King, Yellowbrow is found at the top of New Thunderclap Temple, just up the steps from where you foughtNon-Pure. You can rest at the “Mahavira Hall” Shrine before you enter, which will probably be a good idea as this isn’t a straightforward fight.
The first phase of this multi-phase fight is a straight 1v1 against Yellowbrow himself. He deals enormous damage with his thunder mace, but if you dodge those attacks, he doesn’t have much else up his sleeve apart from disappearing and reappearing a few feet away. After this phase (and a cutscene), you’ll face an amped upMacaque Chieffor the final time, who has all his usual weird attack combos, and a few new ones to boot.
The final phase is a more scripted section where you’re running about Yellowbrow’s floating sculpture walkwaysas the Macaque Chief, mowing down enemies and then finally fighting Yellowbrow once more for the win. It’s a very strange fight, and a decently challenging one, but I’d say it isn’t the hardest fight in Chapter 3. Looking at you,Yin Tiger.
Phew! Congrats, you’ve marked off all the bosses in the longest Chapter of Black Myth: Wukong. While you’re here, be sure to check out our guide on thebest skills to get first in Black Myth: Wukong, to help you defeat the more challenging Yaoguais in this list.
